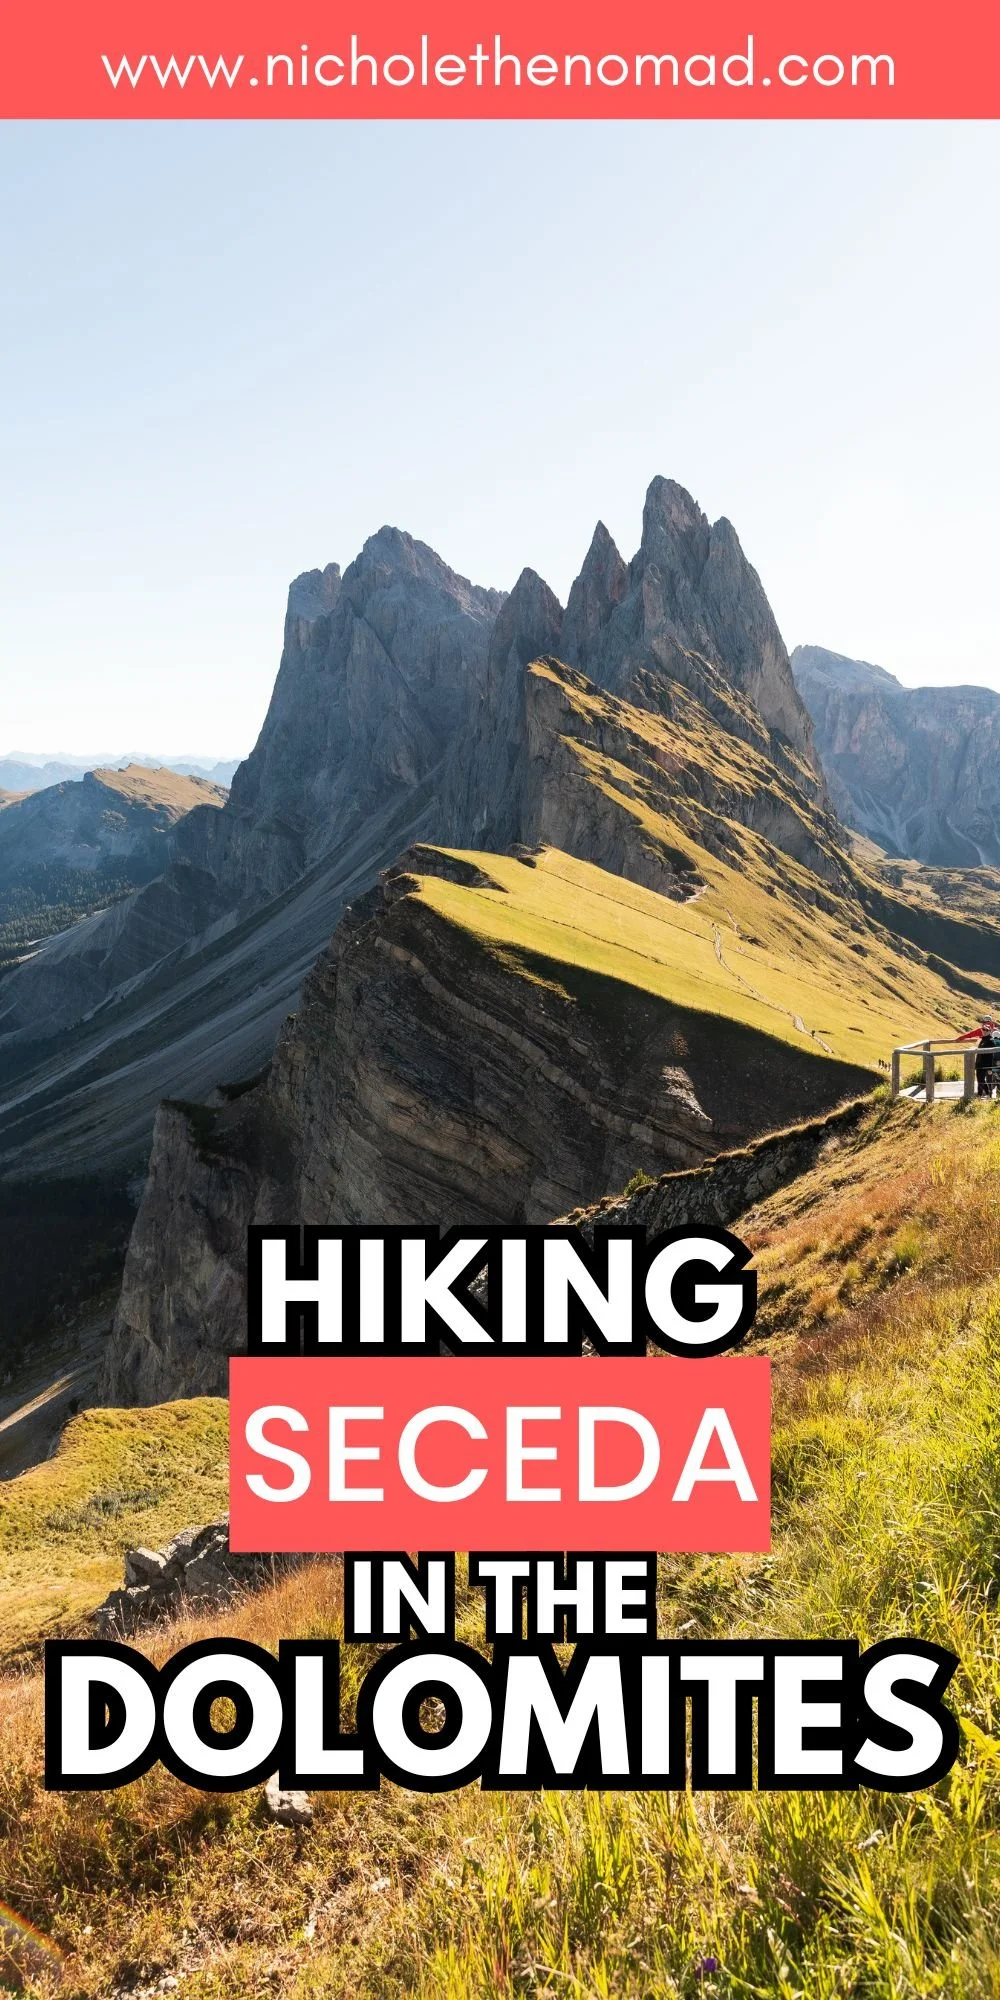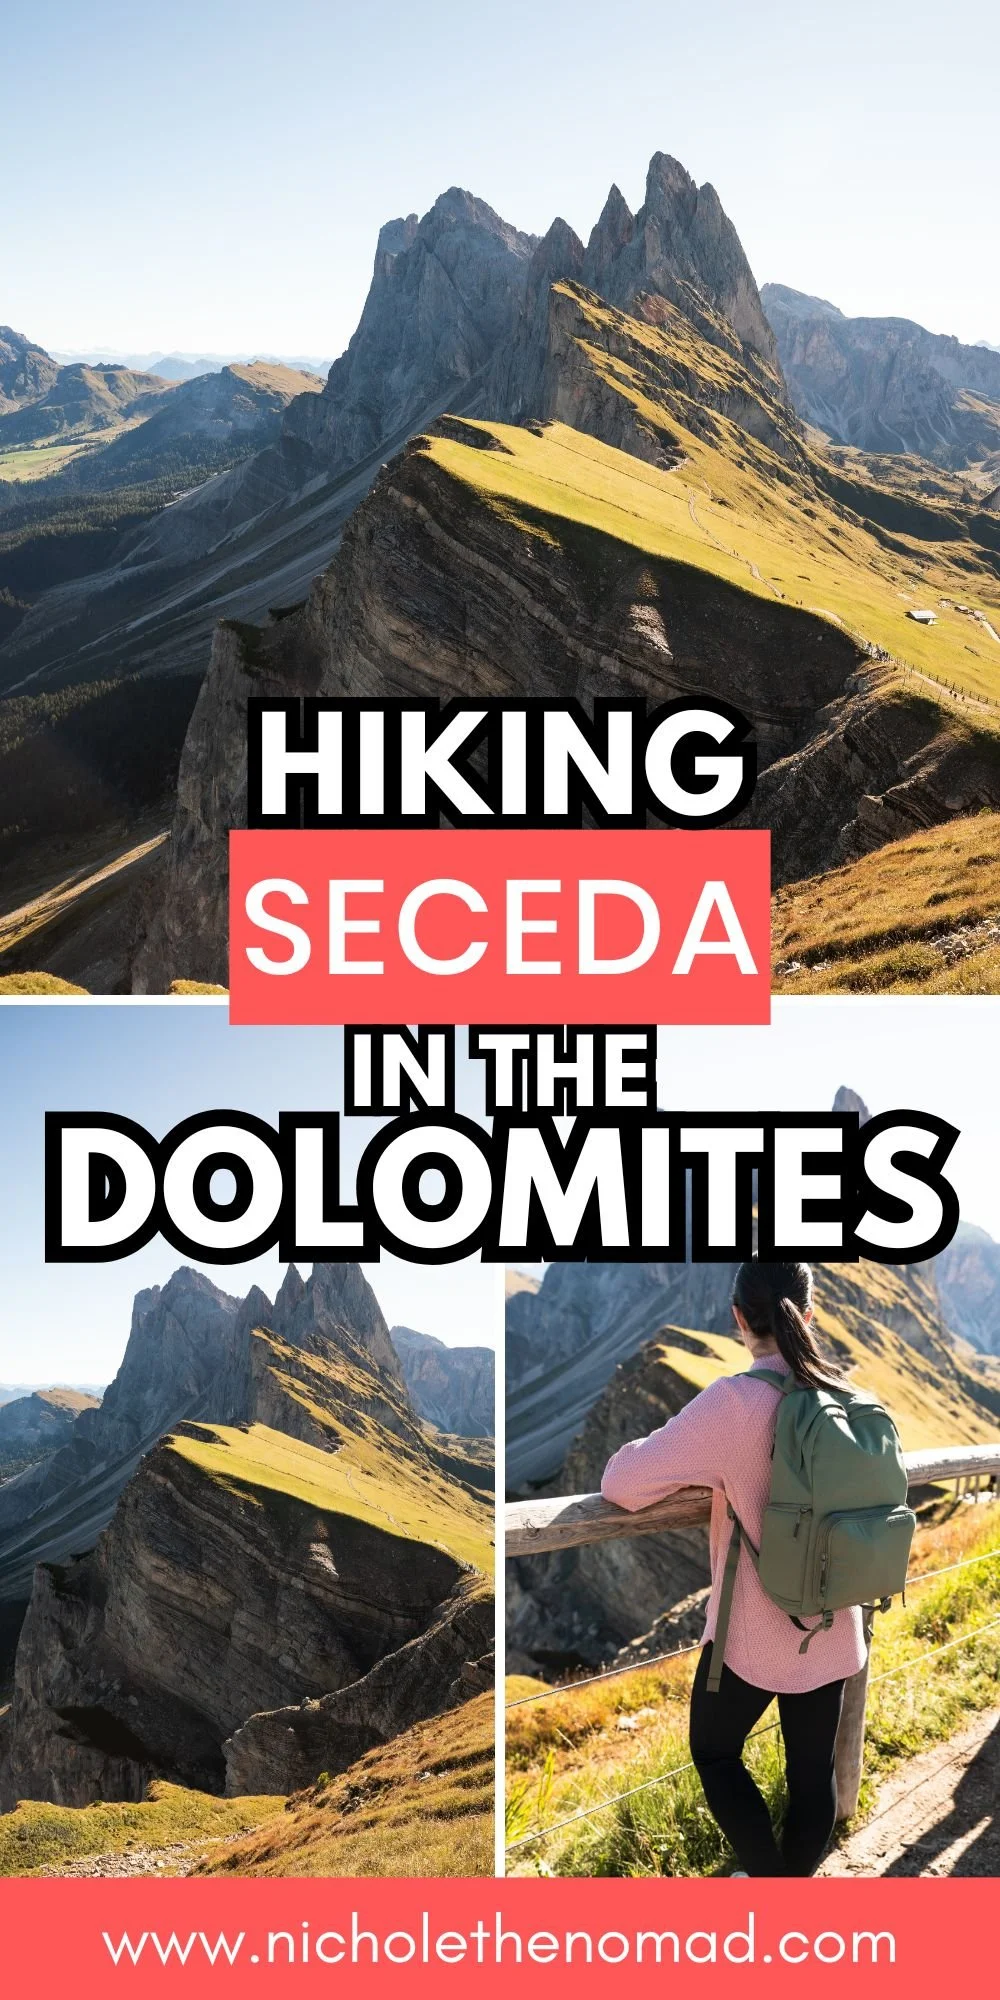
How to Hike Seceda in the Dolomites: Seceda Ridgeline Hike + Longer Route
If you want to visit the Dolomites, Seceda is probably the top thing on your bucket list. It is one of the most beautiful and famous mountains in the Dolomites, known for its dramatic views, fun hiking trails, and great ski trails.
Seceda had been on my bucket list for years, and it was the first place that went on our Dolomites itinerary. And let me tell you, it did not disappoint! Finally seeing it in person felt surreal, and it was one of those moments when my jaw dropped in awe at its beauty.
If you want to visit Secda, you are in the right place! This guide has everything you need to know to hike Seceda, including the famous ridgeline trail and a longer loop if you want to enjoy more breathtaking scenery.

Disclaimer: This post contains affiliate links. If you click through and make a purchase, my blog may receive a commission at no additional cost to you.
Tips for Hiking Seceda
Check Gondola schedules. Most gondolas are only open from May to October, and opening times change depending on the month. I recommend double-checking the times for when you will be there, so you are prepared.
Ride the earliest gondola and buy tickets online. I recommend getting the first gondola of the day to avoid lines and enjoy the trails with fewer people. We arrived right when it opened, and we still had to wait in line. I also recommend buying your tickets online to skip the ticket line.
Download an offline map of the trail route. If you plan to hike the larger loop near Seceda, you need a trail map. Many trails interconnect in this area, and you can easily hike the wrong trail if you do not know where to go. We had an offline trail map downloaded to our phones to help us navigate, and we used it the entire hike.
Pack layers and a rain jacket. The Dolomites have unpredictable weather that can change unexpectedly, making it crucial to pack gear just in case. The top of gondolas may also have cooler weather than the nearby towns, especially in the morning, and we always carried at least a light jacket to help.
Wear sunscreen. I know this may sound obvious, but it is crucial to wear sunscreen, especially when you are hiking. Many hikes are at higher elevations, and you can get sunburned pretty quickly. Trust me, we made that mistake on our first day because we did not think the sun would be that strong when we visited in September.
How to Get to Seceda
You can reach Seceda in a few ways. The easiest is via gondolas and chairlifts, which bring you right to the beginning of the Seceda Ridgeline hike. If you want to hike or visit during sunrise or sunset, you can hike the steep and long trail to Seceda.
By Ortisei Gondola
The easiest way to reach Seceda is via the gondola in Ortisei. The ride consists of two gondolas and brings you right to the top of the Seceda Ridgeline Loop.
The first gondola is small, fitting about six people, and is a quick ride to the platform of the second gondola. The second gondola is larger, fitting many people. We felt like sardines being crammed in it, but it was totally fine!
The second gondola is much steeper, making it a fun experience. Once you reach the top, you can walk a short distance to the iconic viewpoints of Seceda.
By Col Raiser Gondola
The second easiest way to reach Seceda is via the Col Raiser gondola. It also consists of two parts: a gondola and a chairlift.
The first gondola leaves from Santa Cristina and brings you to Col Raiser, where you can either hike the steep trail to Seceda or ride the Fermeda Chairlift. The Fermeda Chairlift brings you incredibly close to Seceda, where you can hike the Seceda Ridgeline Loop.
By Hiking
If you want to hike to the top, be prepared for a long and strenuous hike. No matter where you start, the trail gains over 3,000 feet of elevation, and the hike is around 8-10 miles.
We almost hiked to it because we wanted to visit for sunrise, but ultimately decided against it. We did not want to wake up extremely early and hike a strenuous trail, so we decided to catch the first gondola.
What to Pack to Hike Seceda
The mountain weather in Italy can be unpredictable, so it is crucial to pack the right gear and layers for the season you visit. When we were in the Dolomites, the weather could go from sunny to rainy in just a few hours.
This is a great baseline for what to pack, and you can adjust as needed:
- hiking boots
- moisture-wicking clothes
- hiking backpack
- food and water
- rain jacket
- fleece jacket
- insulated jacket
- sunscreen
Seceda Hike Overview
Seceda is one of the most beautiful hikes in Val Gardena and should be on every Dolomites bucket list! It is extremely popular, and you will likely be in a crowd of people enjoying the views, but it is worth it.
The best thing about Seceda is that you do not have to hike a long trail to experience it! If you only want to hike the popular route, you can enjoy a 1.5-mile loop. If you want to hike a longer trail with even more breathtaking views, I recommend hiking a 6-mile loop. This guide reviews both options, so you can decide how you want to experience it.
Seceda Hiking Stats
If you only want to hike the Seceda Ridgeline, here are the trail stats:
Length: 1.5 miles (2.4 km) round trip
Elevation gain: 420 feet (128 meters)
Difficulty: Easy
Best time to hike: Summer (June through September)
Facilities: The gondola has restrooms.
Food: You can purchase food and drink at Restaurant Seceda or Baita Sofie Hütte.
Webcam: I used this webcam to check the conditions before visiting.
If you want to enjoy a longer loop with more breathtaking views, here are the trail stats:
Length: 6 miles (9.7 km) round trip
Elevation gain: 1,900 feet (580 meters)
Difficulty: Moderate/strenuous
Best time to hike: Summer (June through September)
Facilities: The gondola and rifugios along the trail have restrooms.
Food: You can purchase food and drink at Restaurant Seceda or Baita Sofie Hütte, or many other rifugios along the loop.
Webcam: I used this webcam to check the conditions before visiting.
Seceda Trail Map
Seceda Ridgeline Loop:
Seceda Longer Loop:
Hiking to Seceda: Seceda Ridgeline Hike + Longer Route
This guide reviews hiking to Seceda via the Seceda Ridgeline Loop from the Seceda gondola and how to extend it into a longer loop. We hiked the longer loop and thought it was worth it to enjoy more views and explore the area.
Always remember to leave no trace. It is crucial to pack out what you pack in and leave no trash. Some of these spots have trash bins, so you can easily throw your trash away. If they do not have trash bins, you can throw your trash away once you reach a trash bin.
Gondola to Seceda Ridgeline
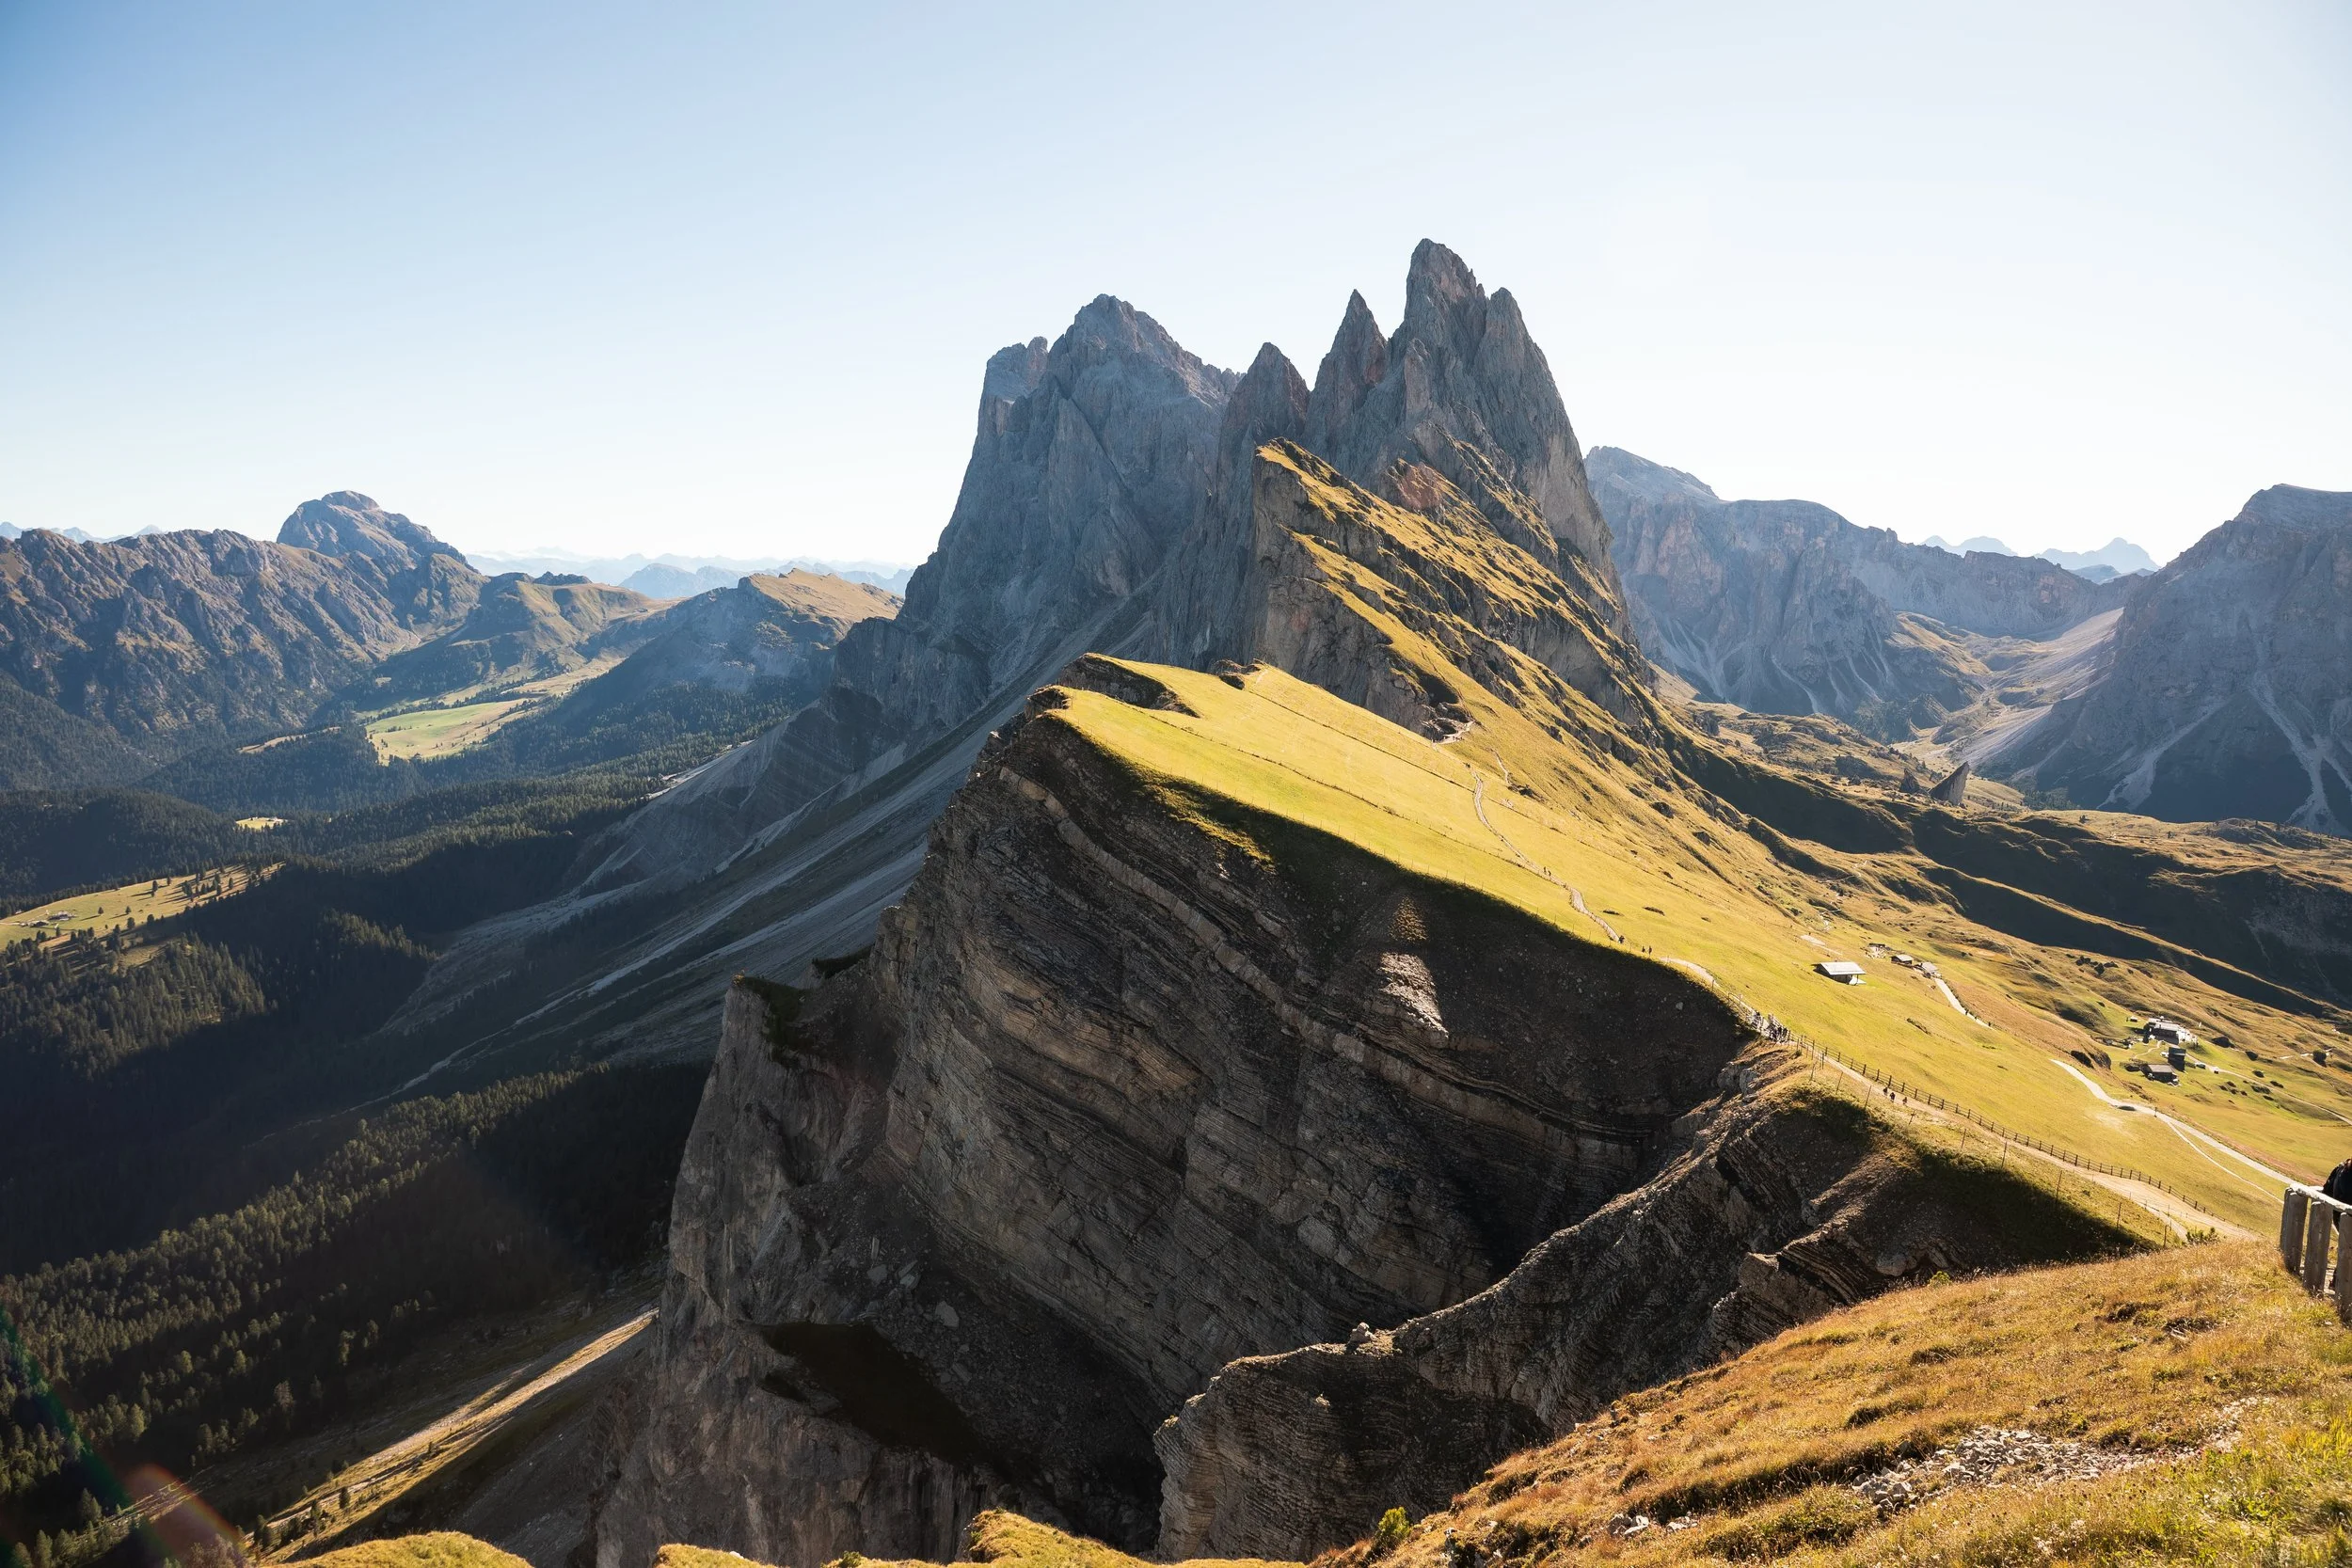
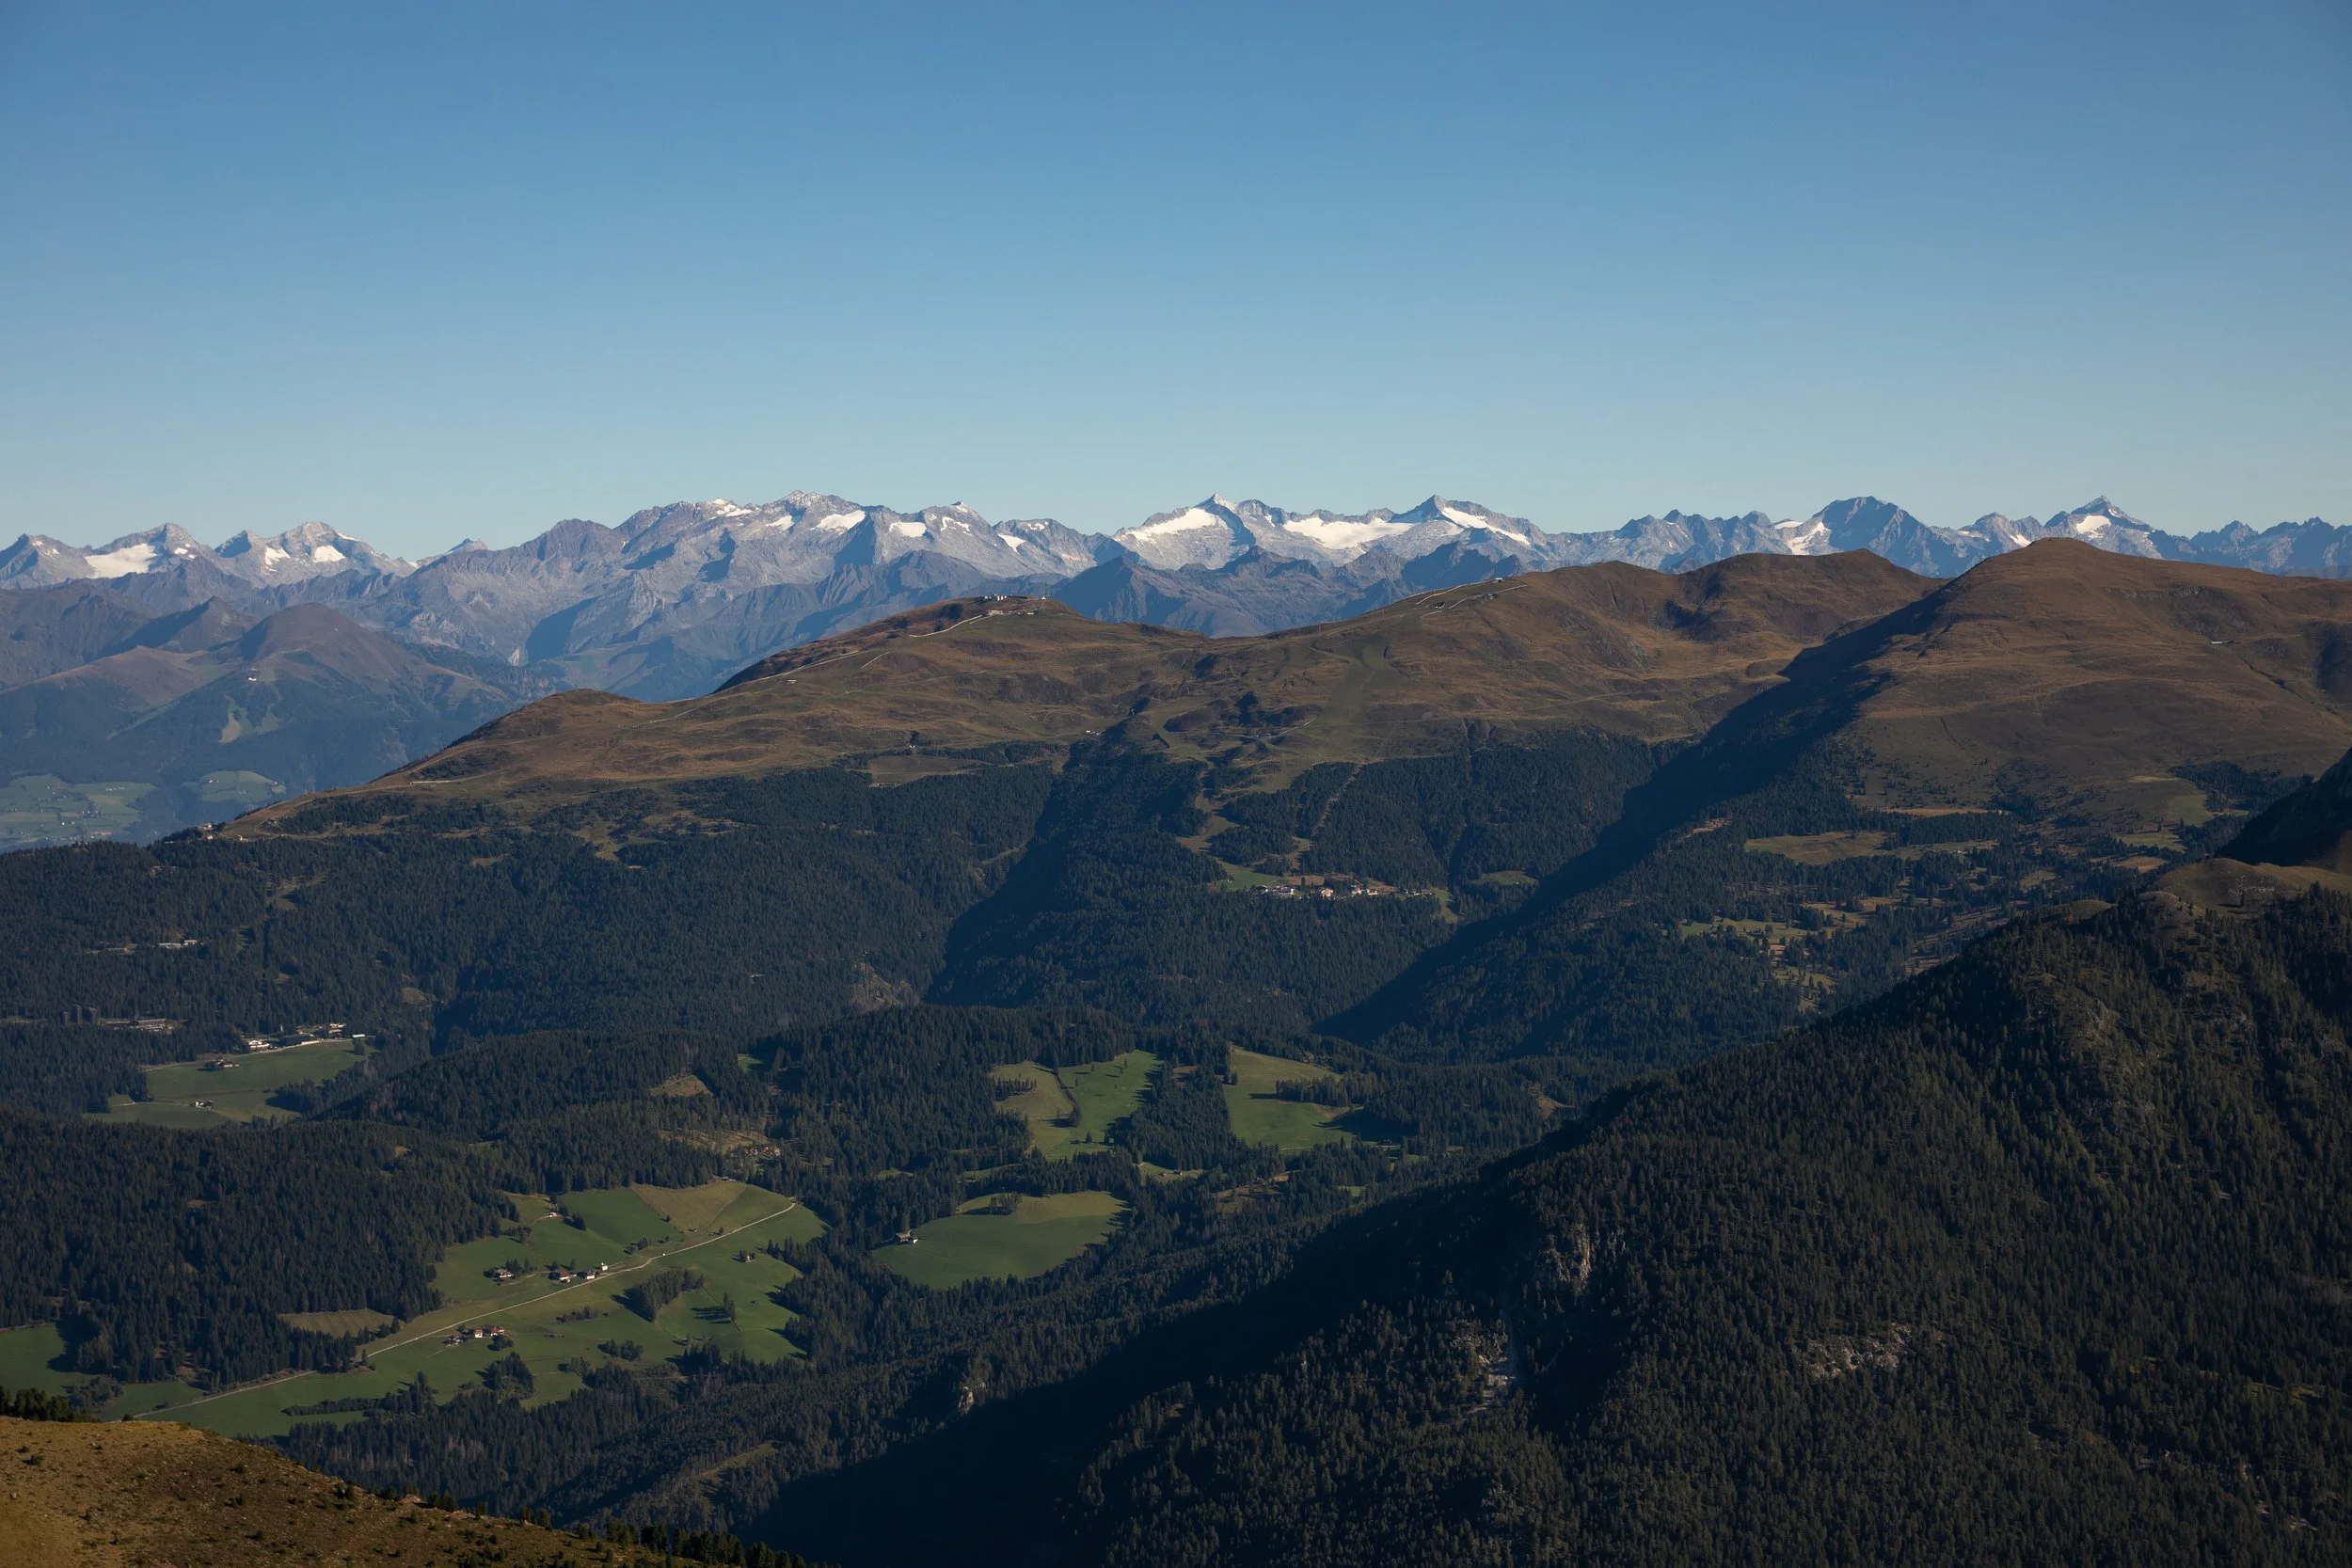
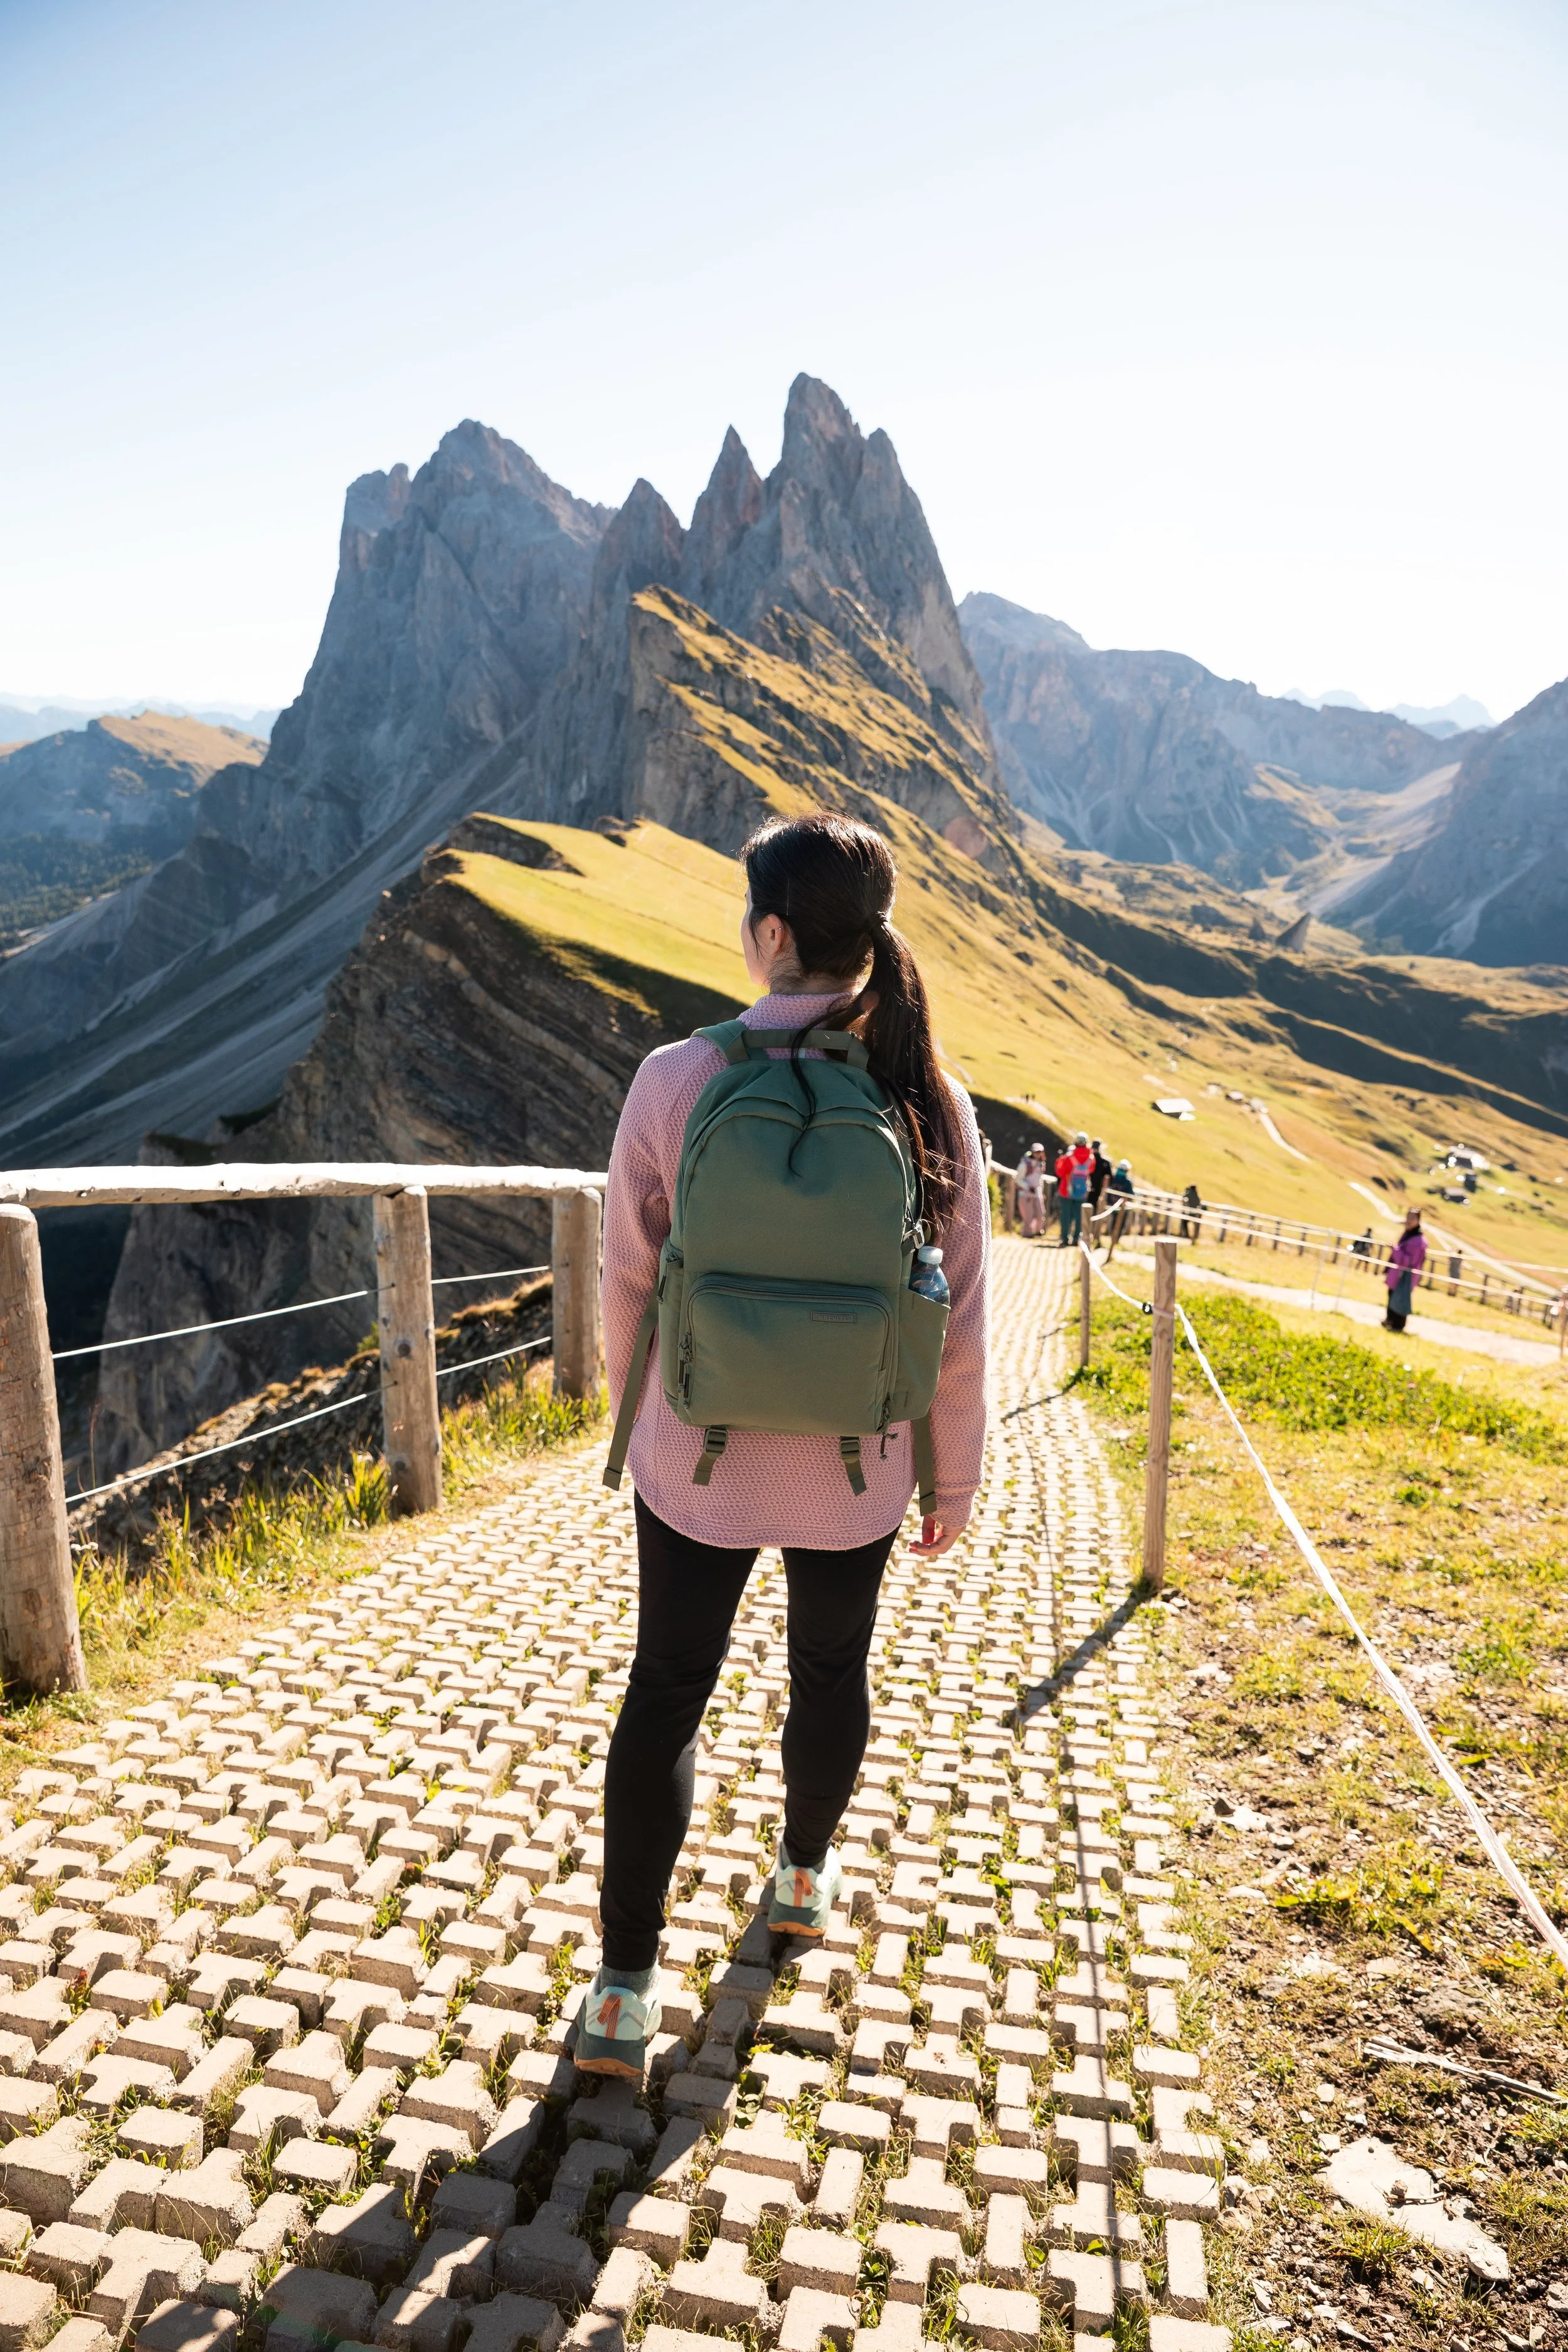
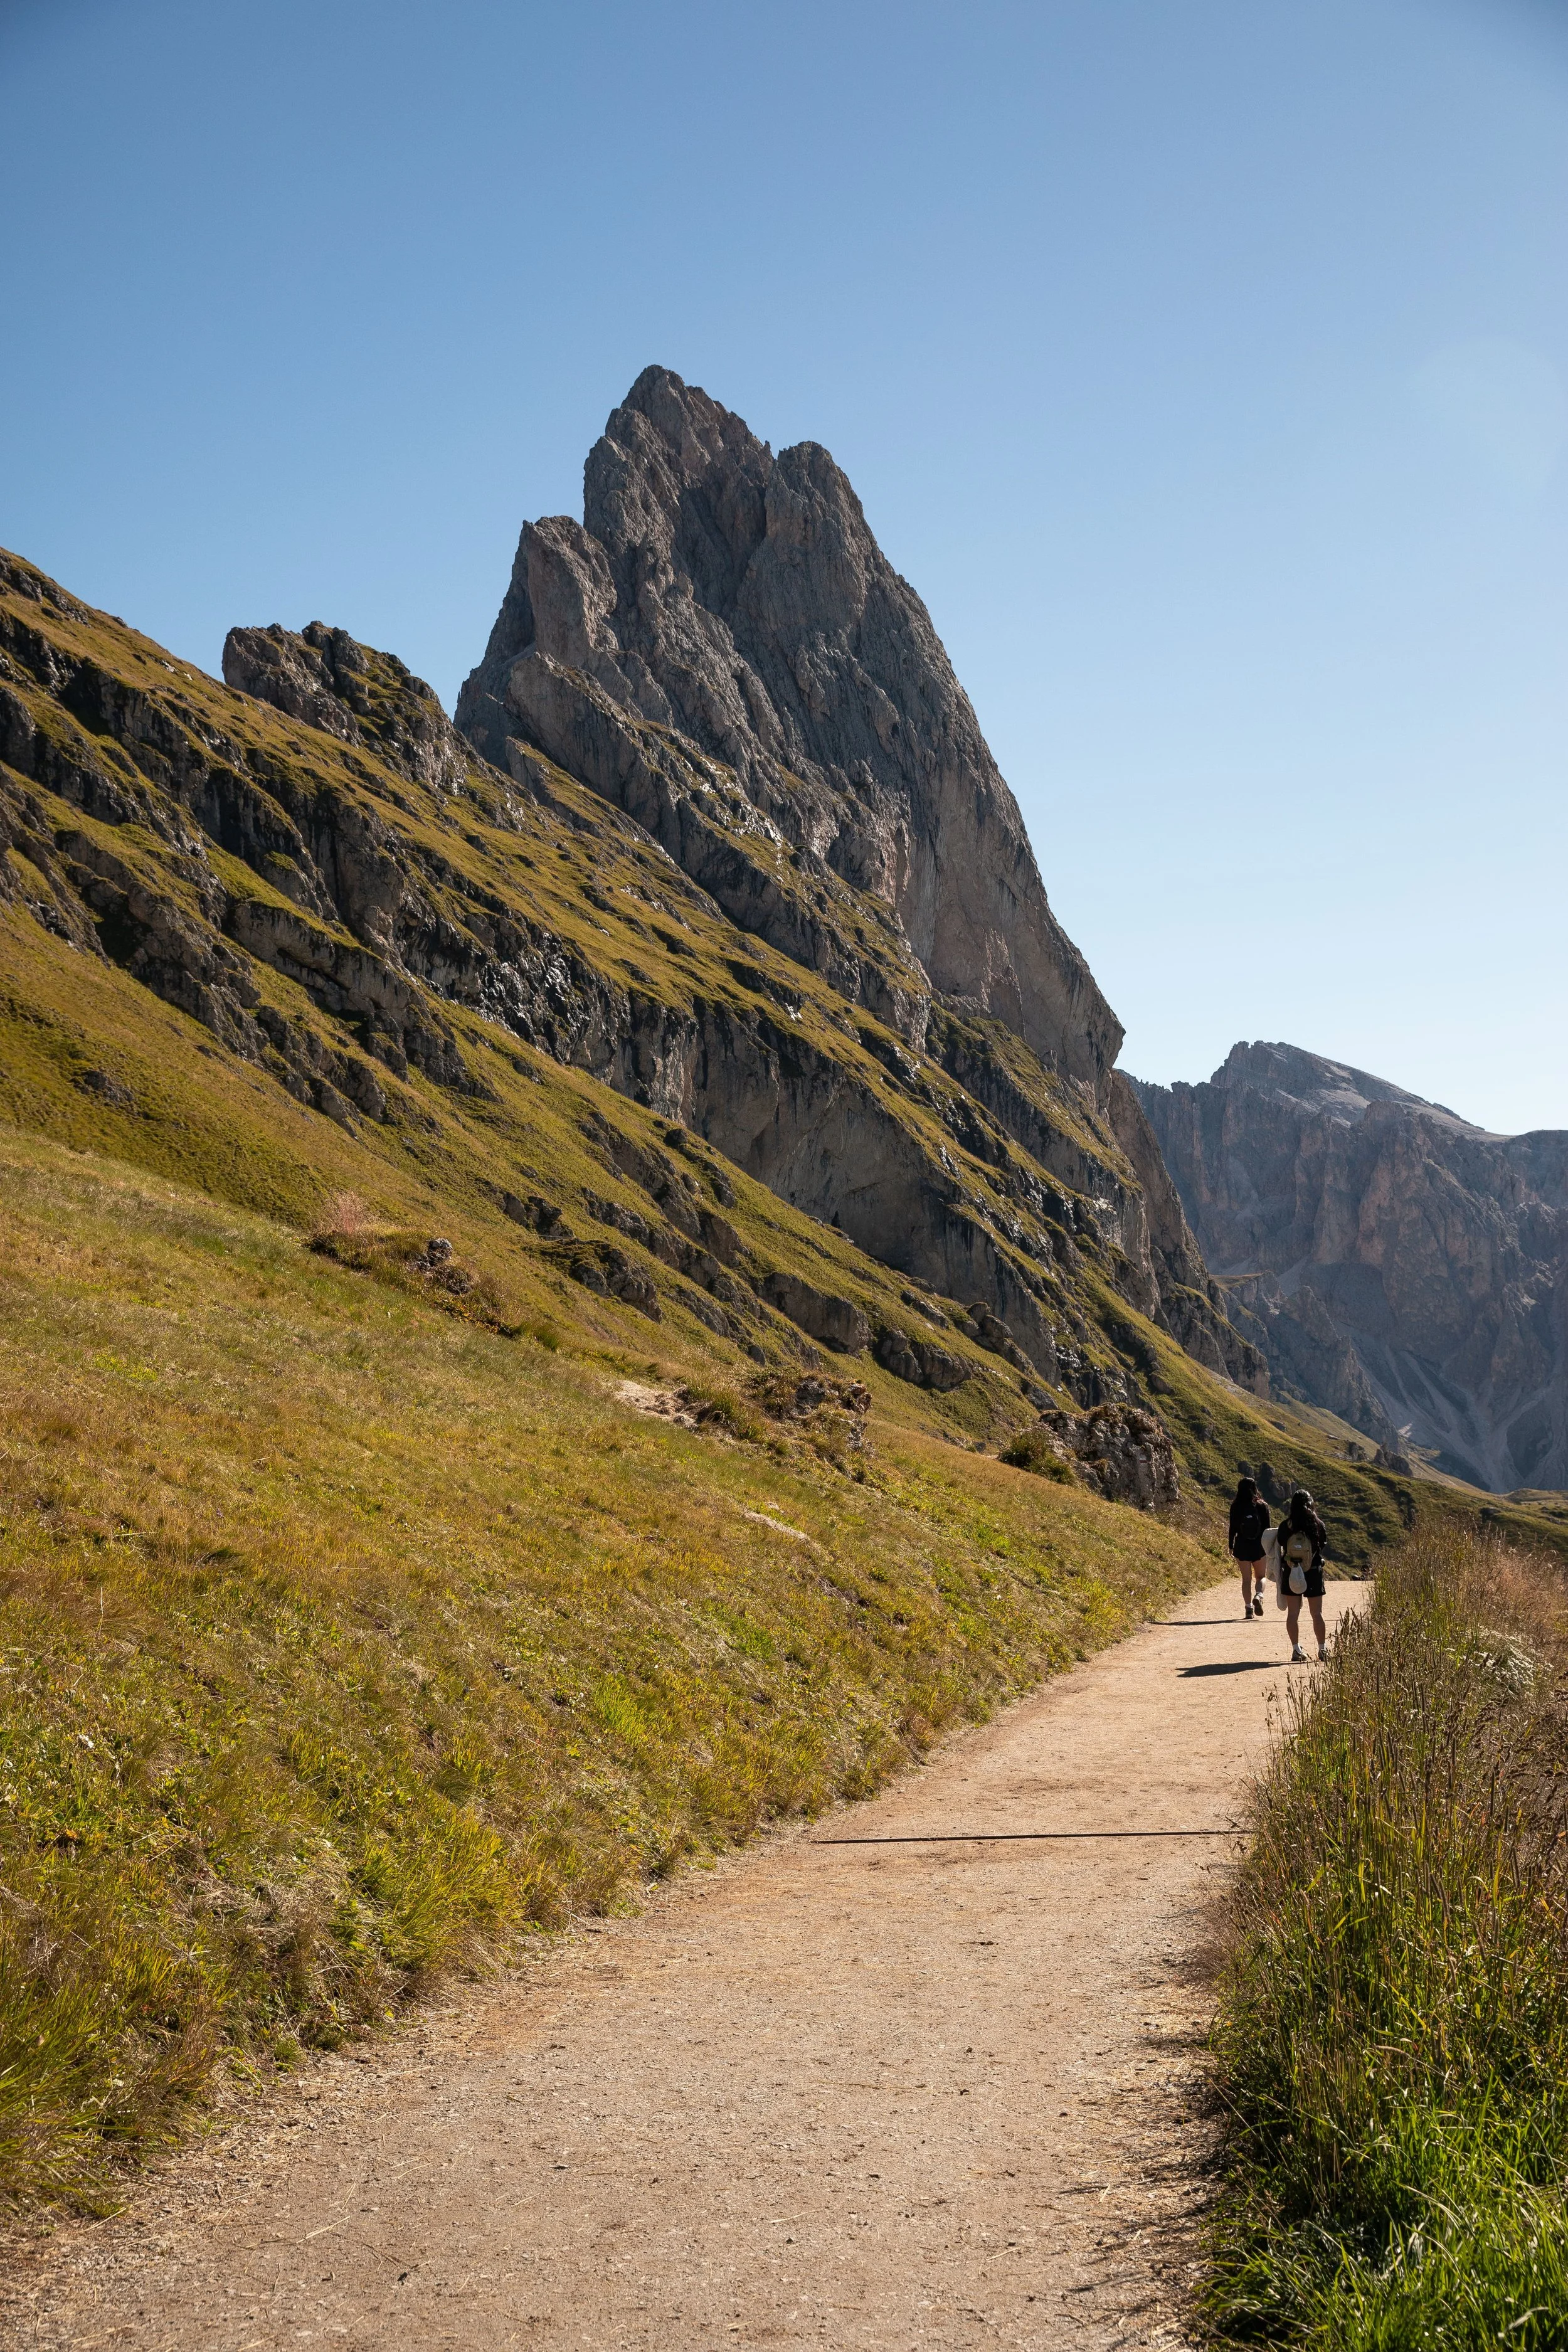
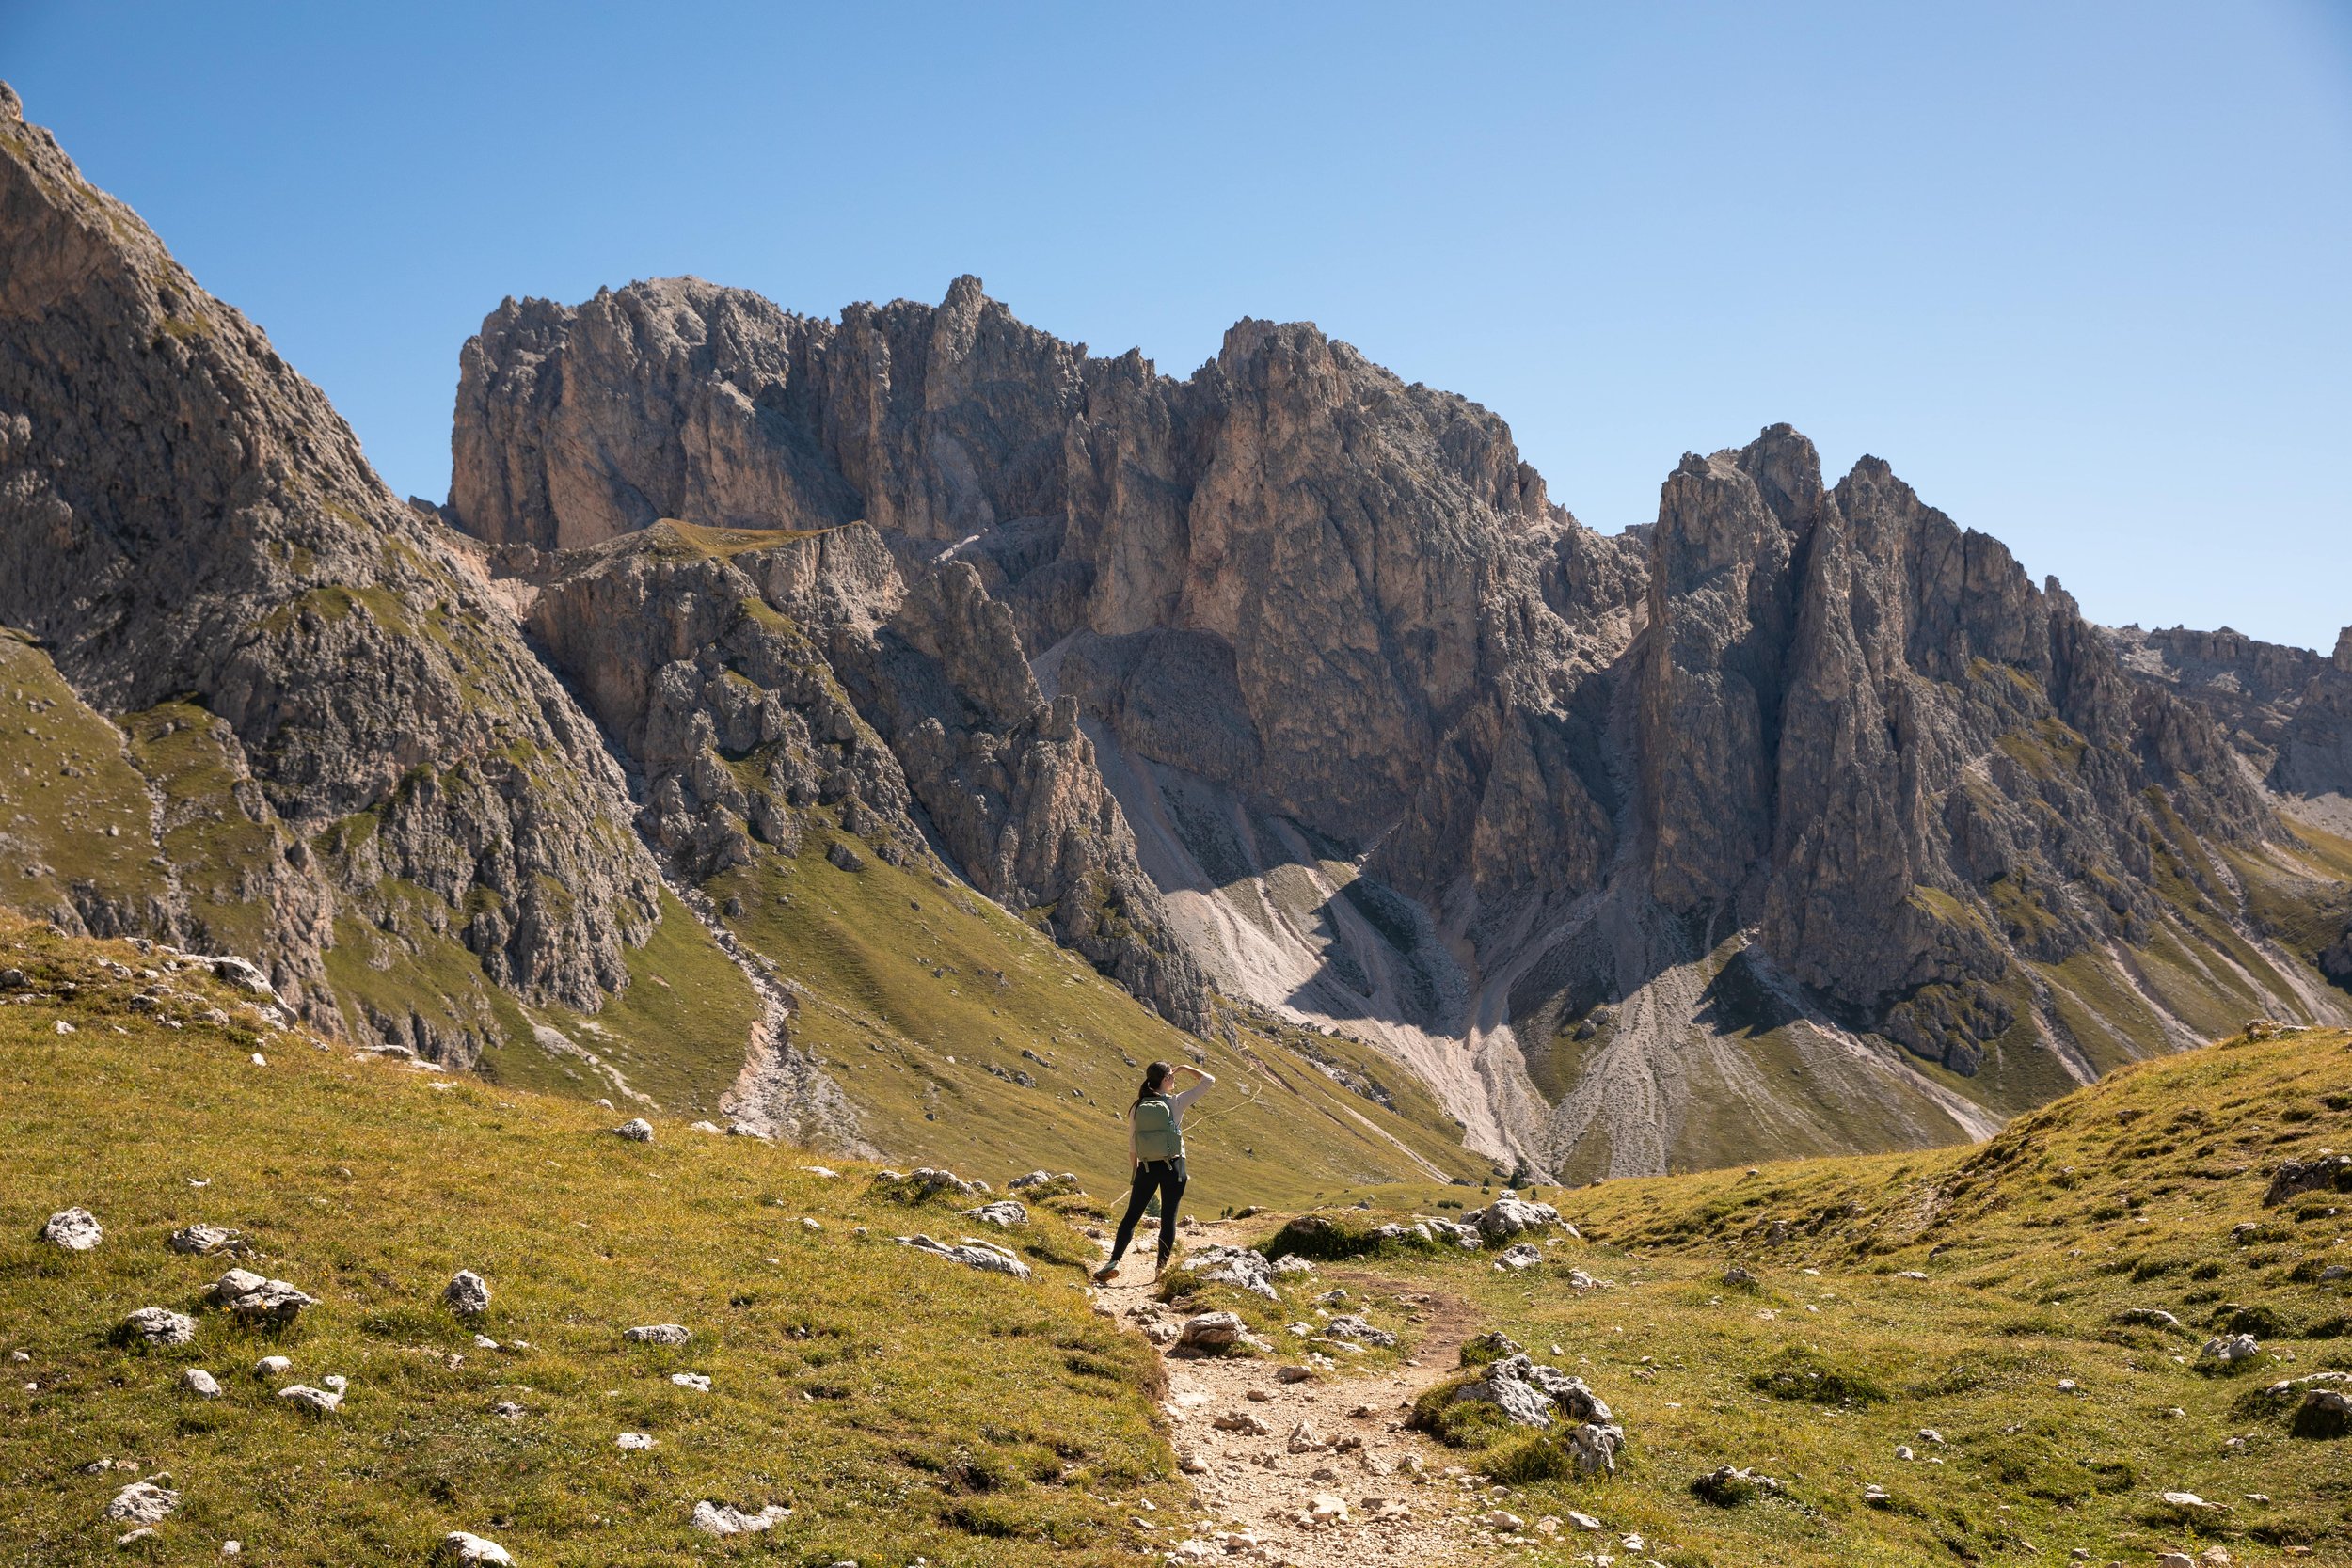
Immediately after exiting the gondola, you get insanely beautiful views of the surrounding mountains. My jaw was on the floor because they were breathtaking.
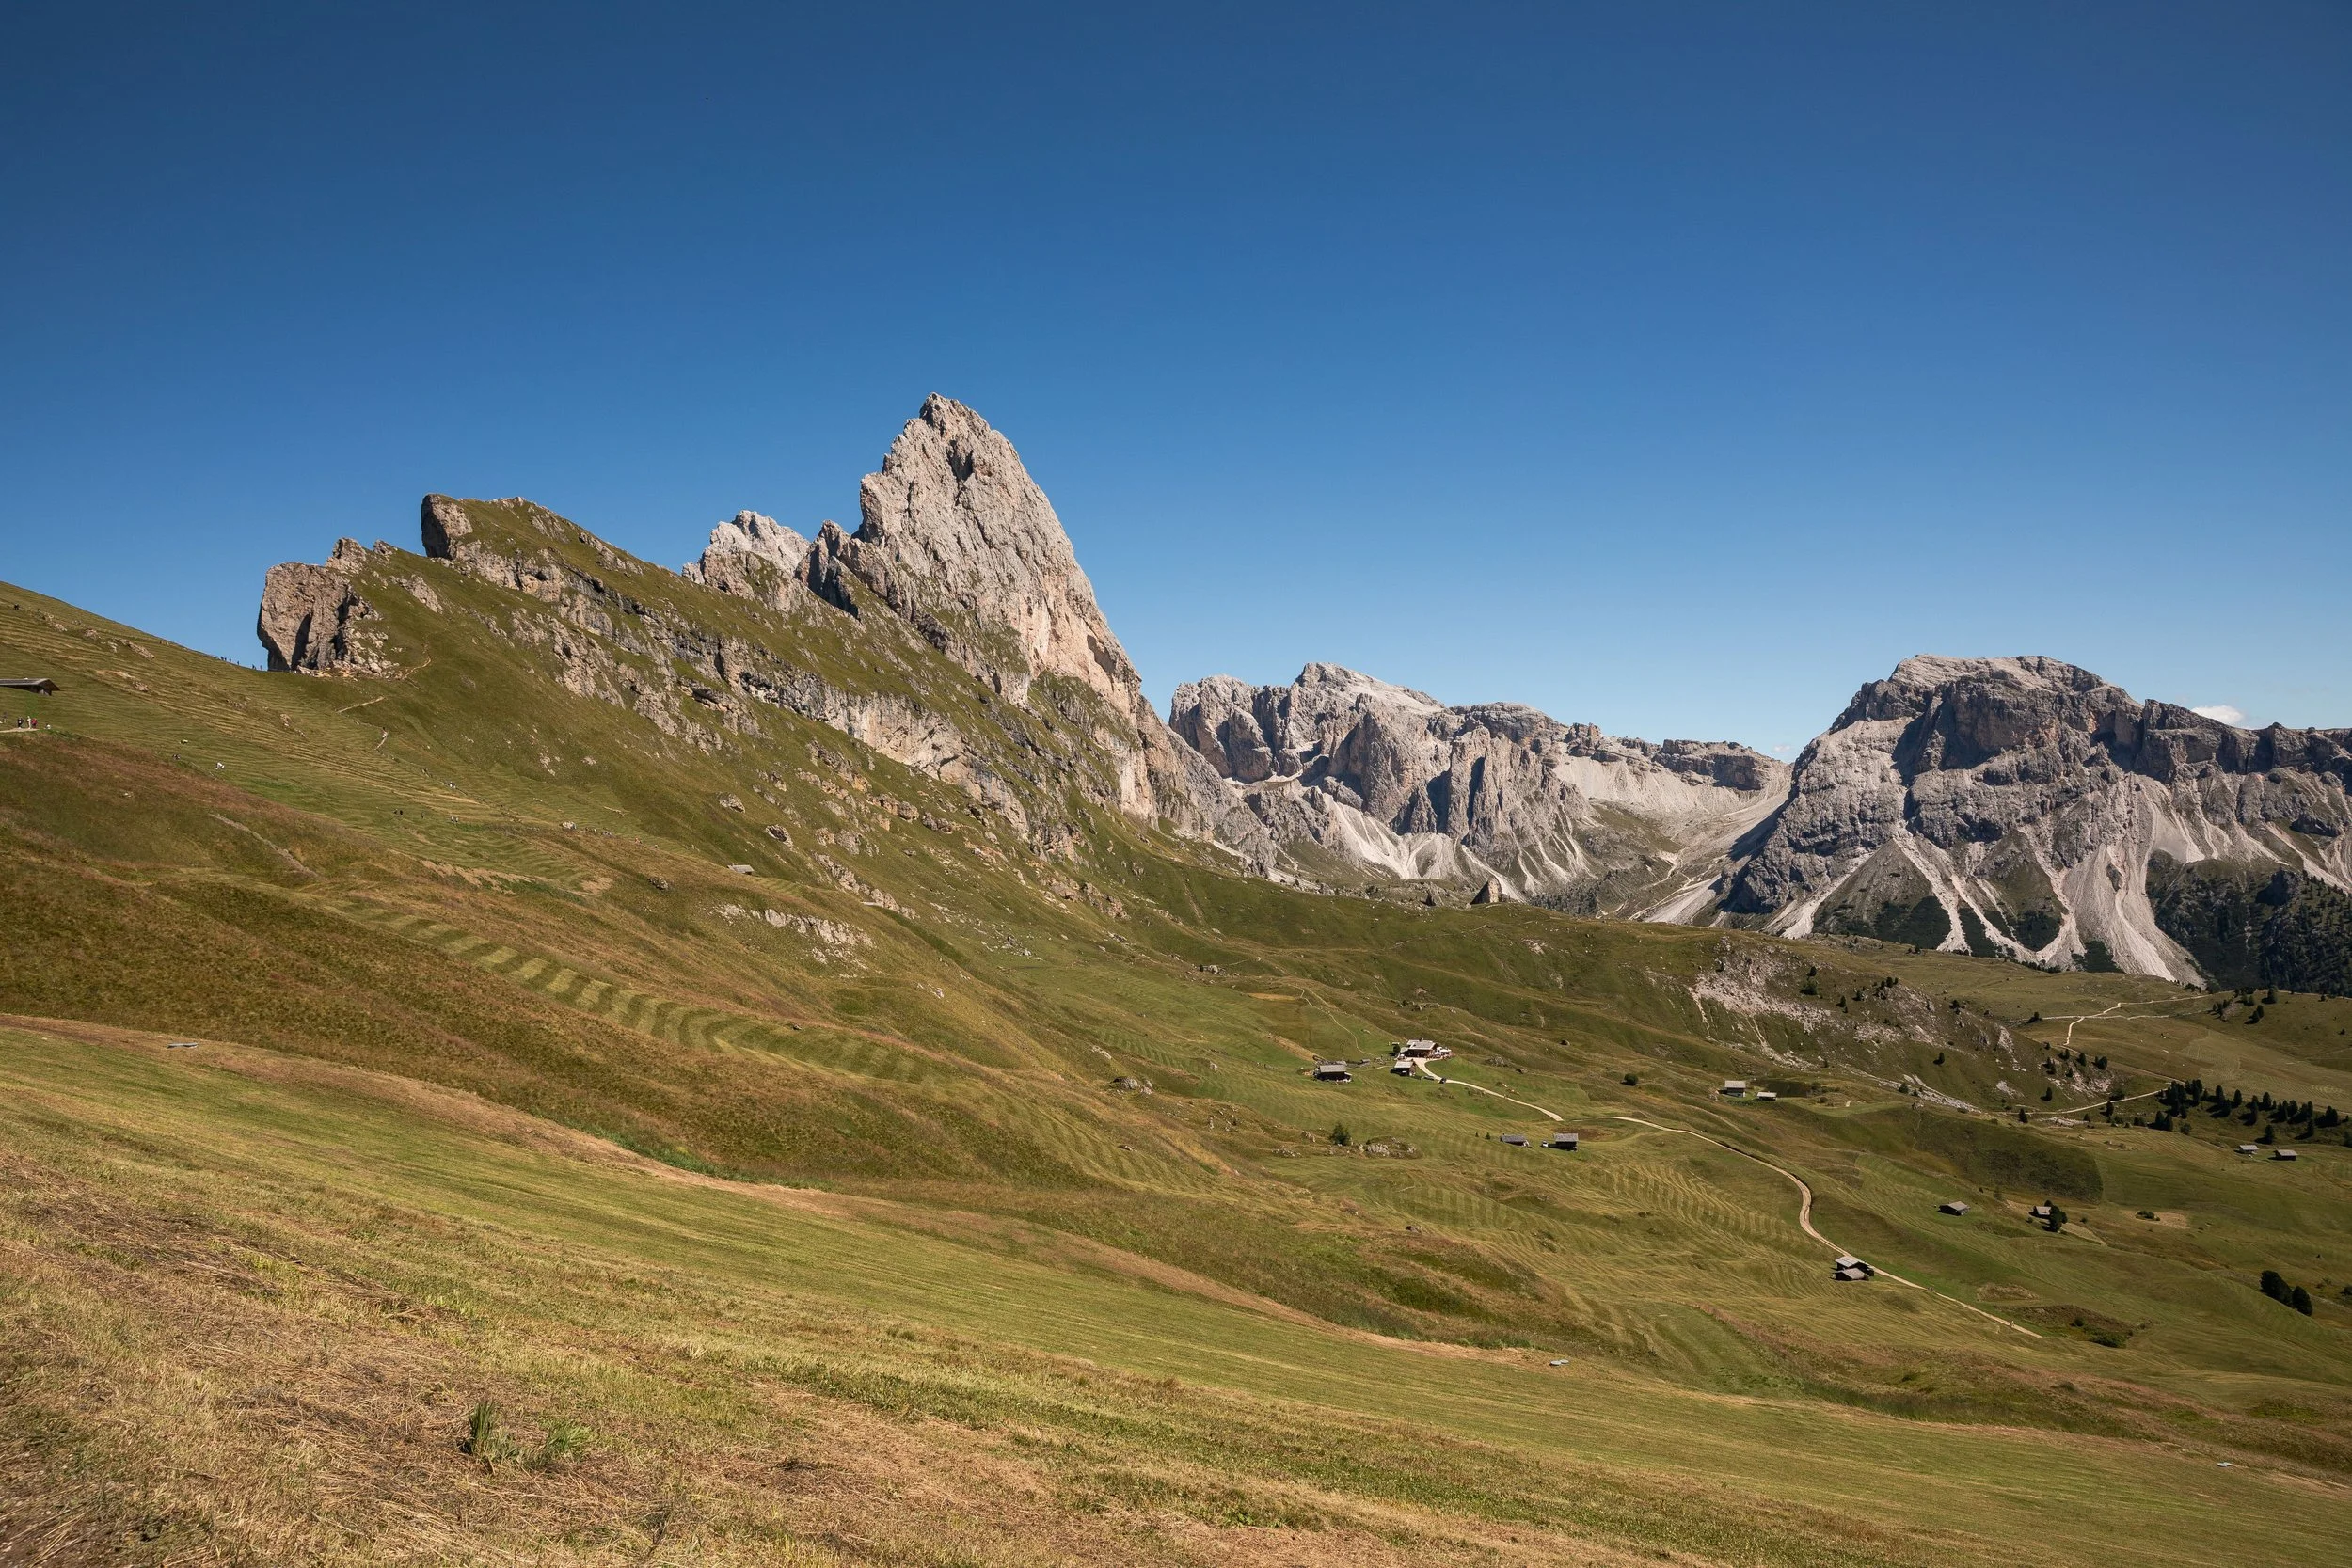
The trail starts to the left of the gondola and immediately begins to ascend. Once it reaches the top of the hill, you get breathtaking views looking north towards the surrounding mountains, and you get your first look at Seceda.
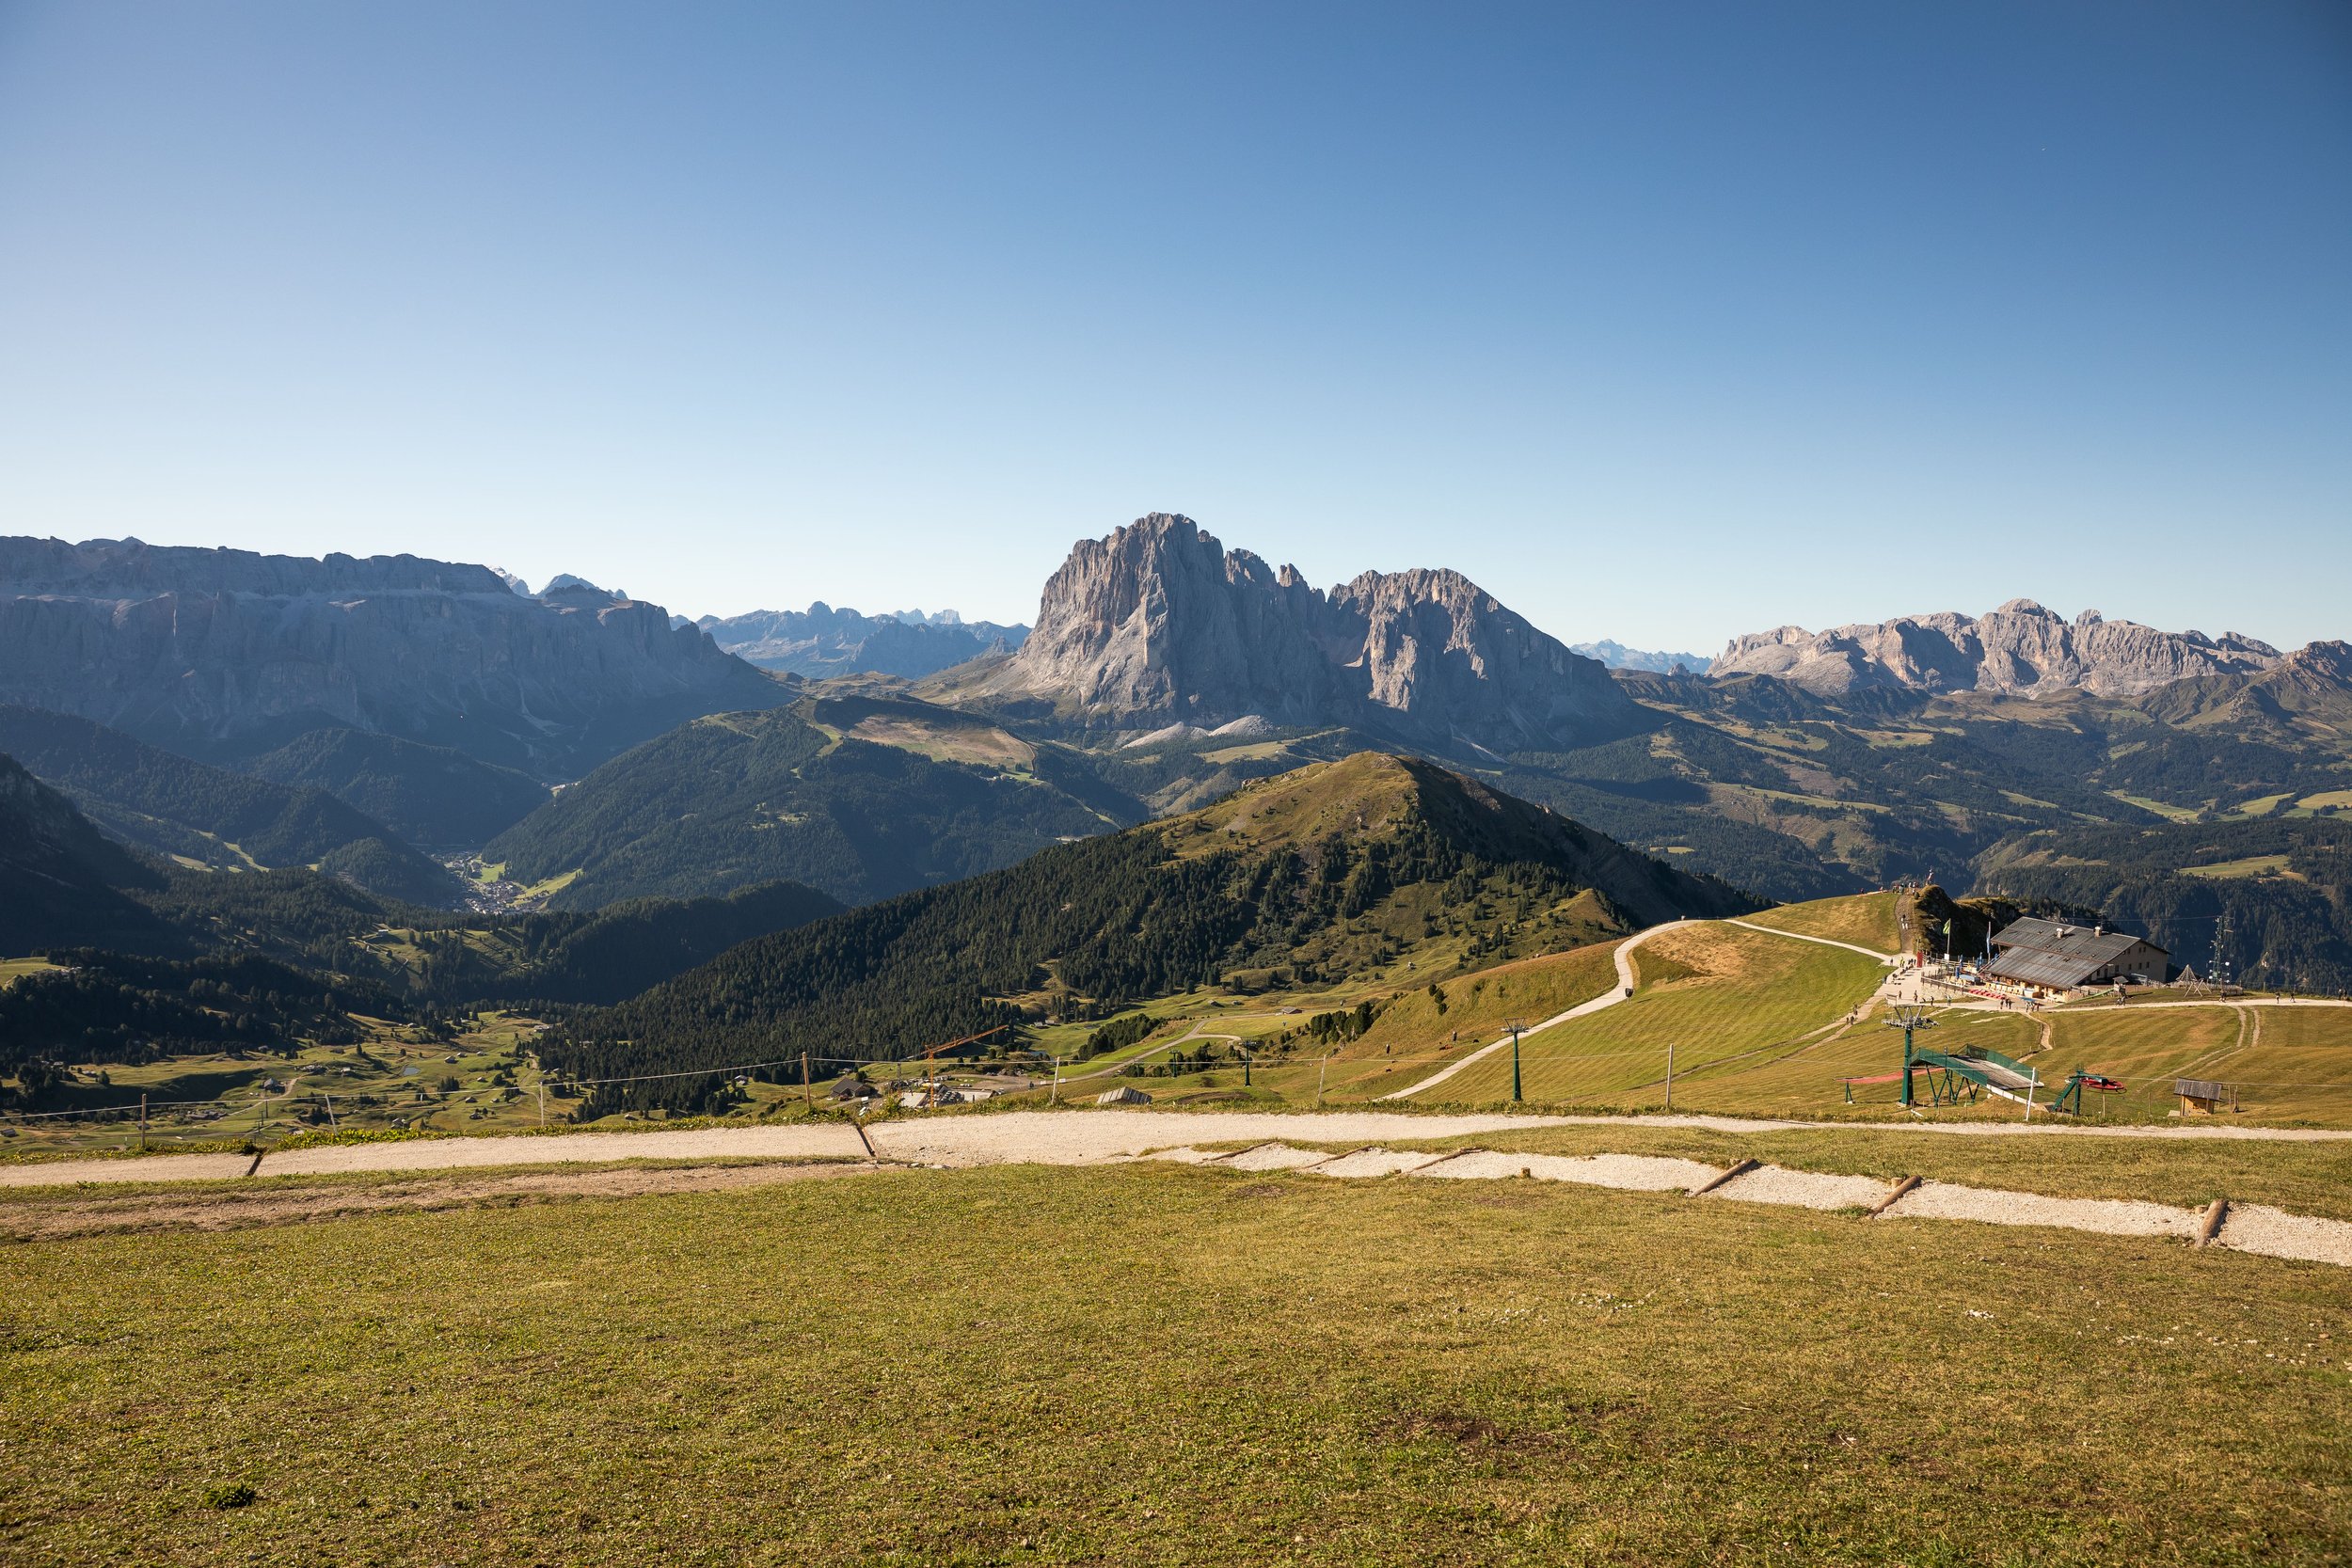
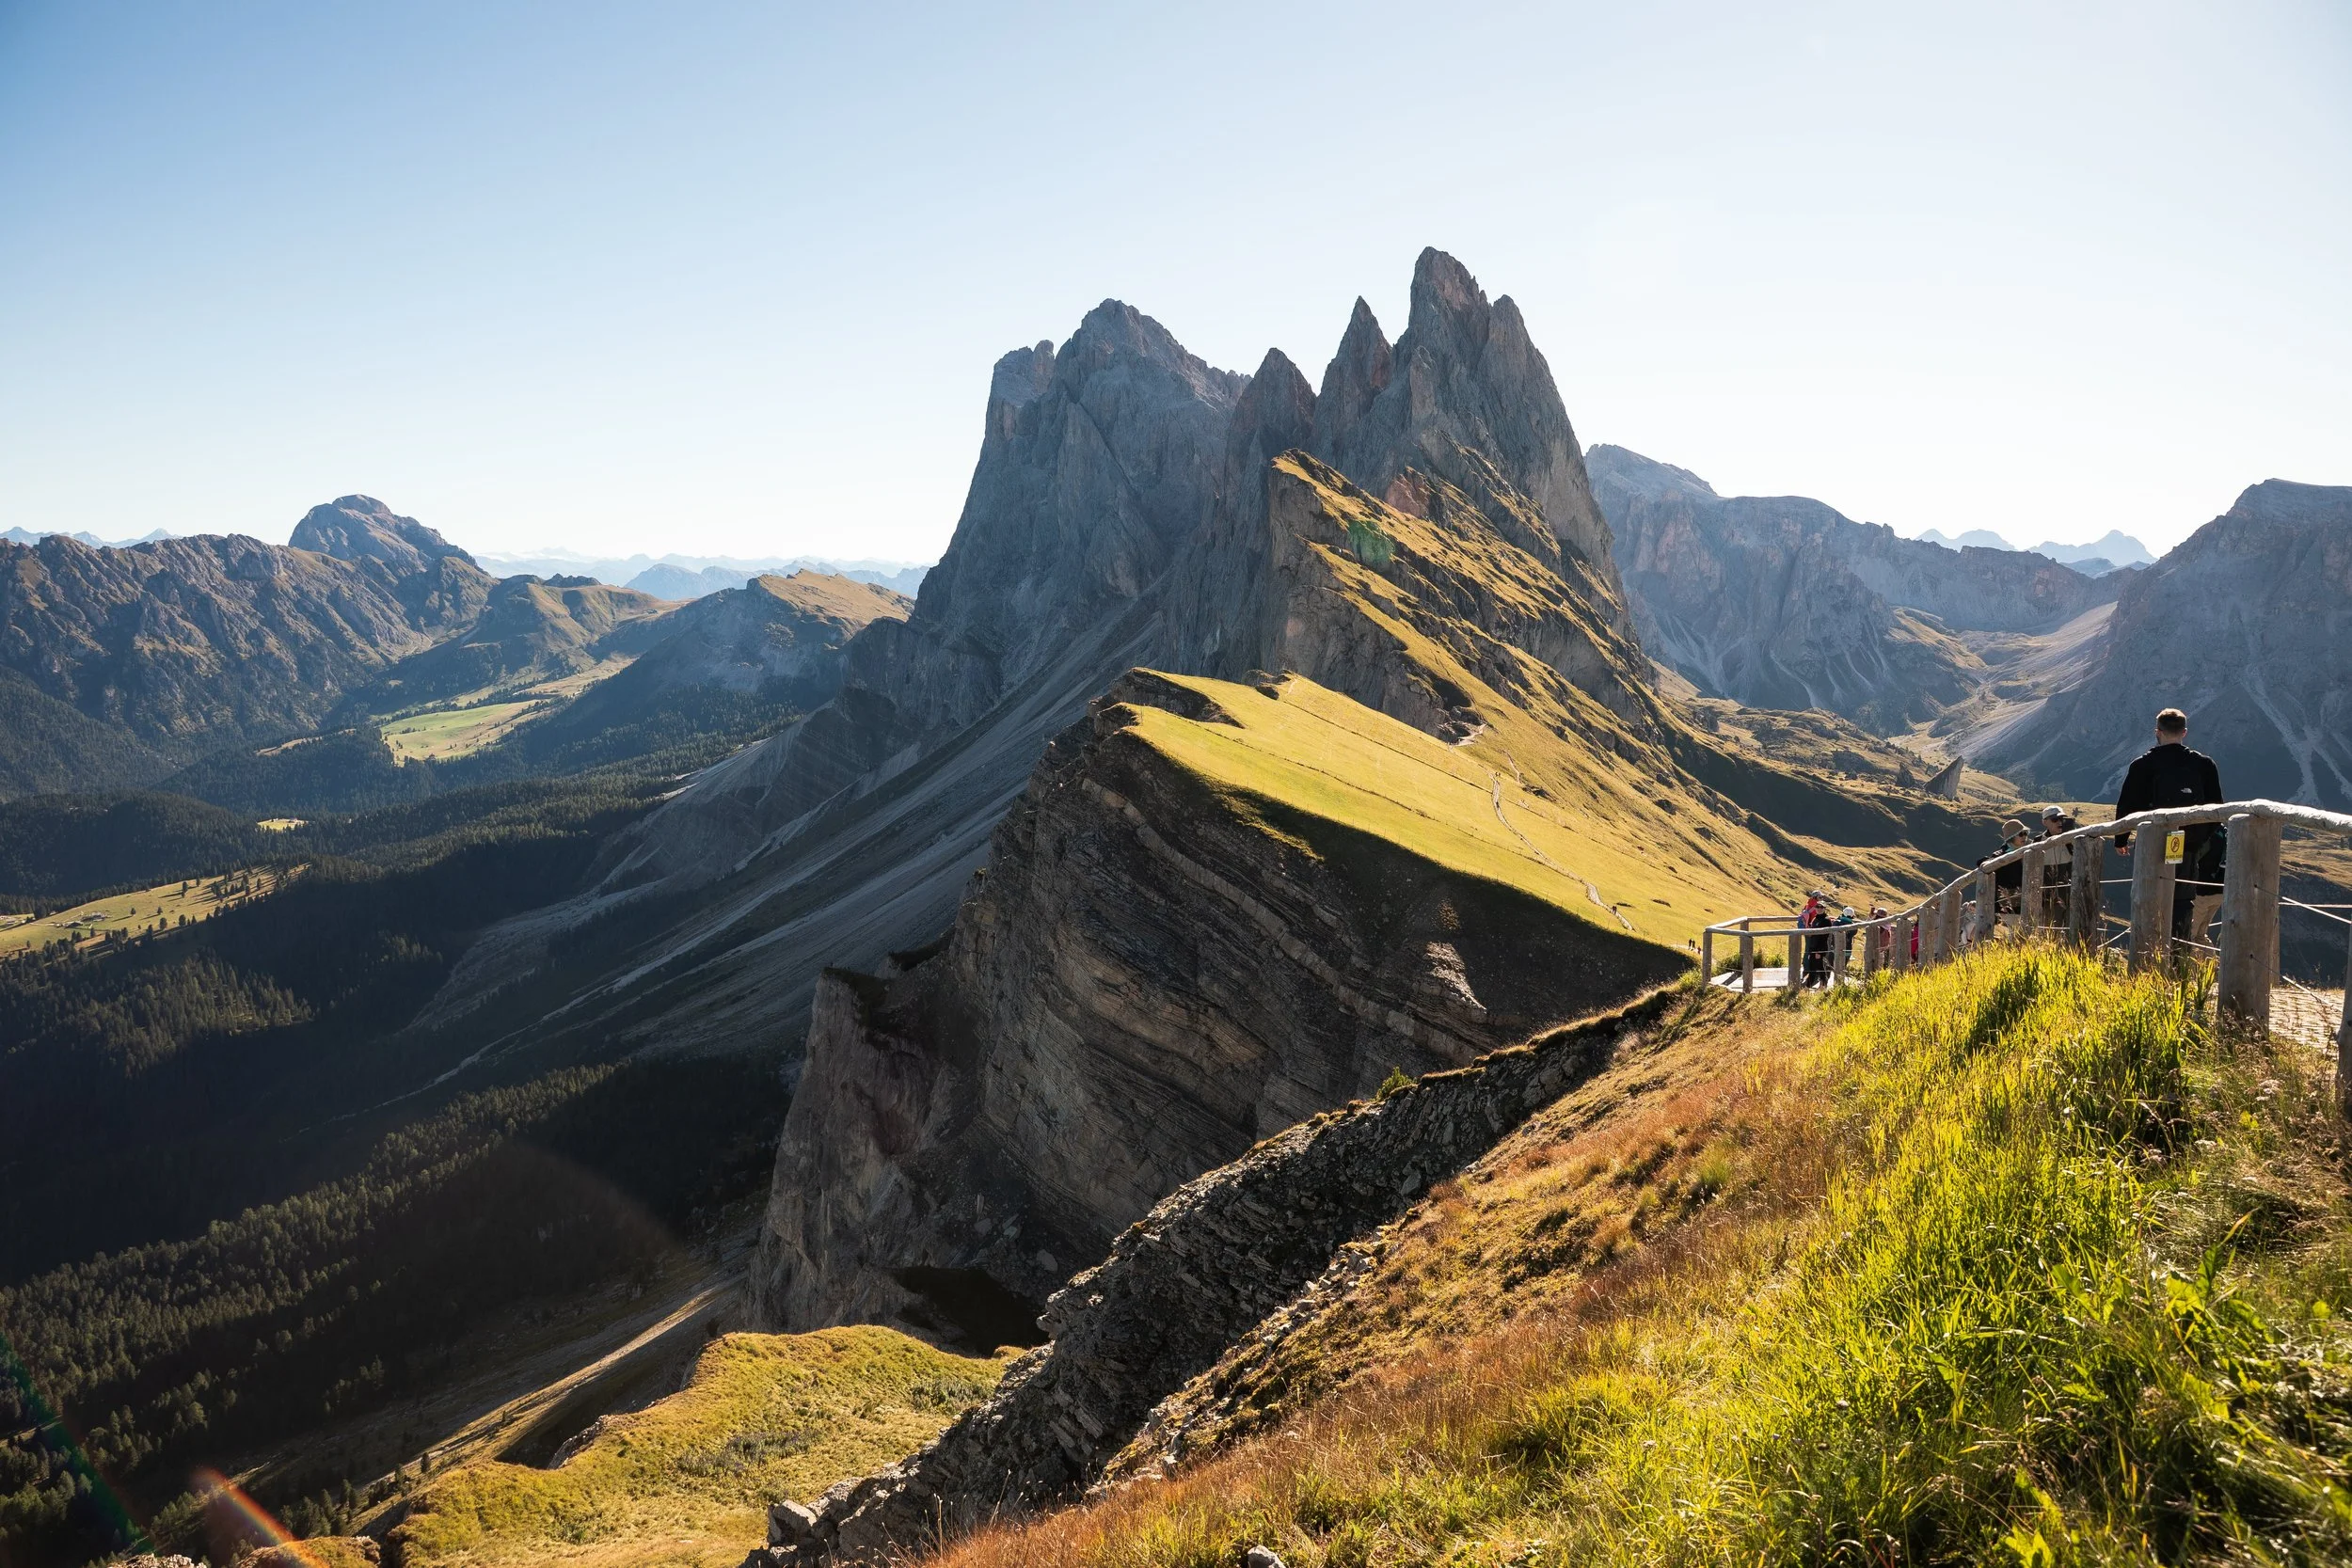
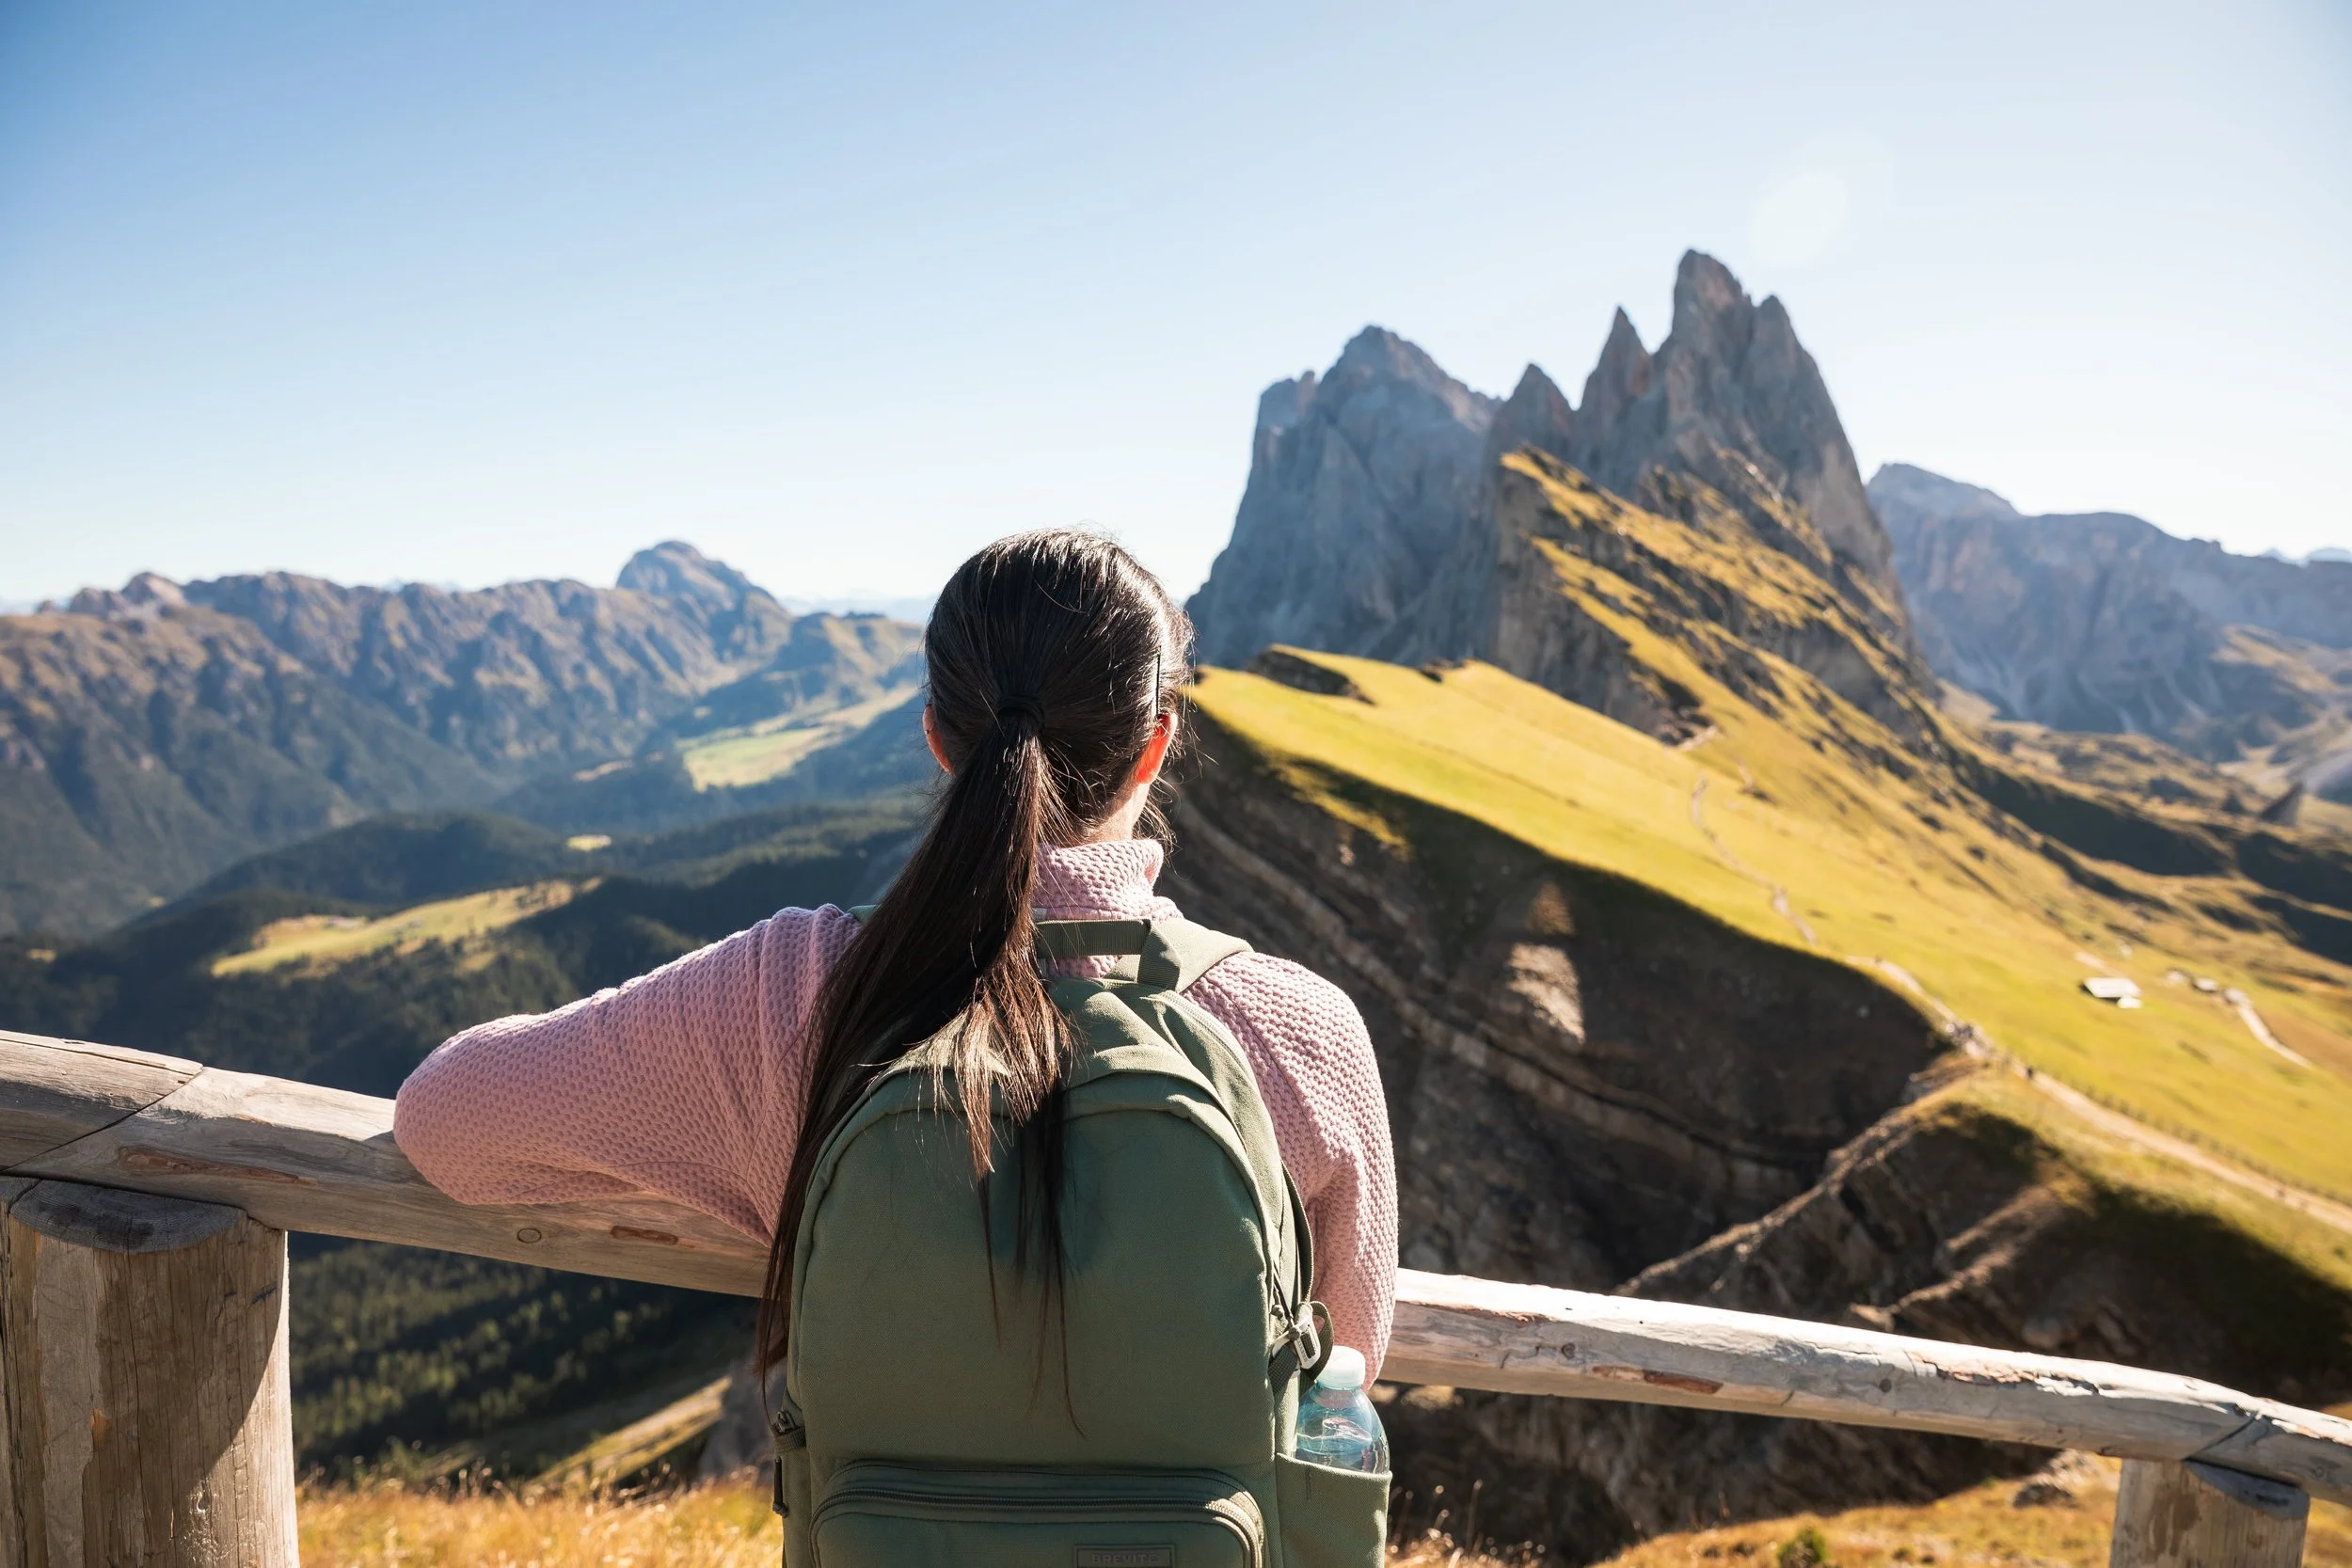
The next portion of the trail offers stunning views of Seceda, and I honestly thought these were the best views of it along the trail. I recommend taking your time and stopping at each viewpoint to enjoy the views.
Seceda Ridgeline to Forcella Pana
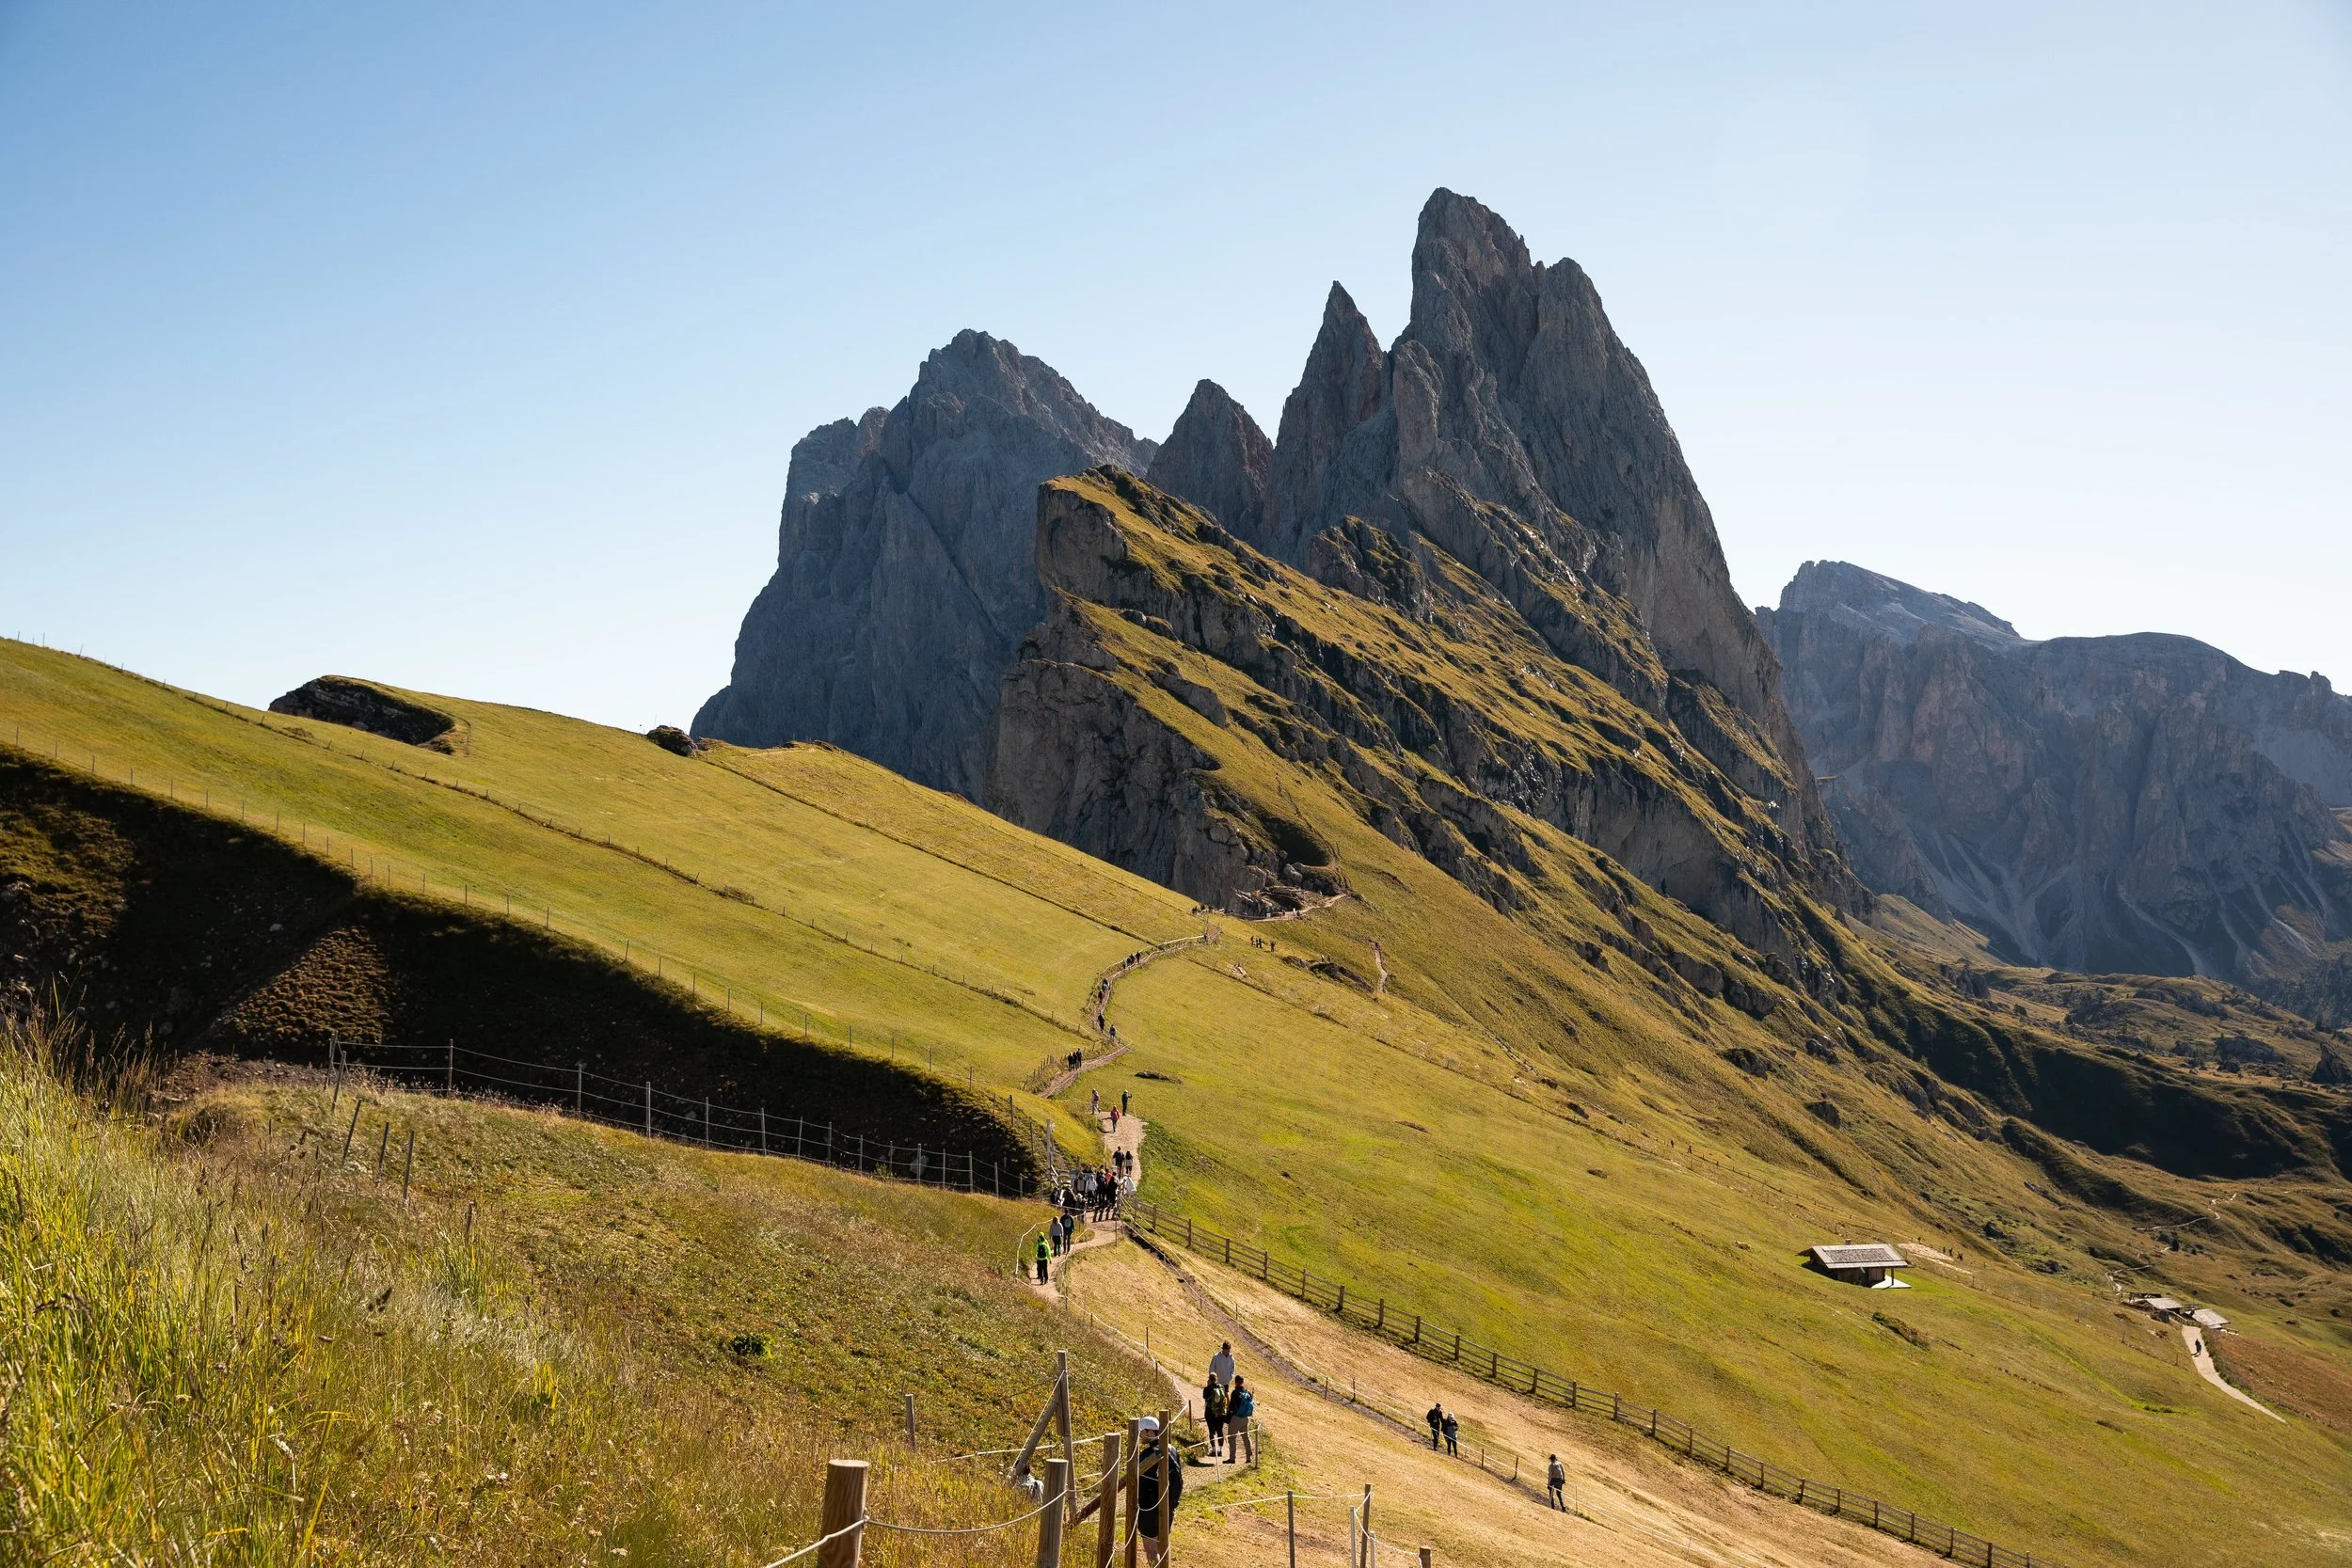
Once you are about a half-mile into the hike, you will reach a small kiosk along the trail. If you want to continue along the loop to get more views of Seceda, you have to pay a small fee. The kiosk is new and owned by the landowners.
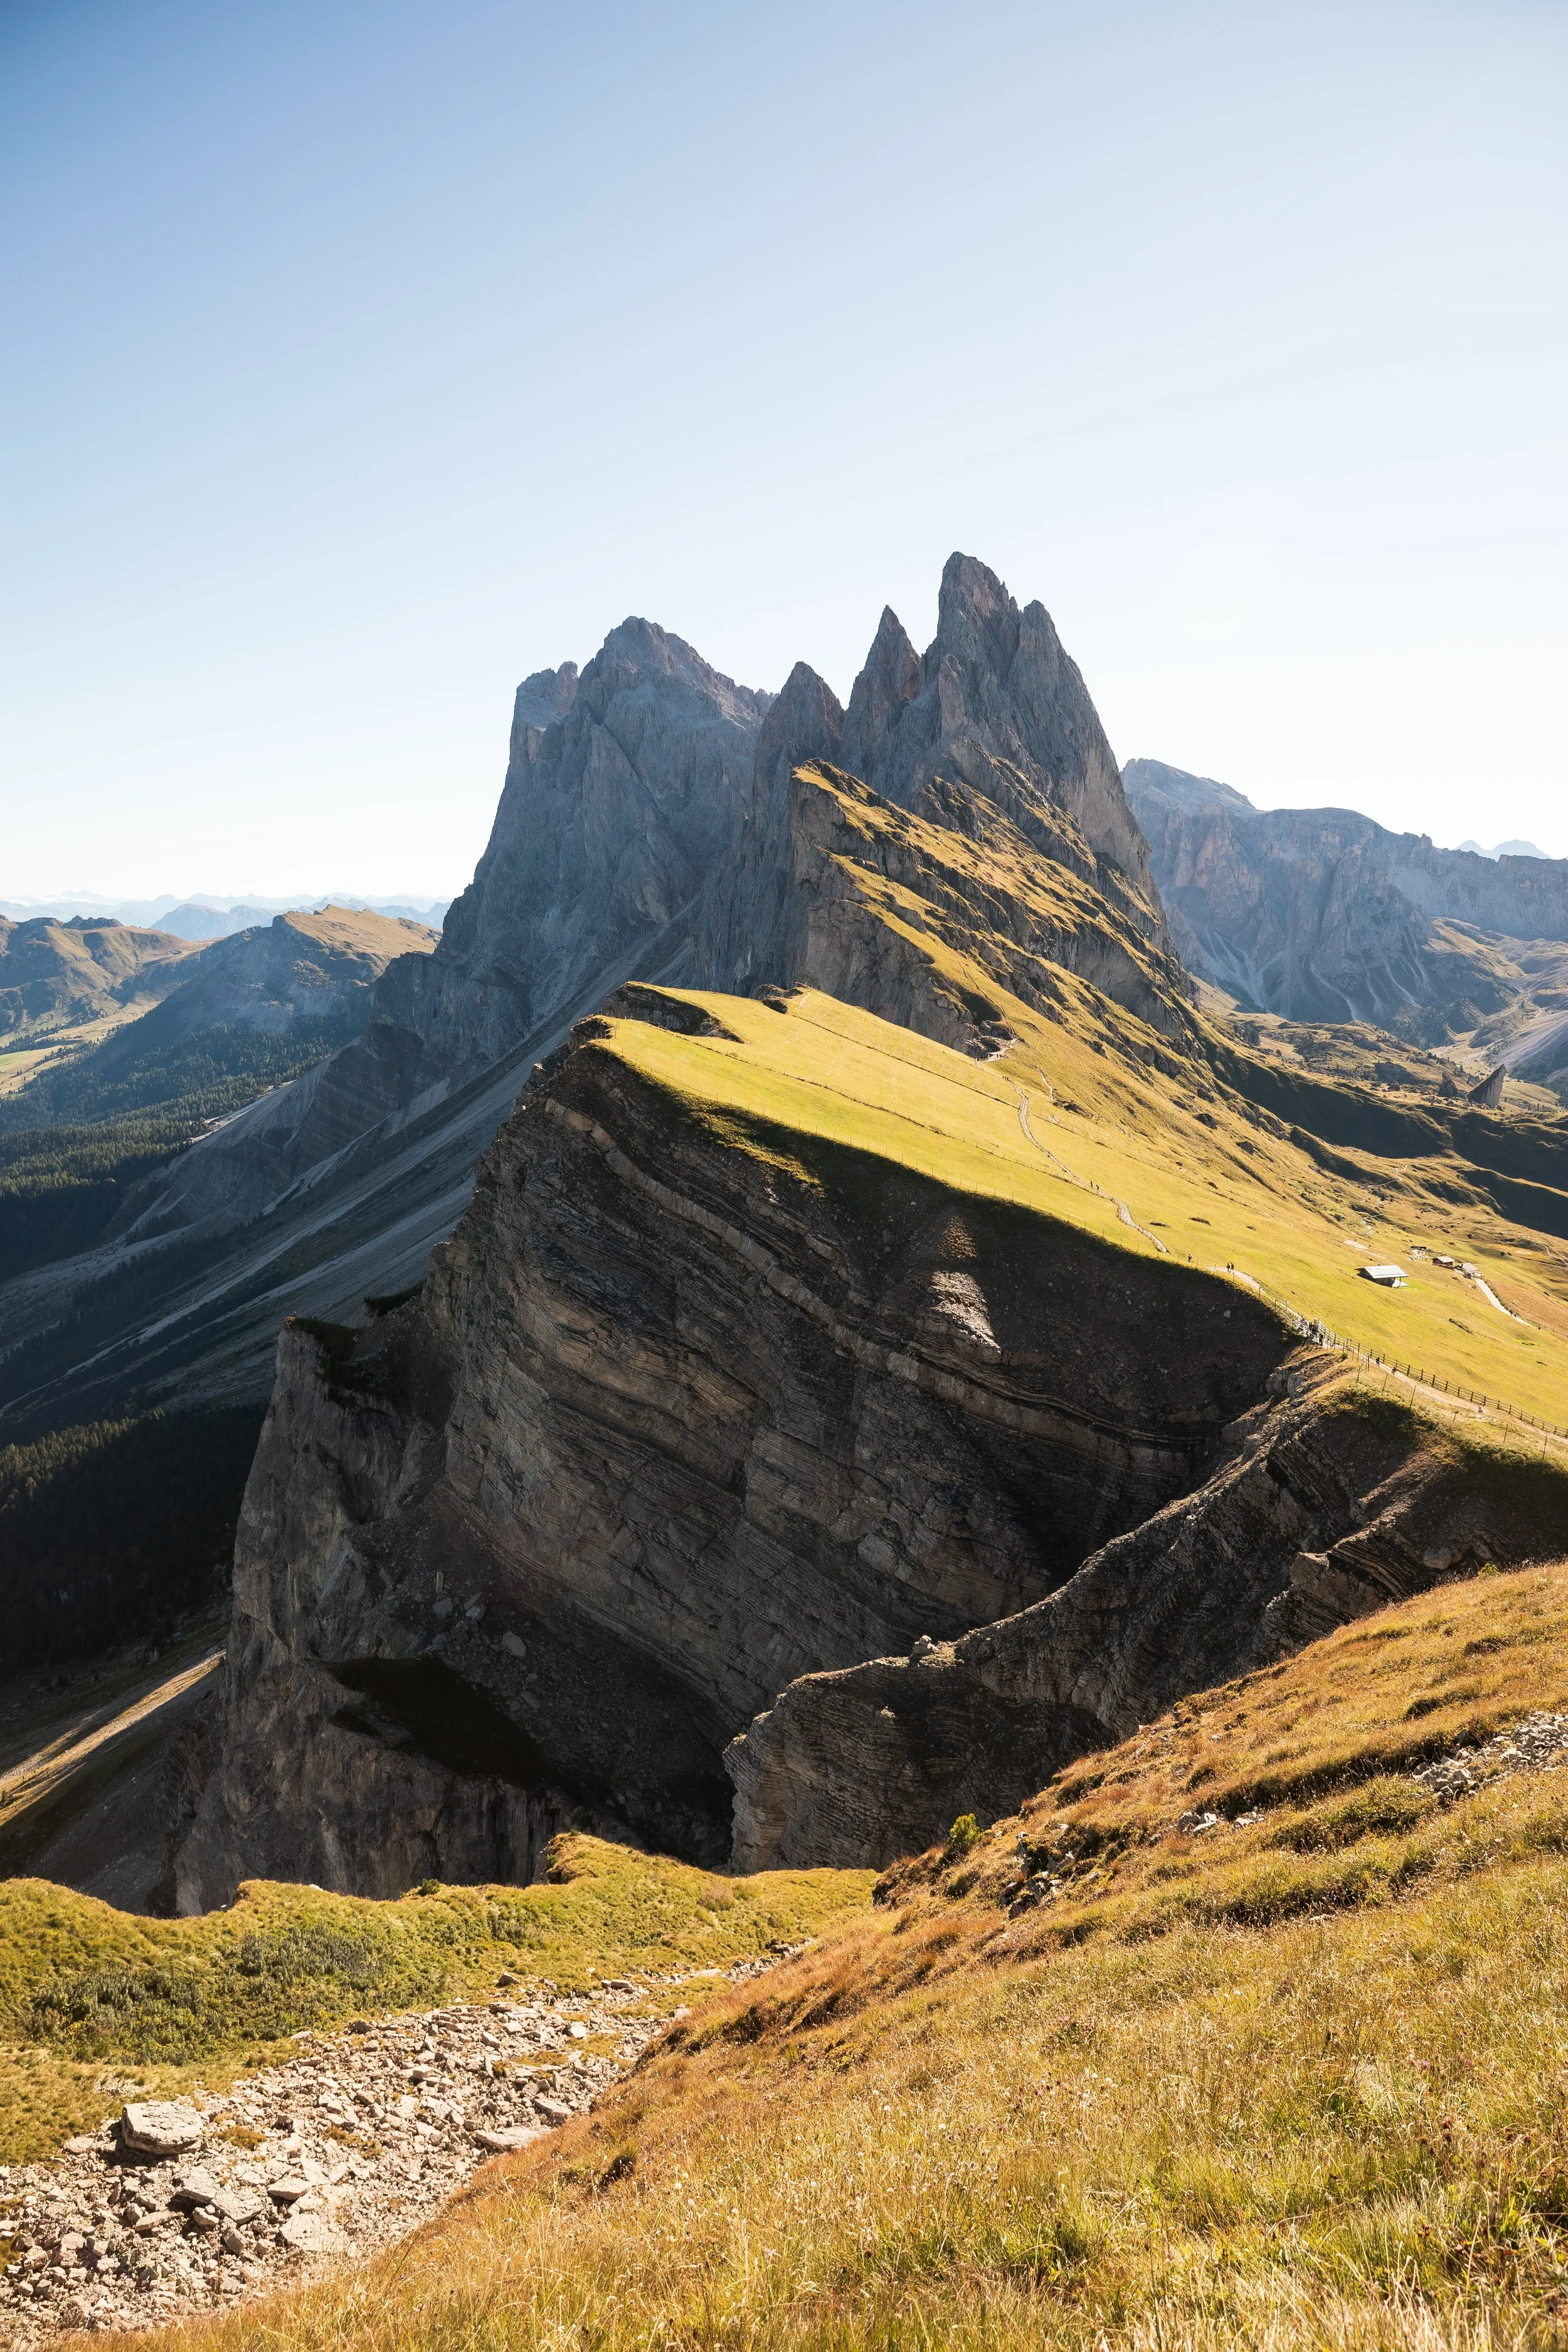
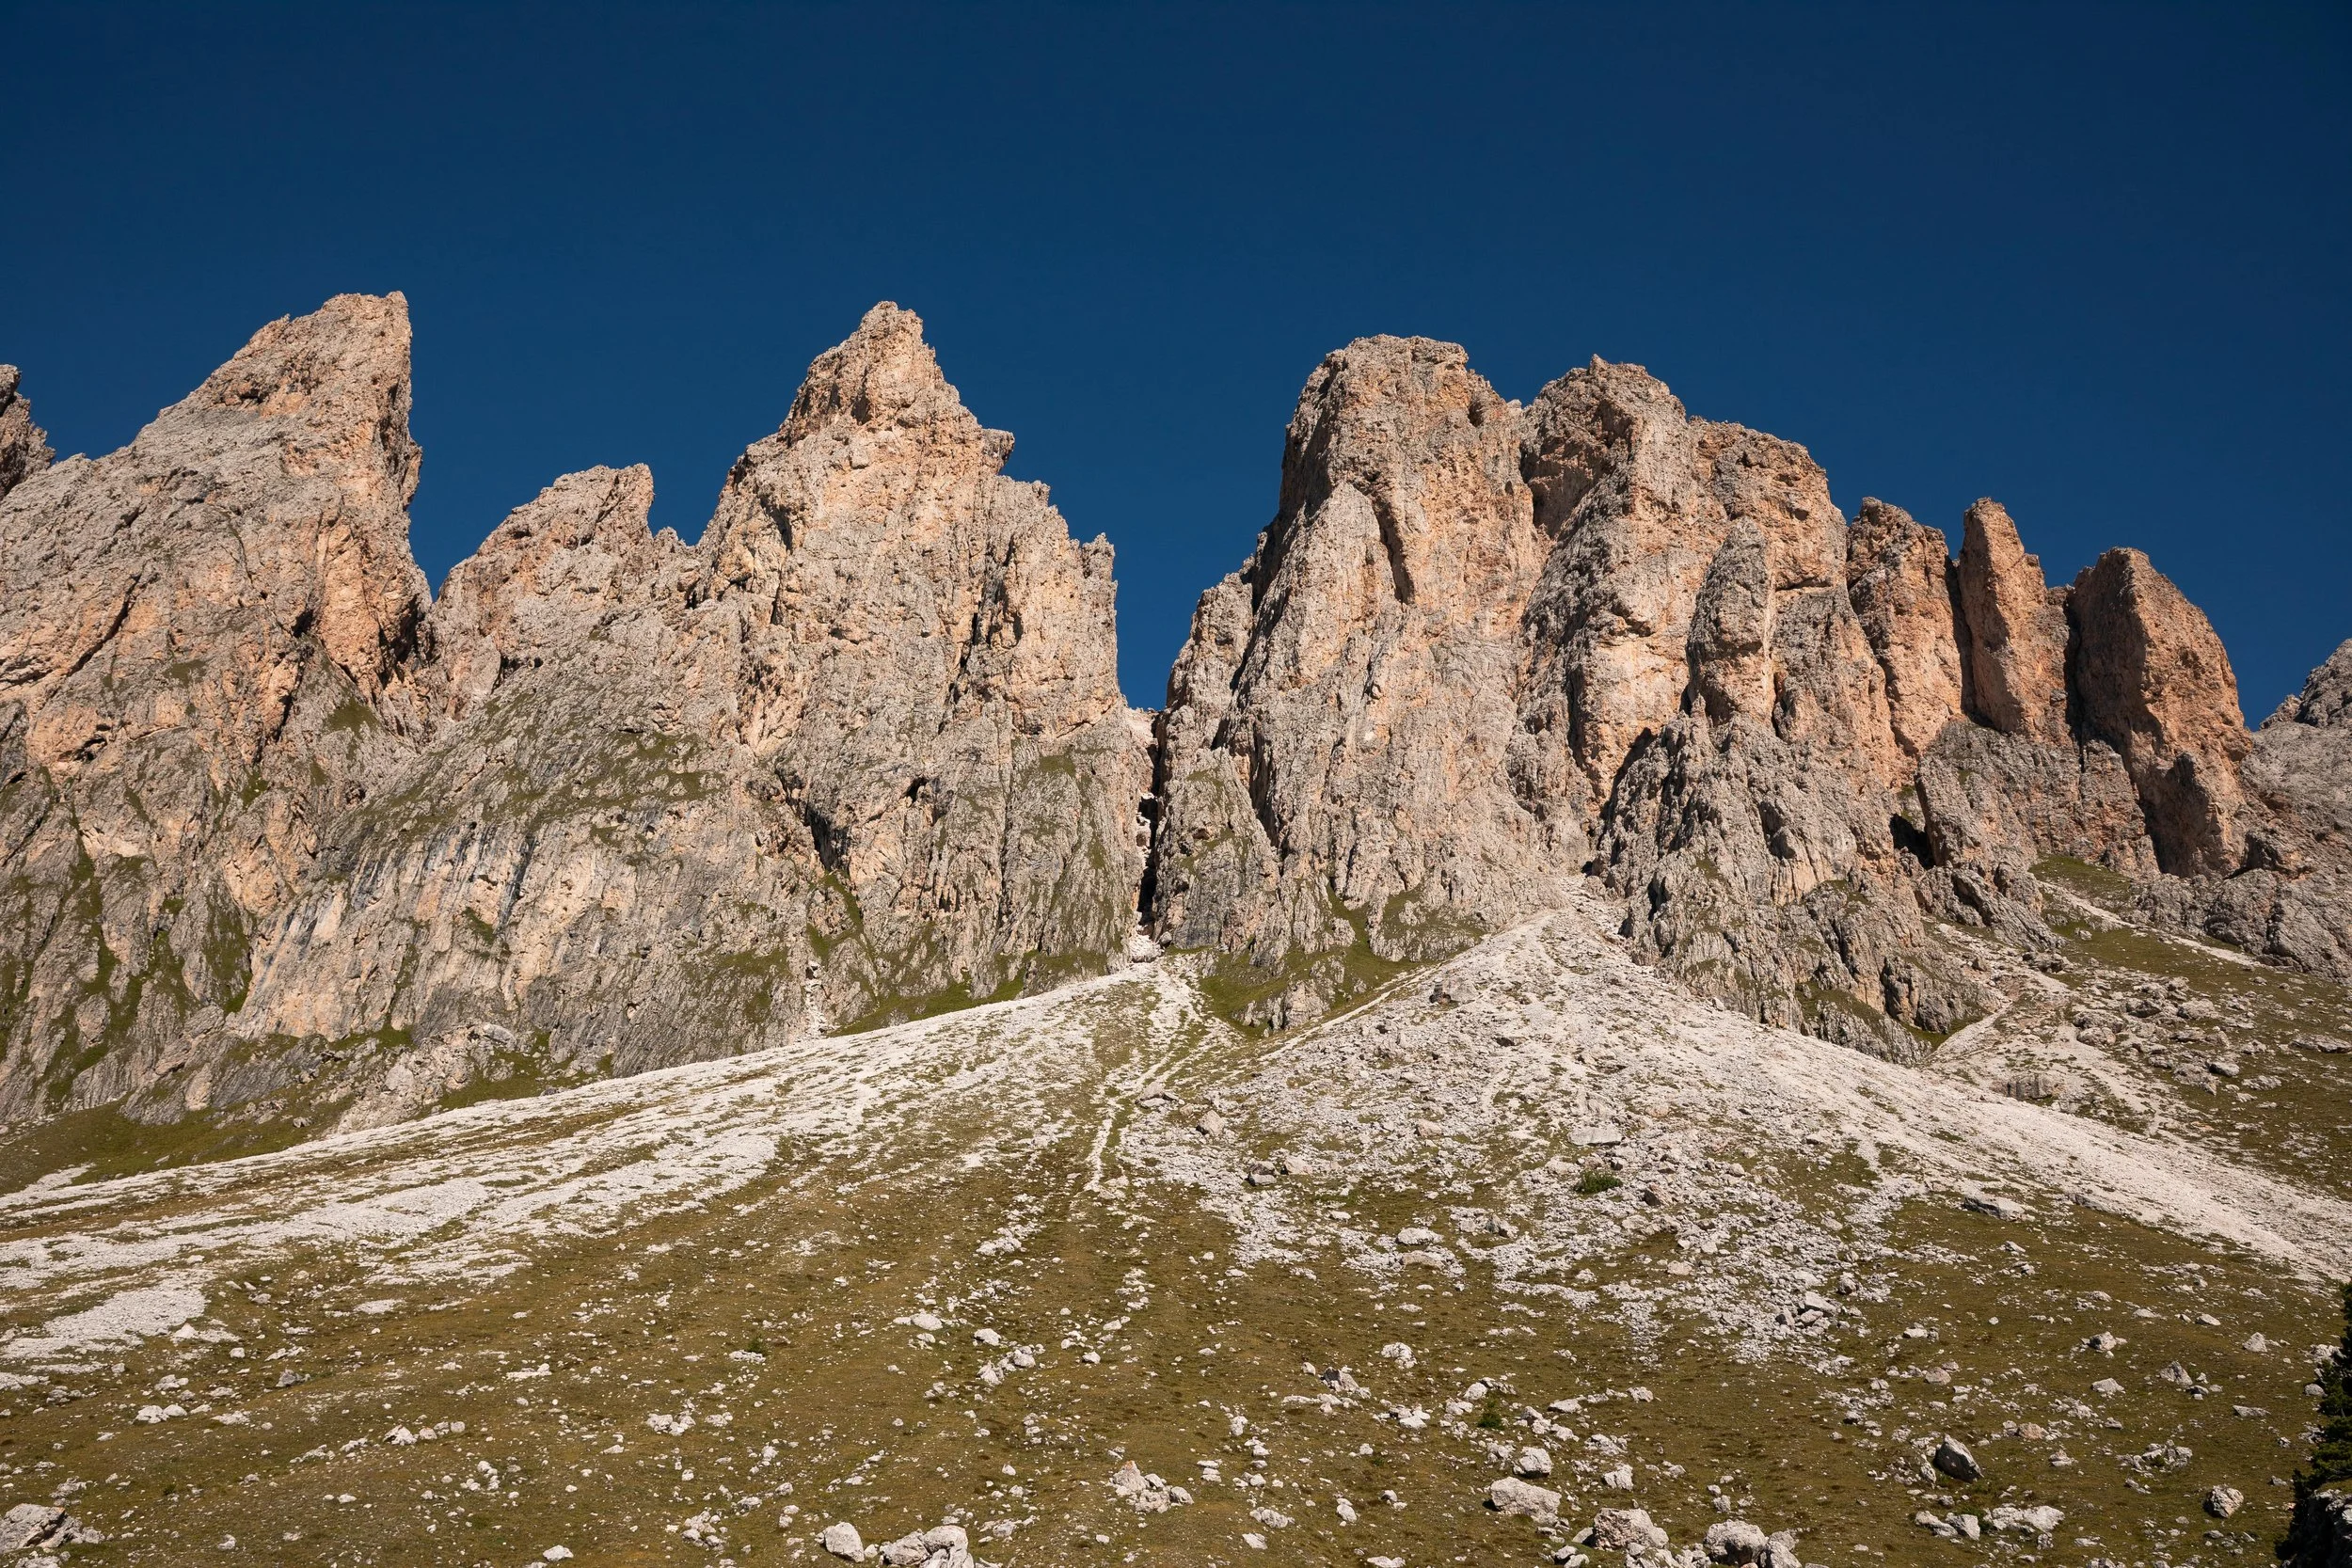
If you decide to pay the fee and continue on the trail, you can get up-close and personal views of Seceda. One of the iconic places to get a photo is past the kiosk, which is why most people pay the small fee to enter.
Once you finish exploring this section of the Seceda Ridgeline Trail, you can either continue the loop back towards the gondola or hike a longer loop, which I will talk about next.
To be honest, we skipped this section. It was extremely crowded, and we felt like the best views of Seceda were at the free viewpoints, so we turned right at the kiosk to continue on a longer loop.
Seceda Ridgeline to Malga Pieralongia Alm
If you want to continue exploring the area, I recommend hiking a longer loop! We absolutely loved doing this because it allowed us to escape the crowds, explore lesser-known areas, and enjoy breathtaking views of the surrounding mountains.
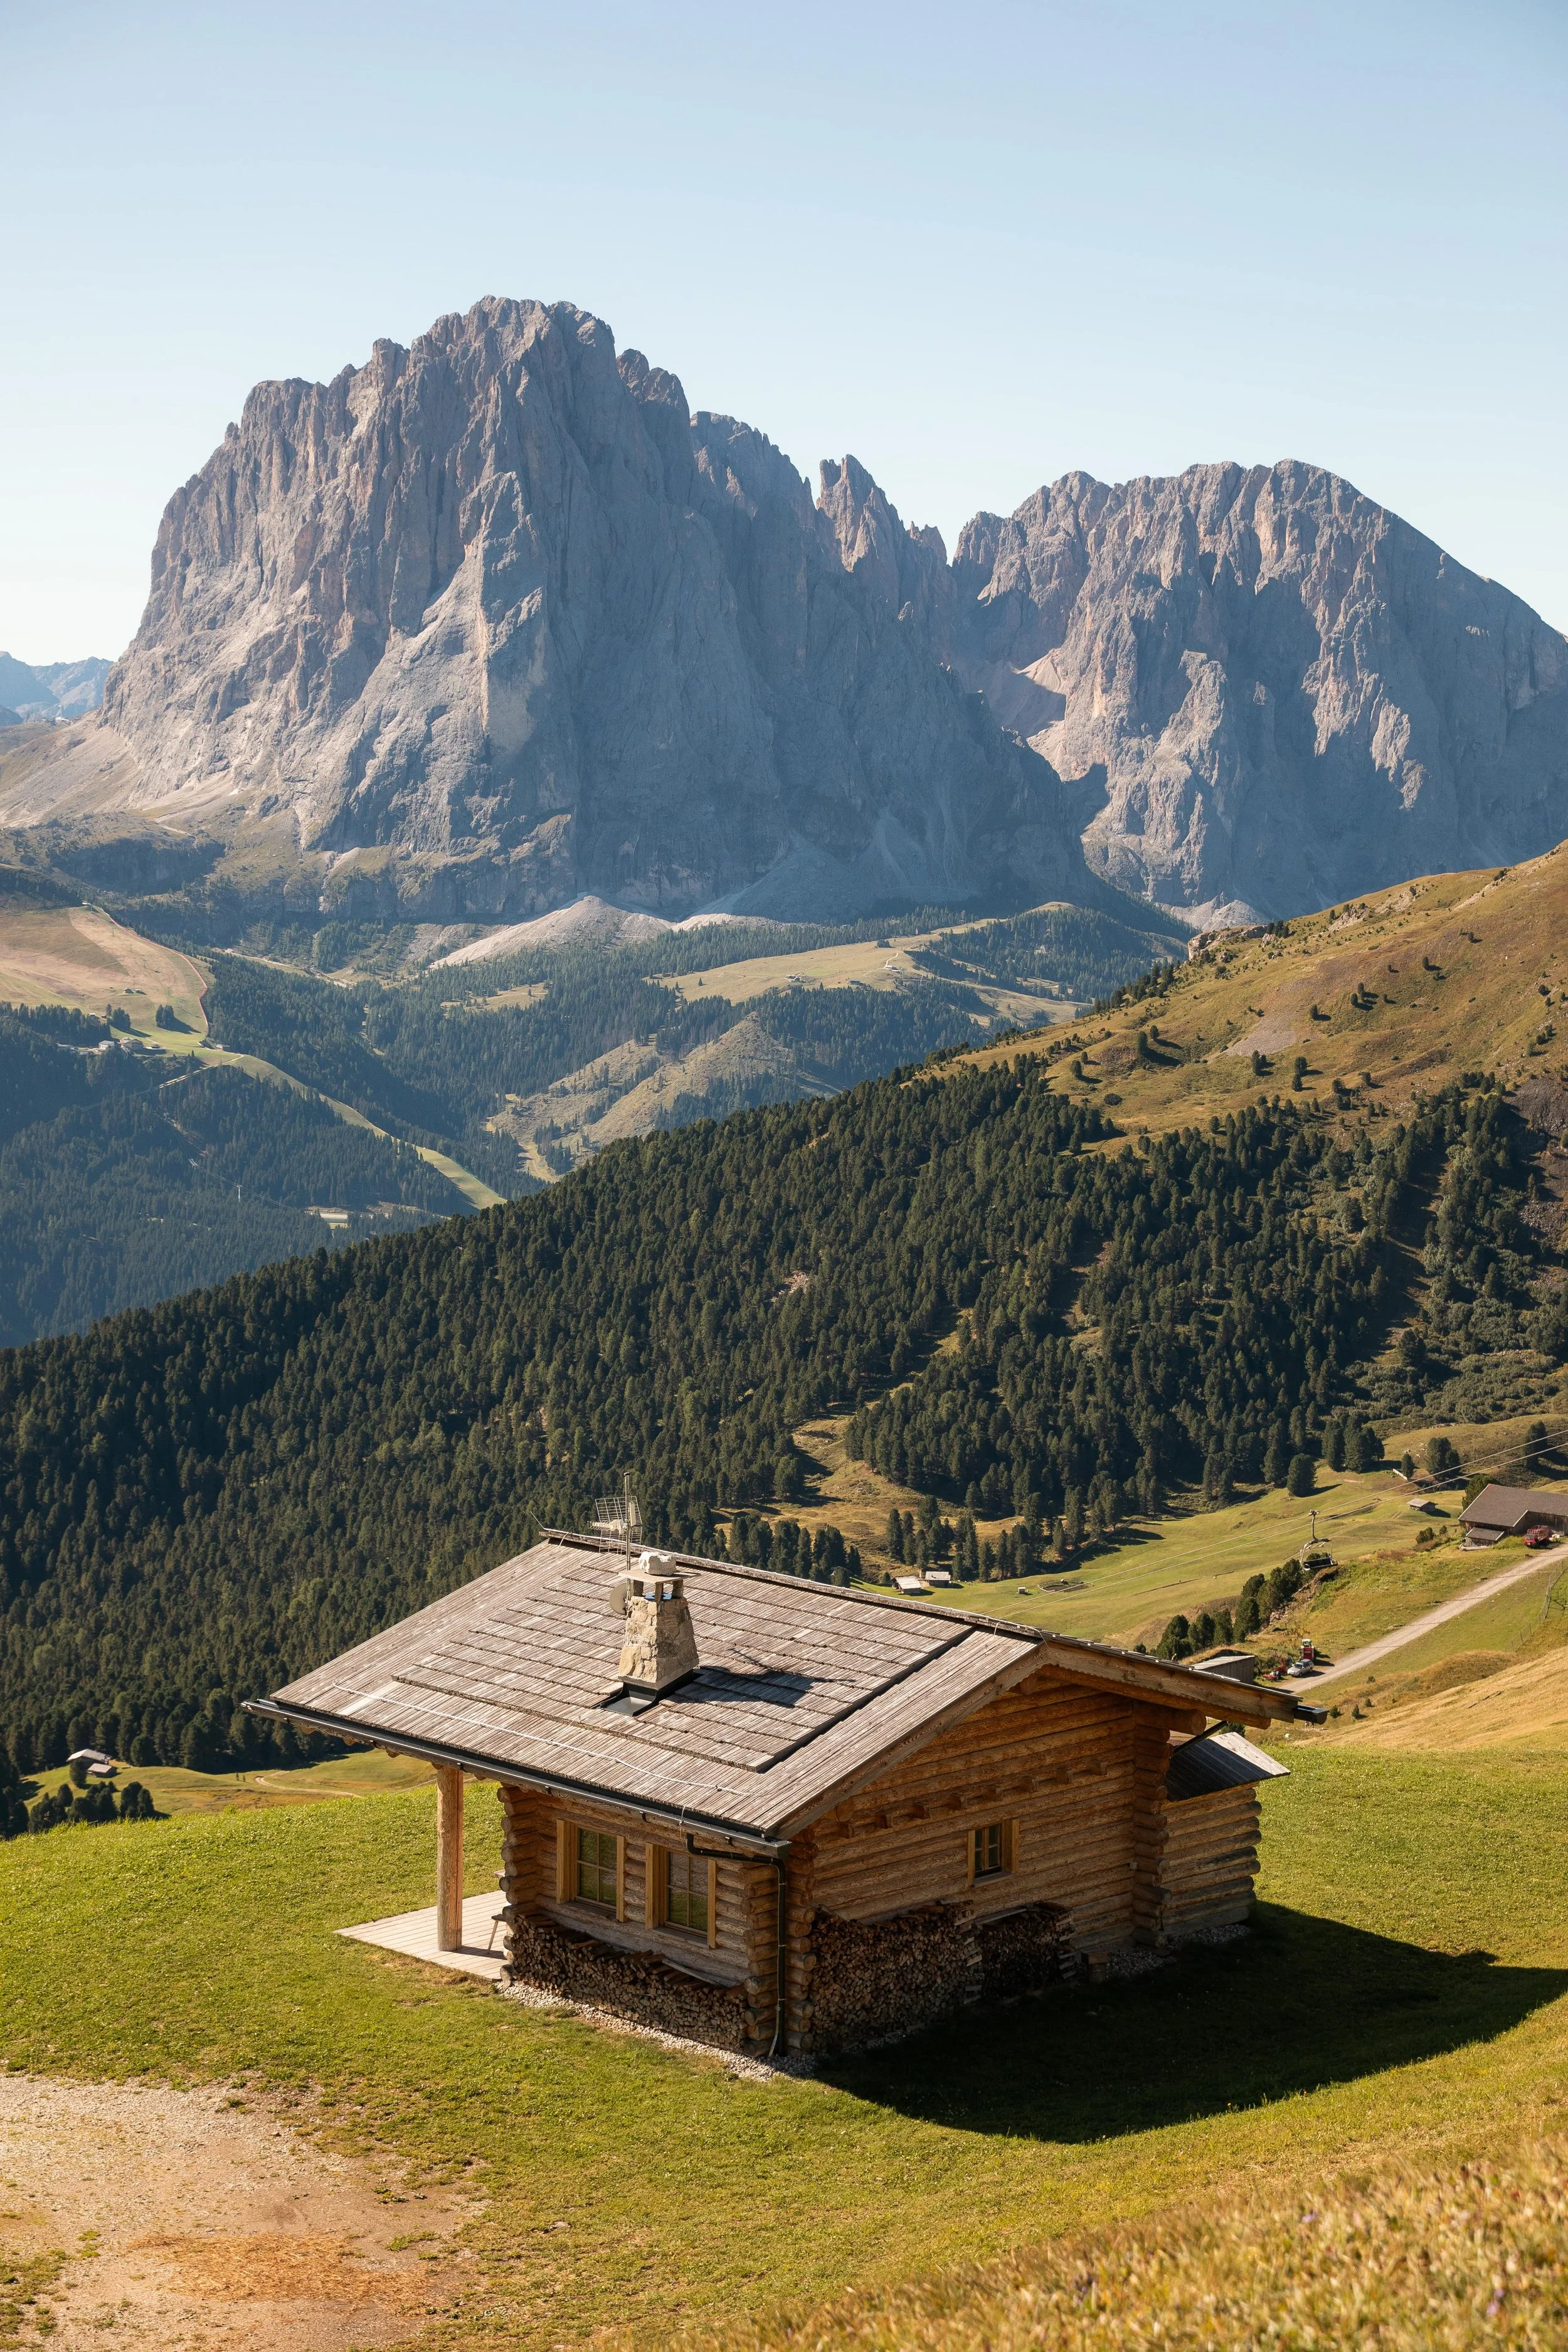
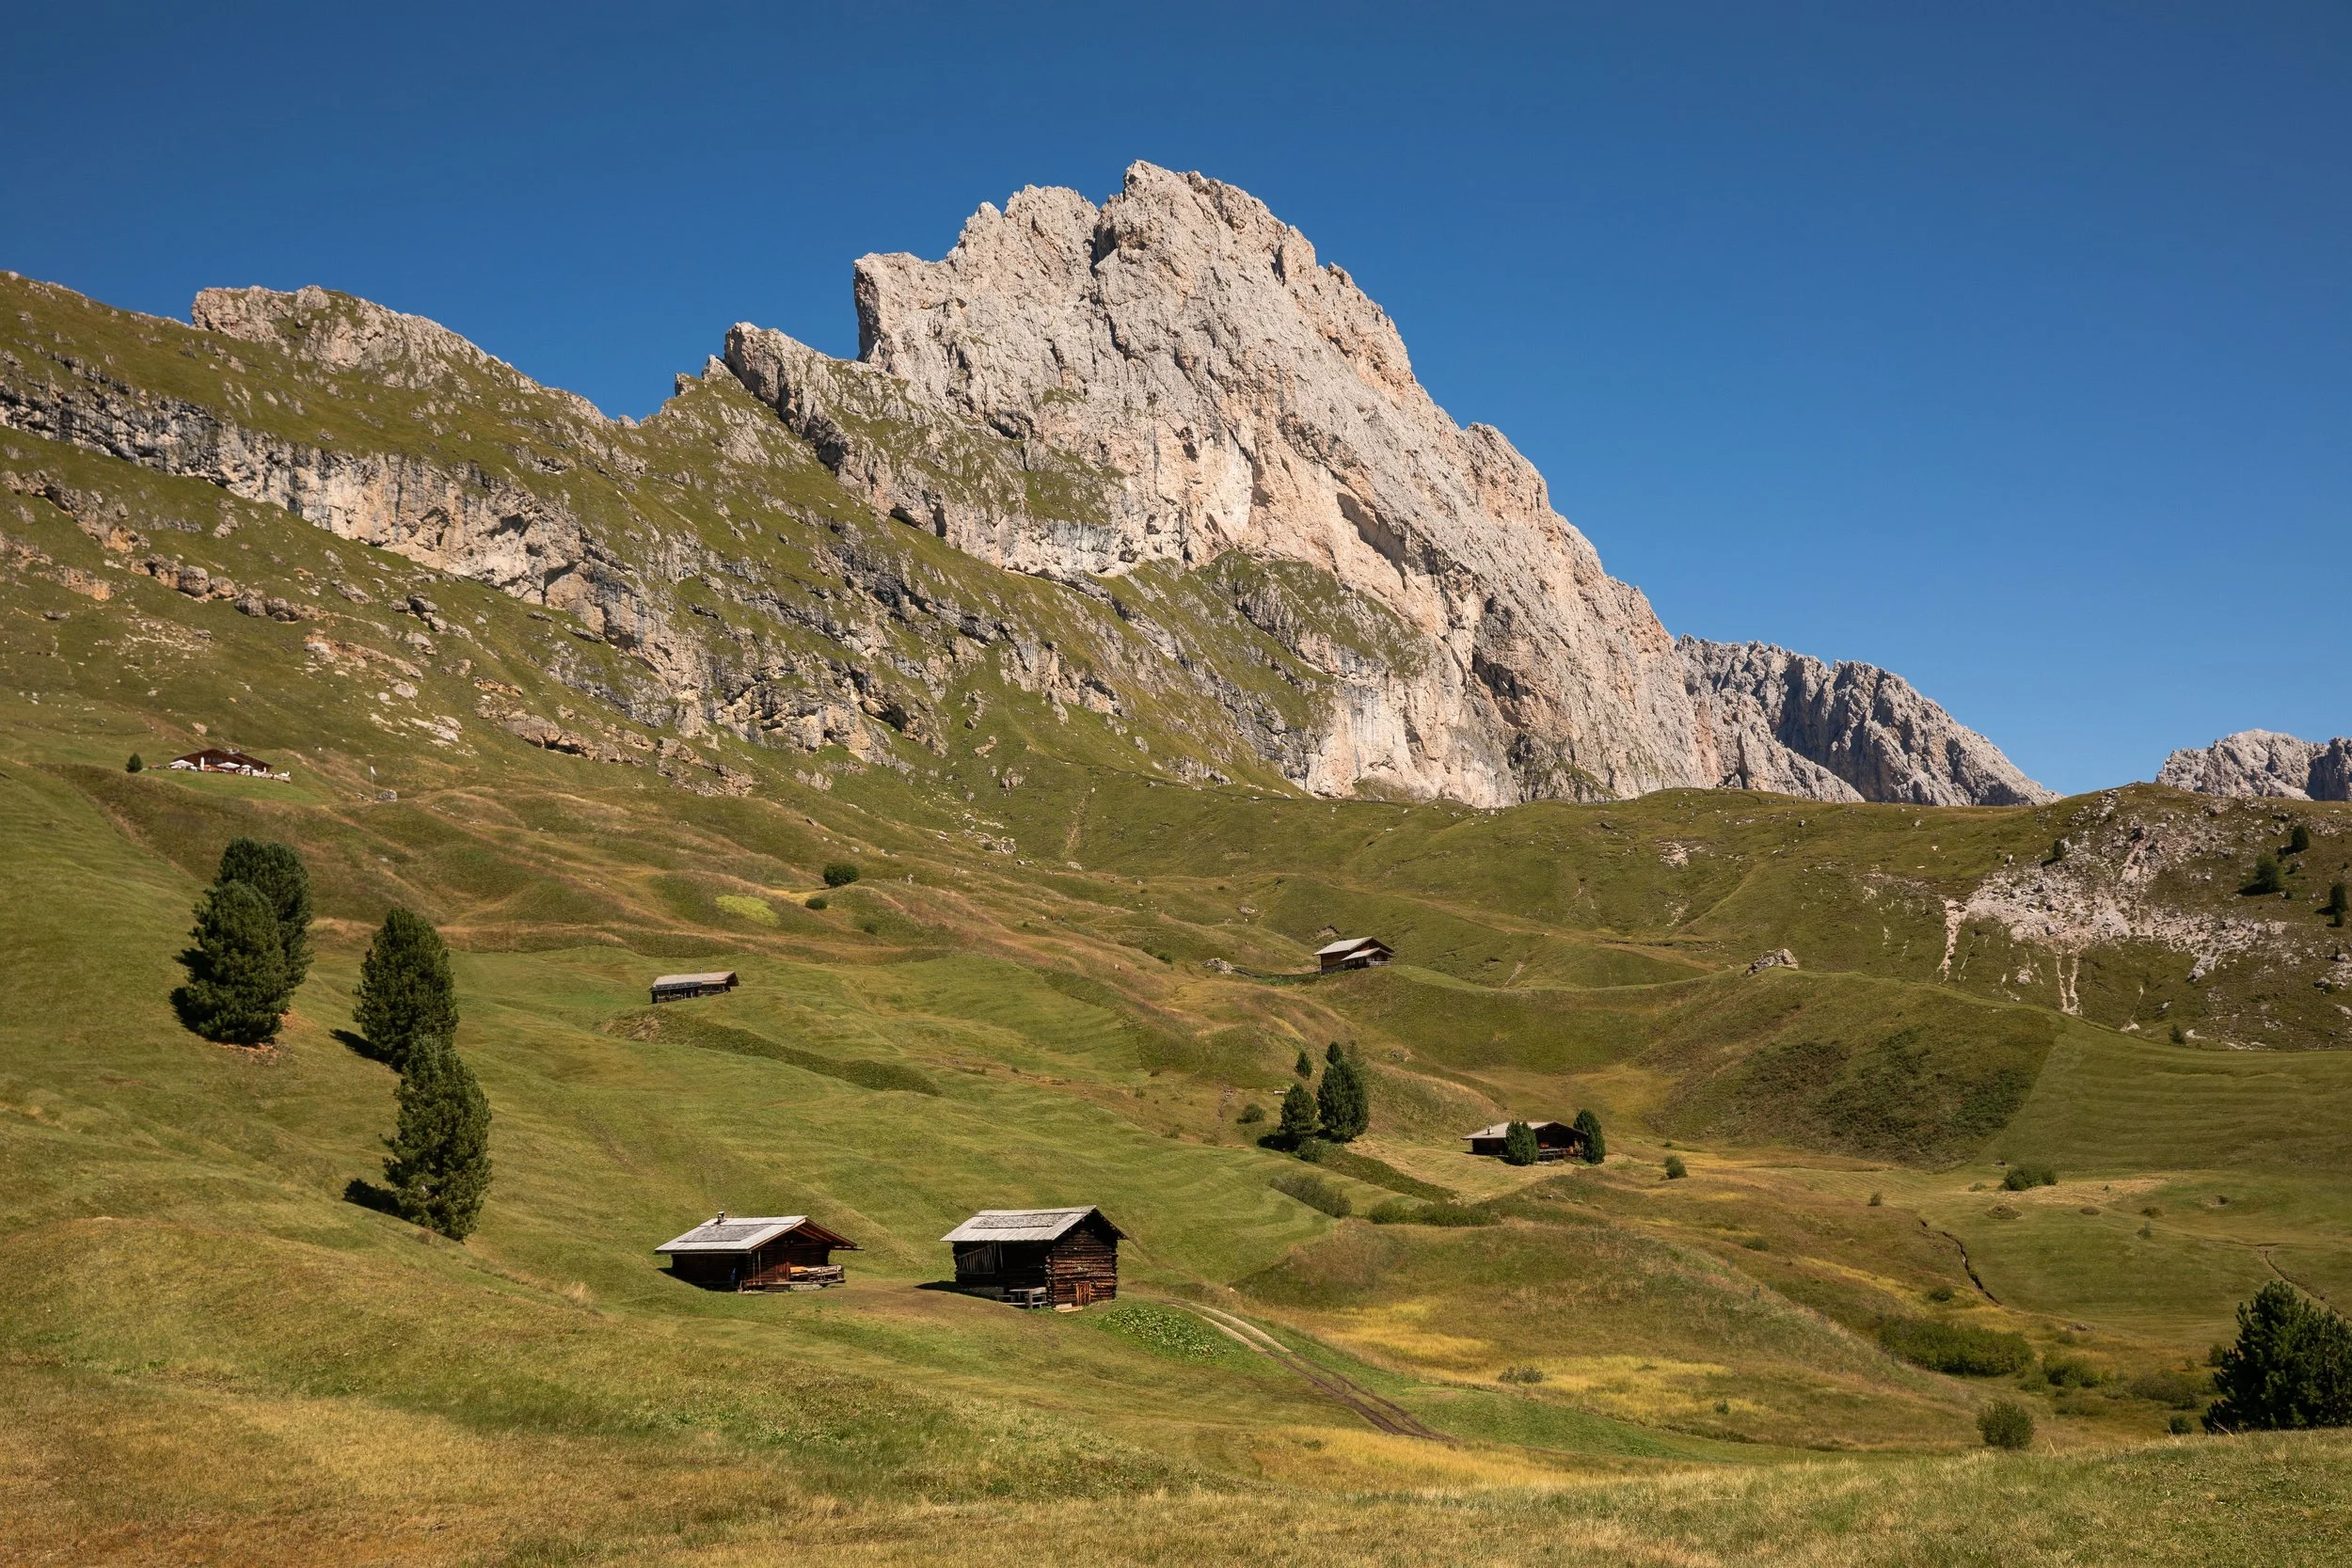
After finishing the Seceda Ridgeline Loop (with or without the trail past the fee kiosk), the trail turns left away from the gondola and towards Malga Pieralongia Alm. The trail slowly descends as it approaches Troier Hut, which is a quick side trail if you want to visit it. If not, you can continue straight towards Malga Pieralongia Alm.
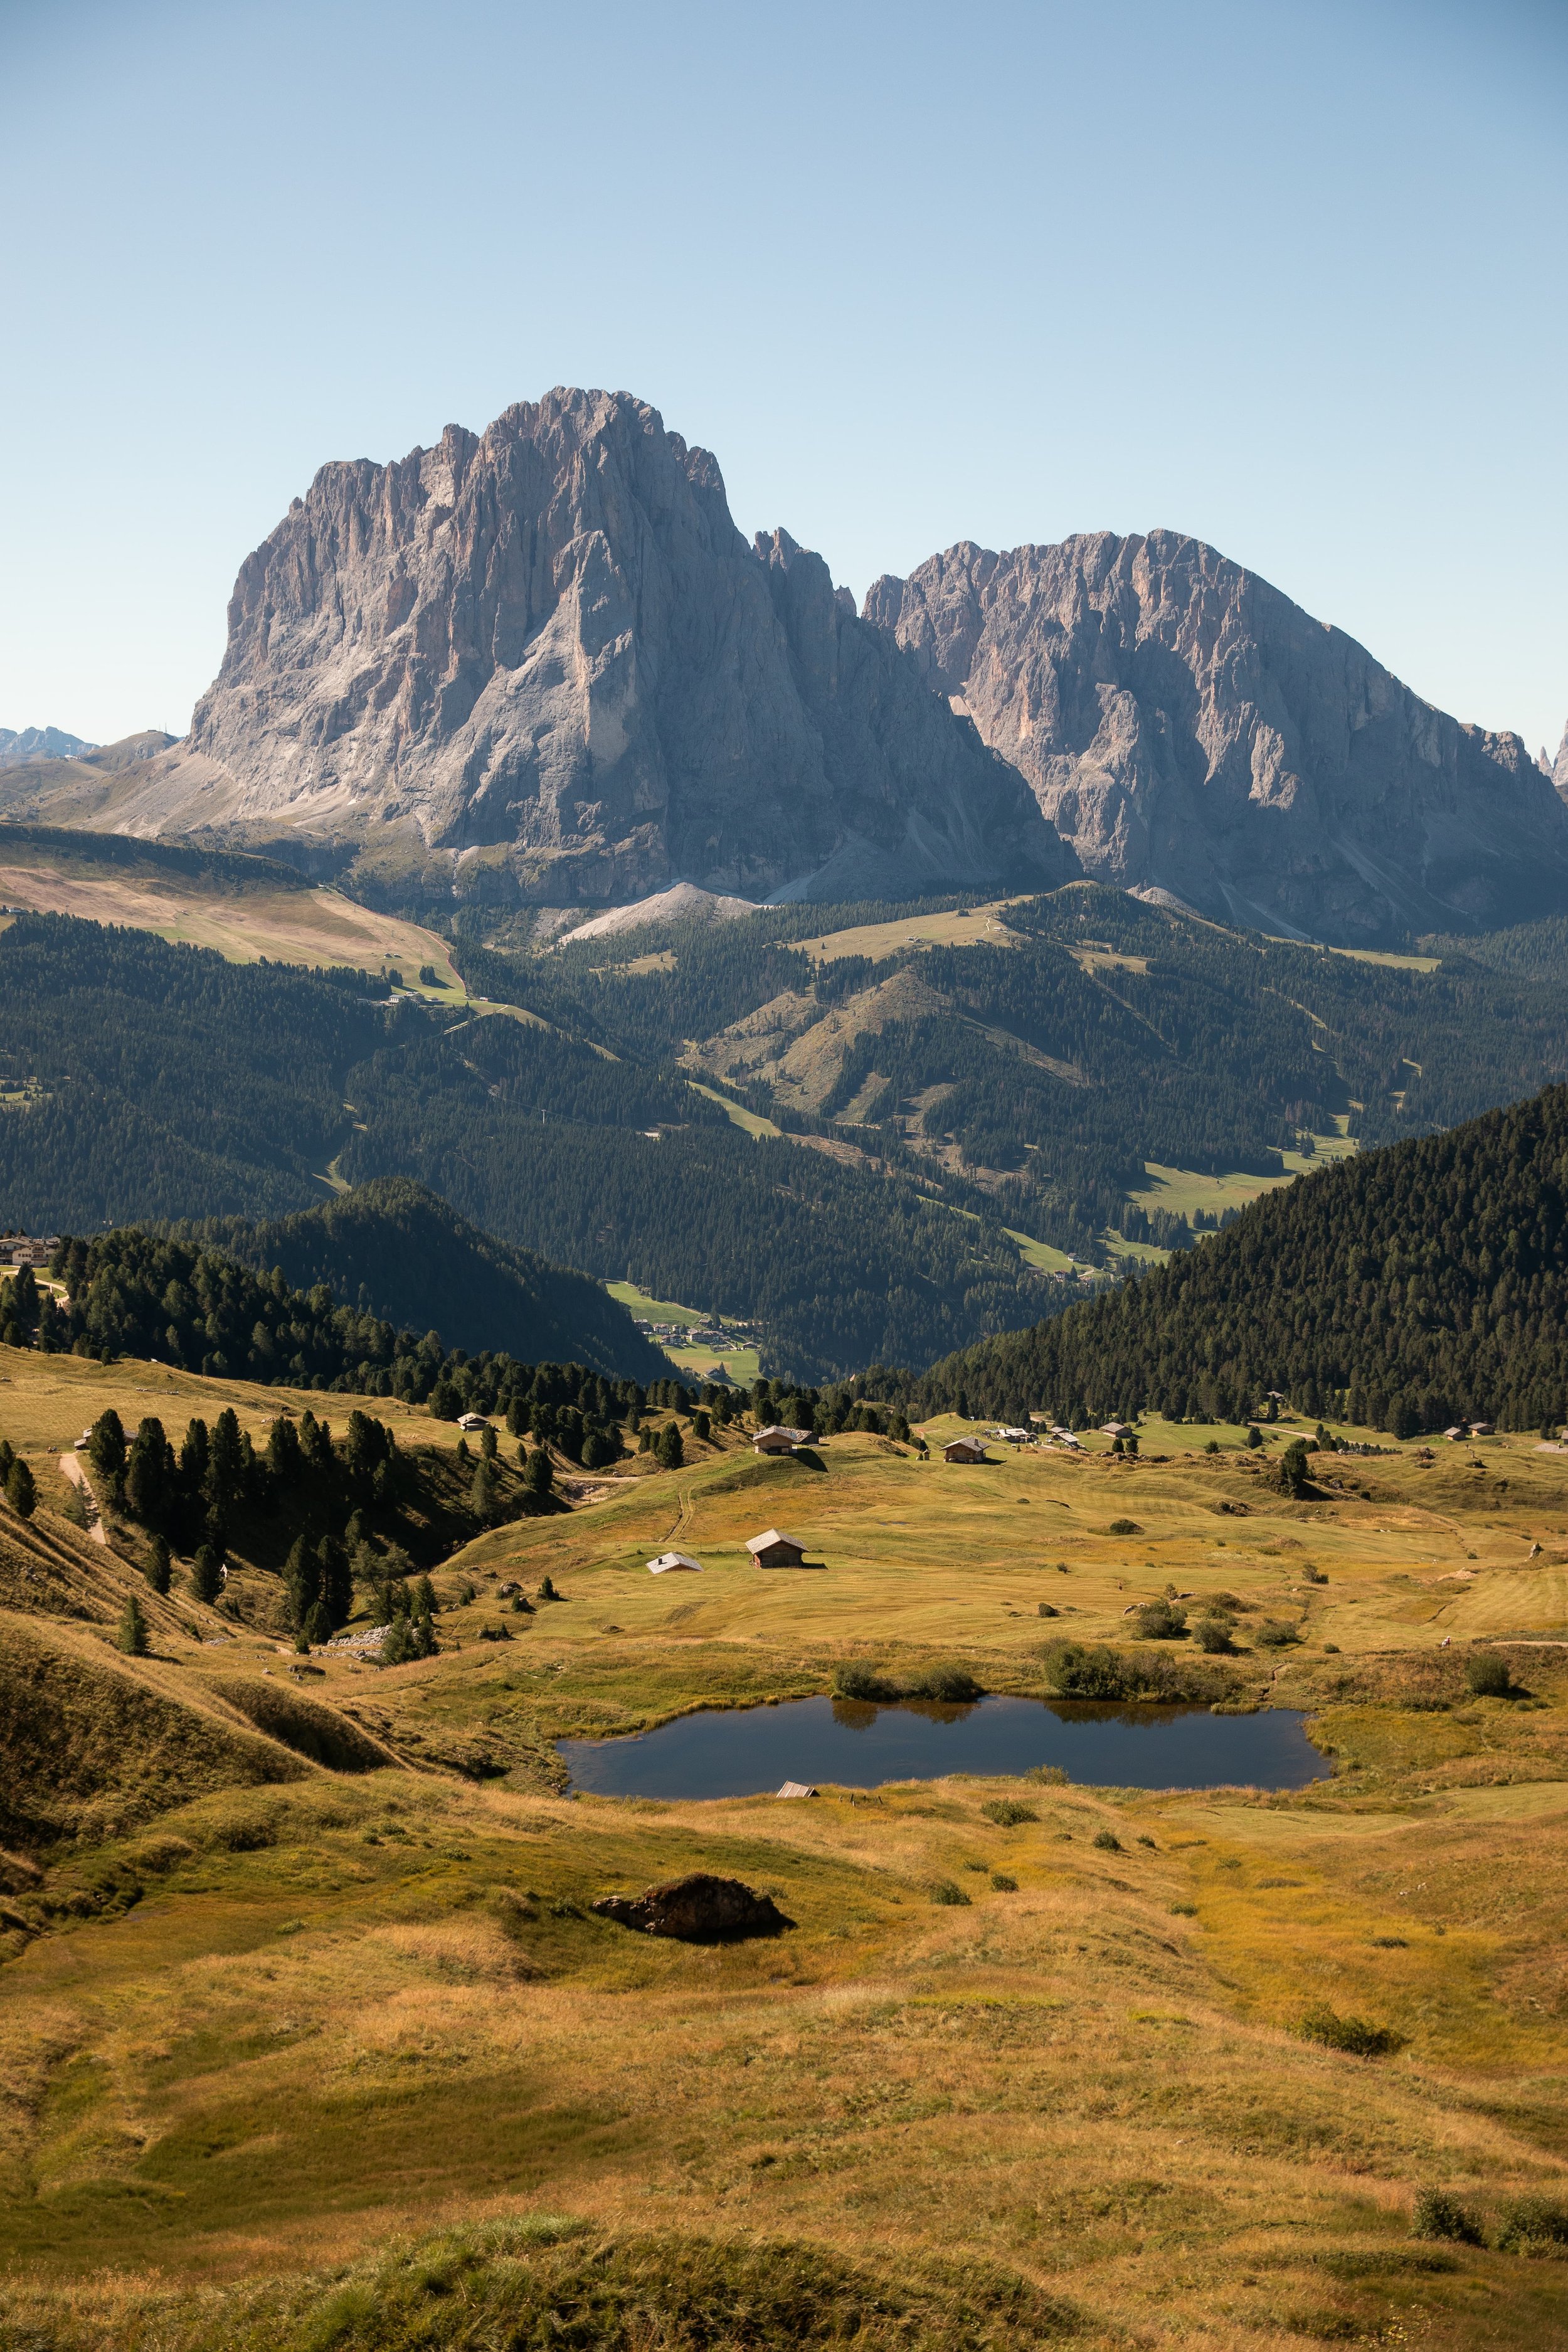
The views along this section of the trail are stunning, offering a unique view of Seceda as you hike to its other side. We loved hiking away from the crowds and experiencing Seceda from a unique perspective.
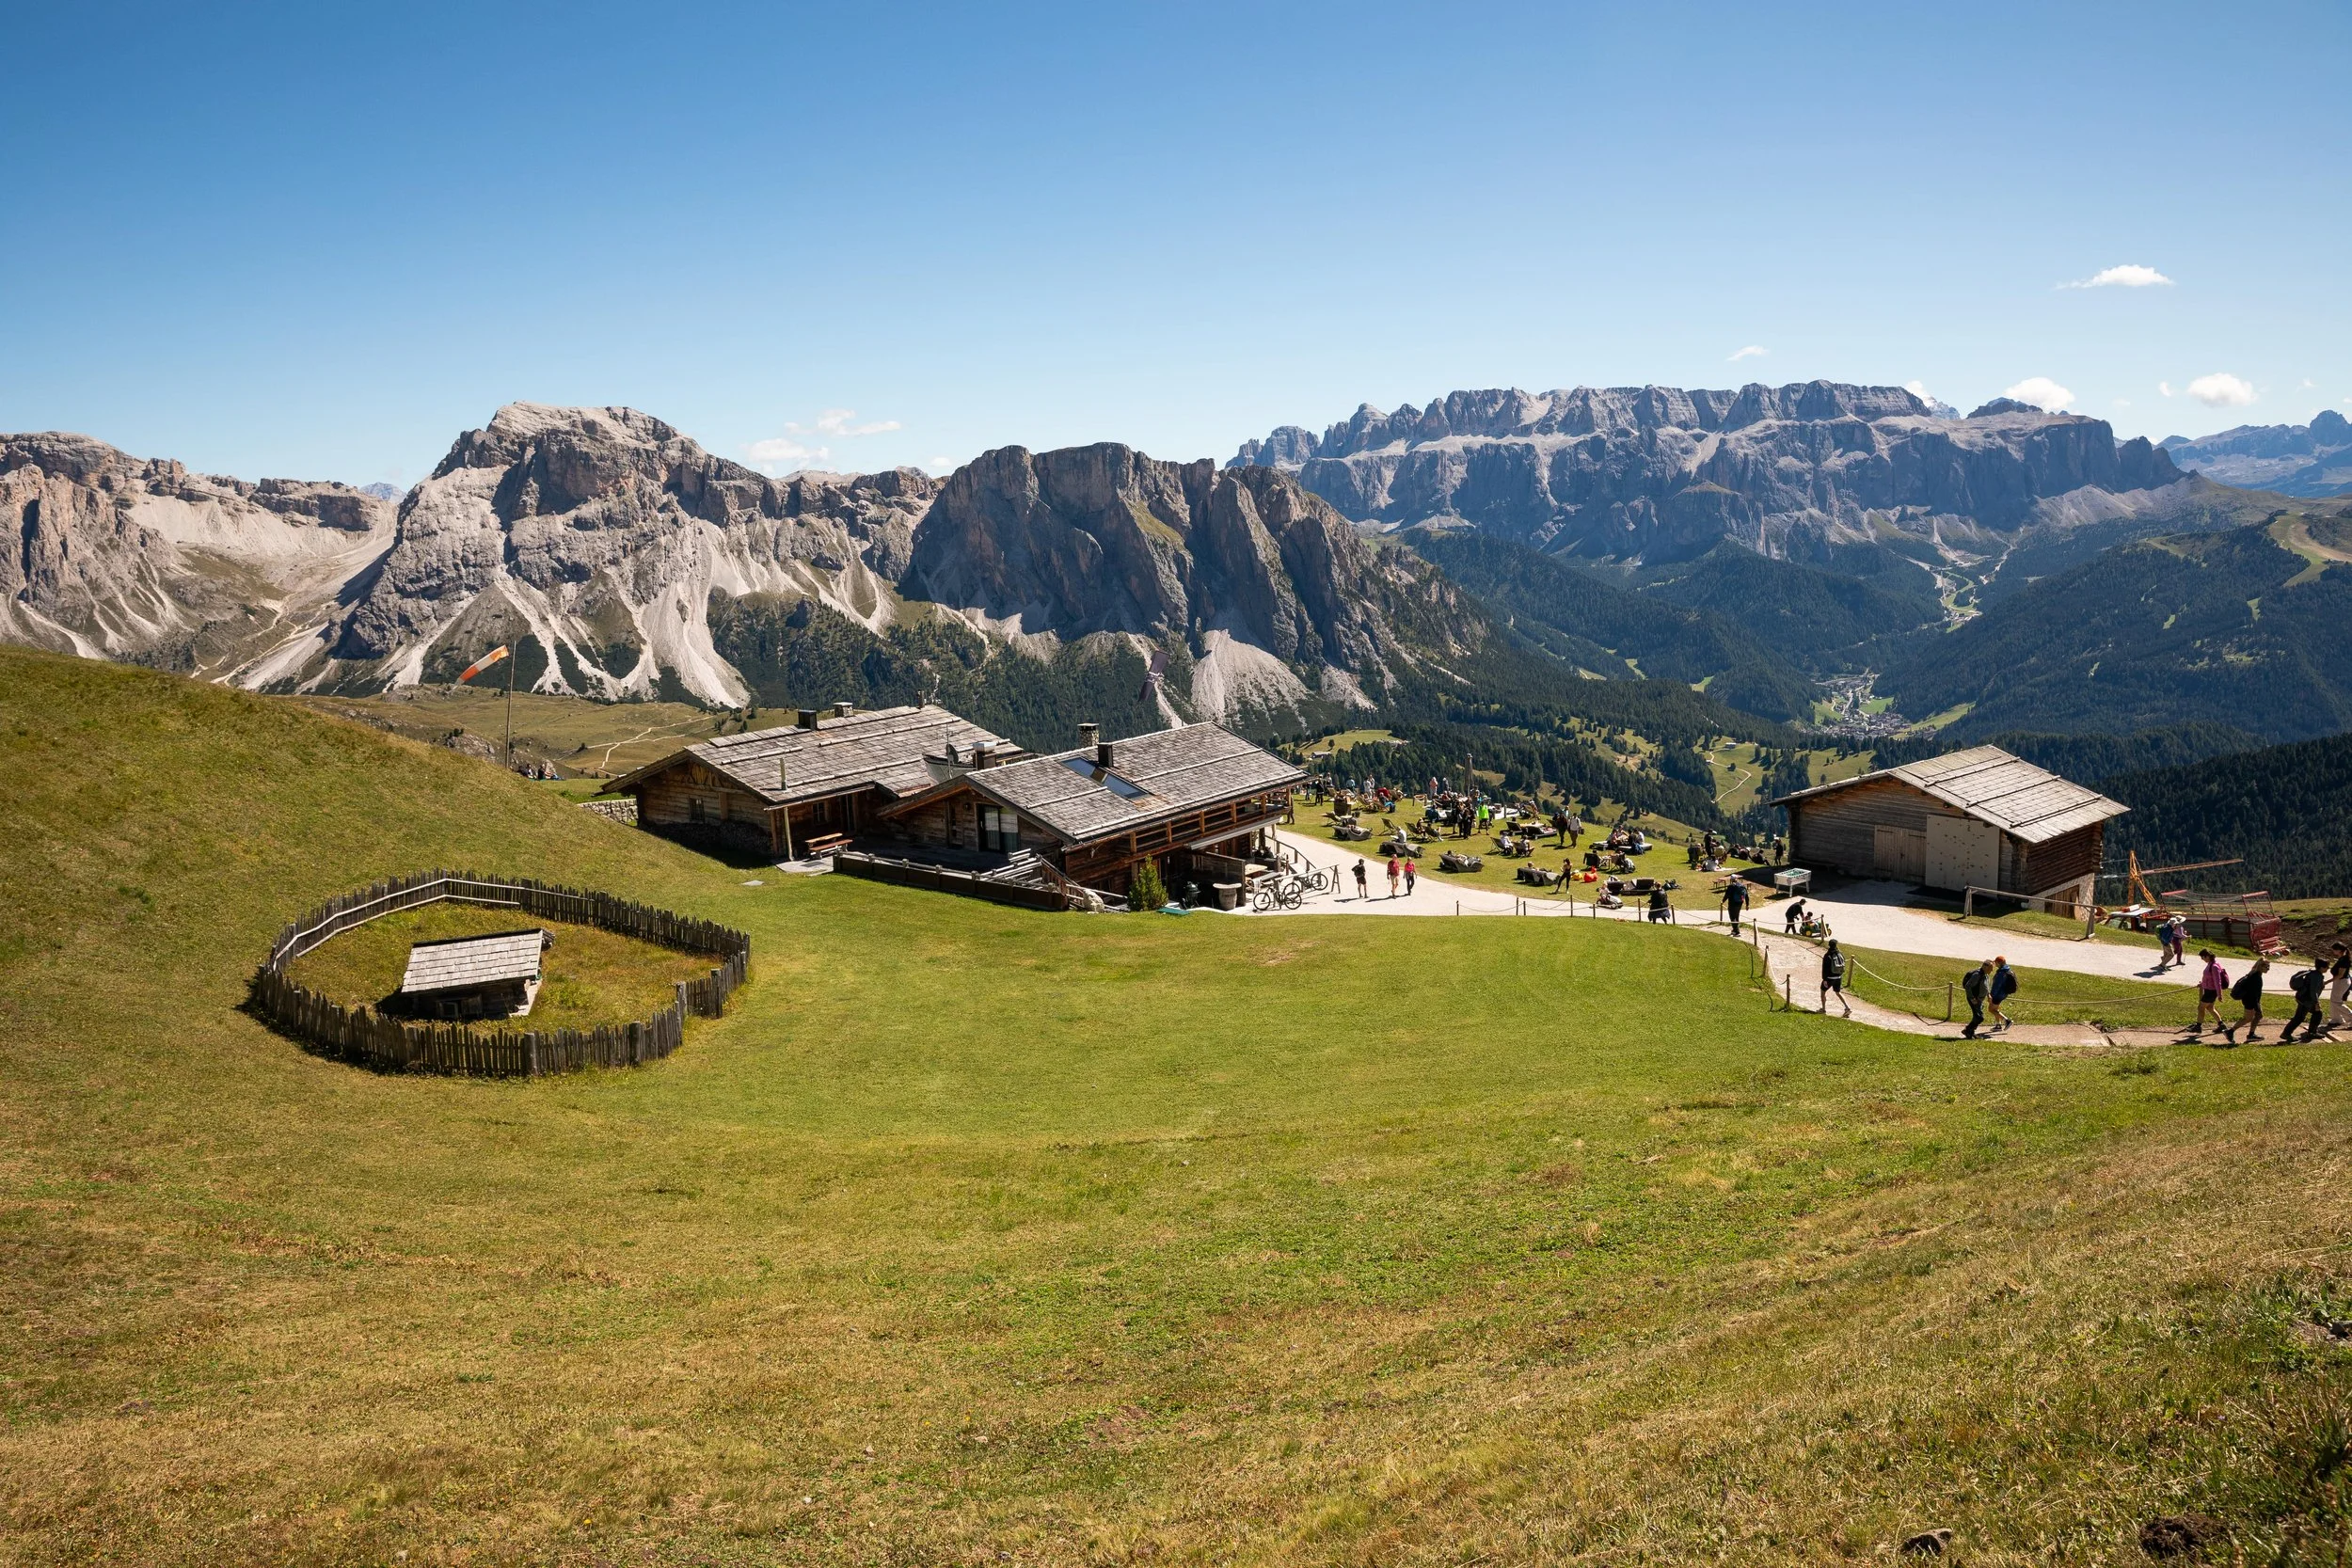
If you are hungry, you can grab a bite to eat at Malga Pieralongia Alm. We stopped here to take a quick break before continuing along the loop.
Malga Pieralongia Alm to Firenze Rifugio
From Malga Pieralongia Alm, the trail continues straight before turning right towards Firenze Rifugio. I loved this portion of the trail because the views of the surrounding mountains were beautiful. They made me feel small in the best way!
Once the trail turns right to continue towards Firenze Rifugio, it descends slowly, offering breathtaking views of the mountains looking south. I could not stop taking photos here because I was in awe of the beauty.

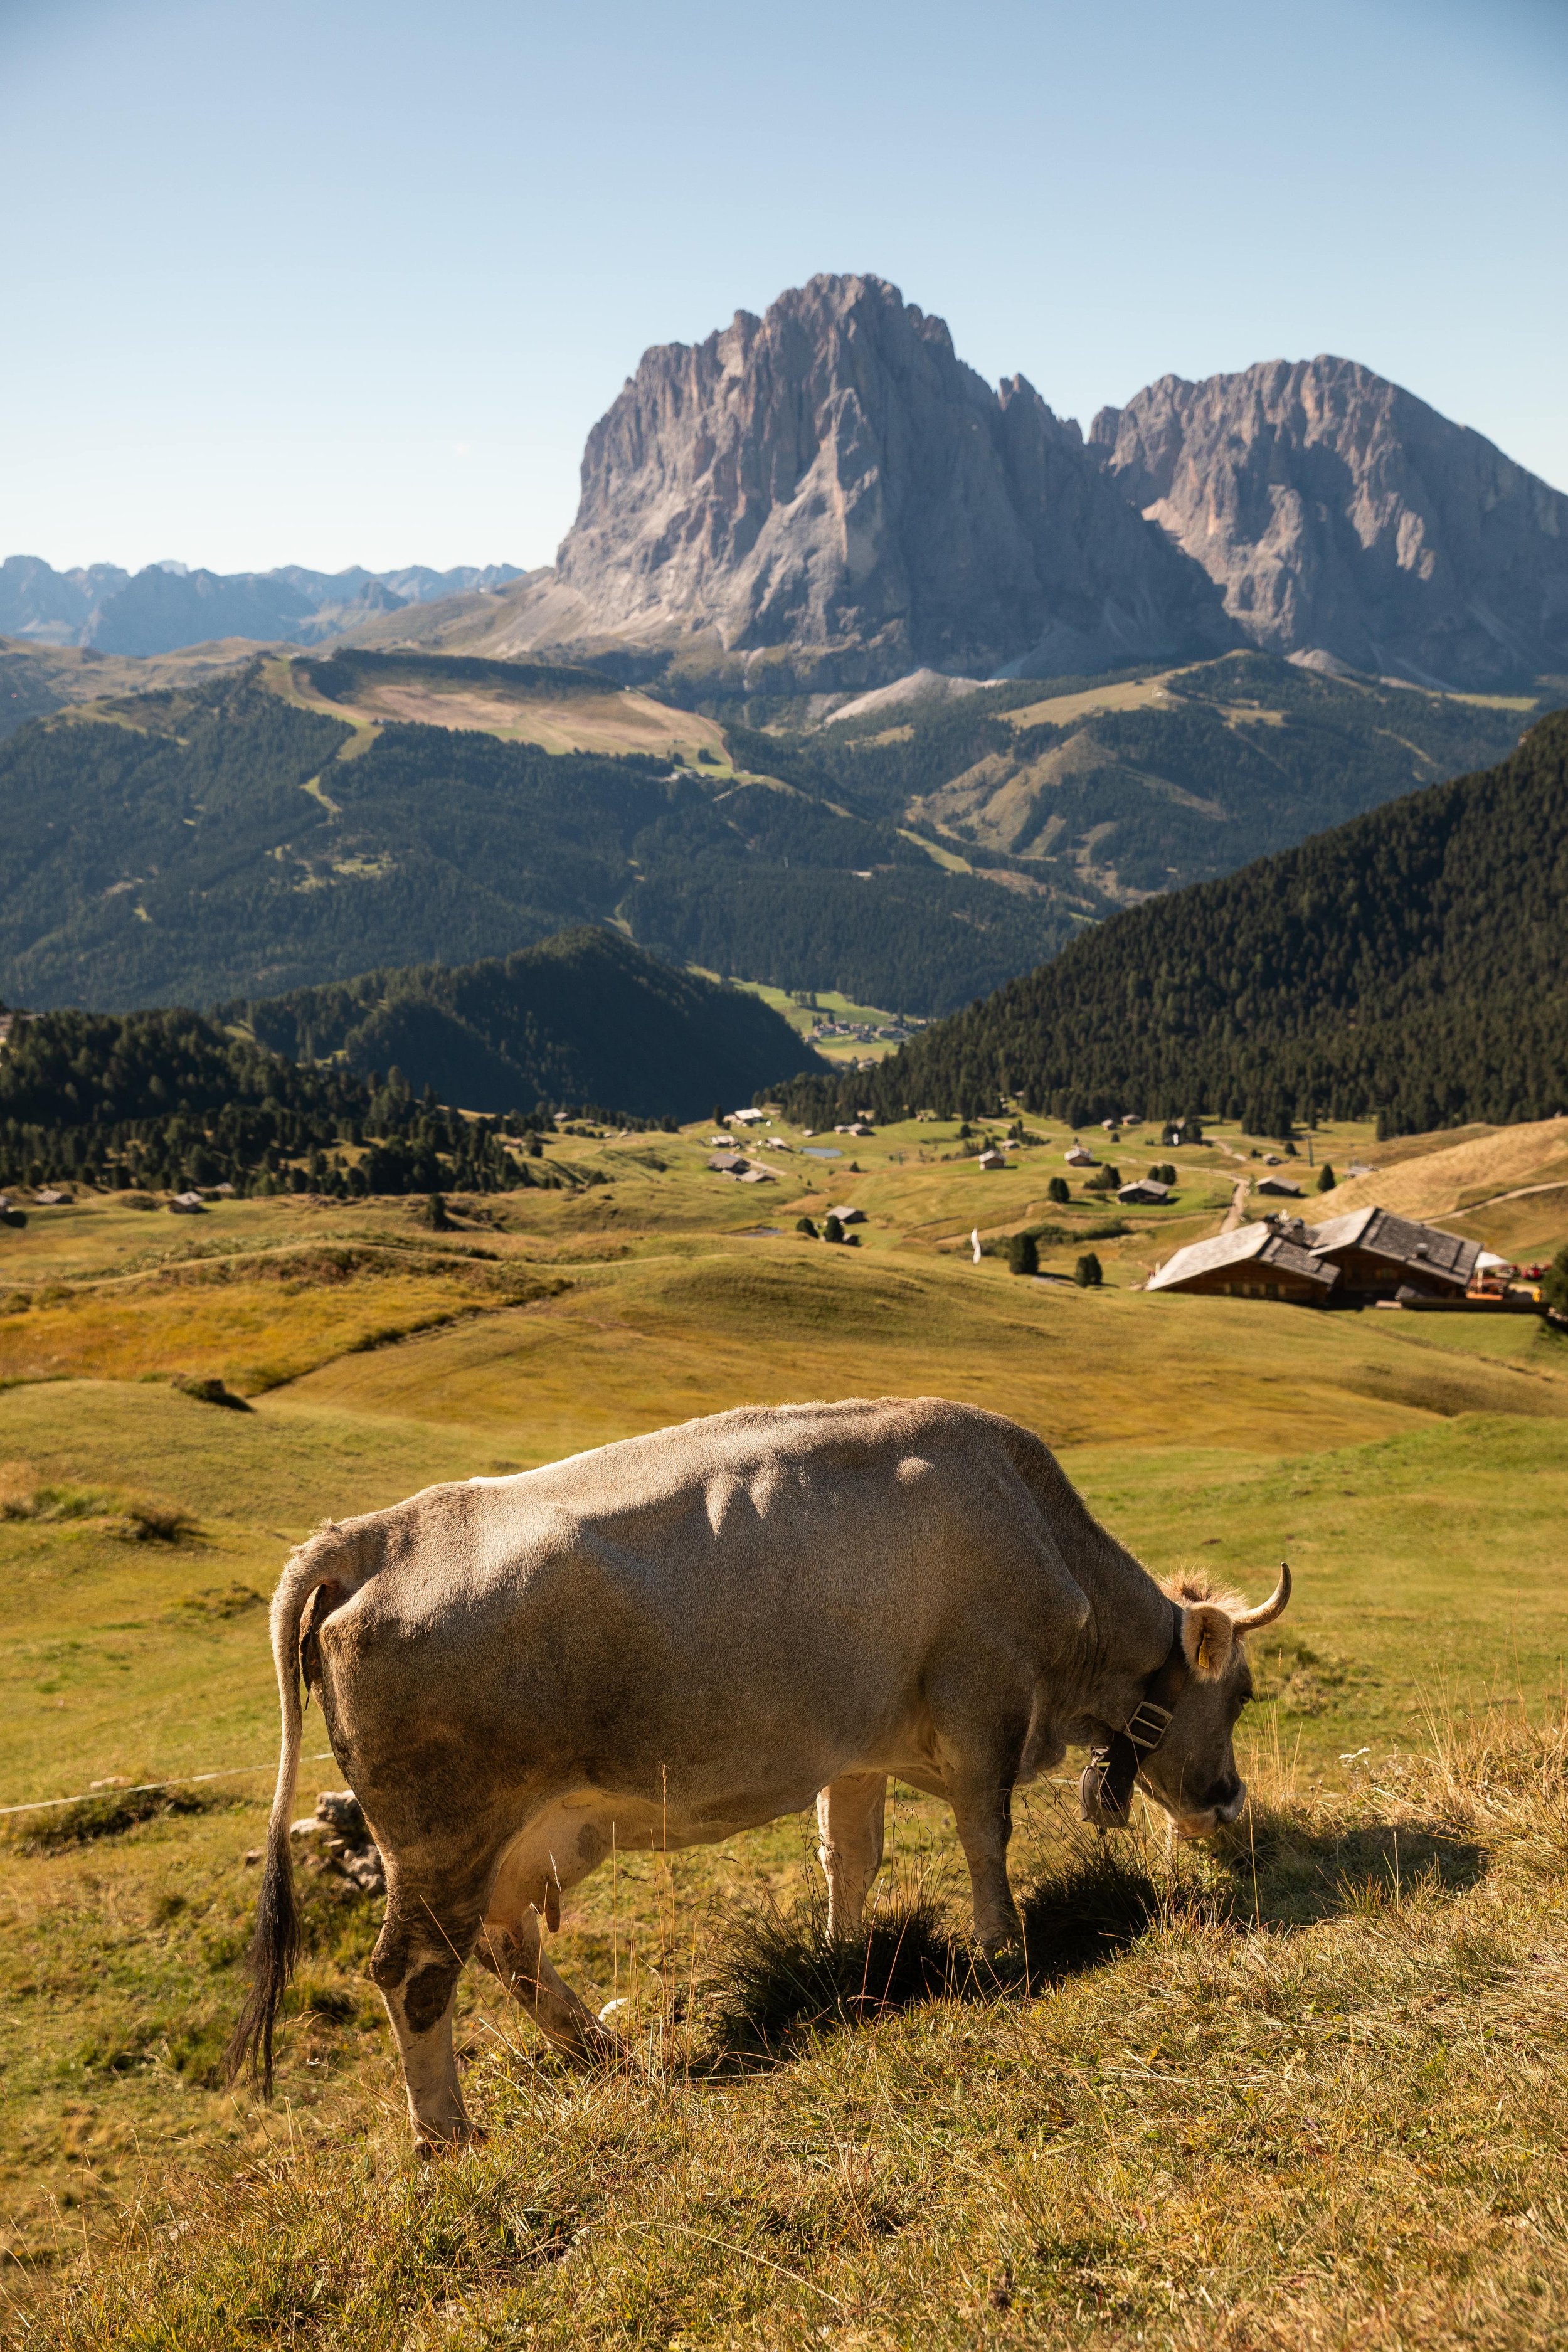
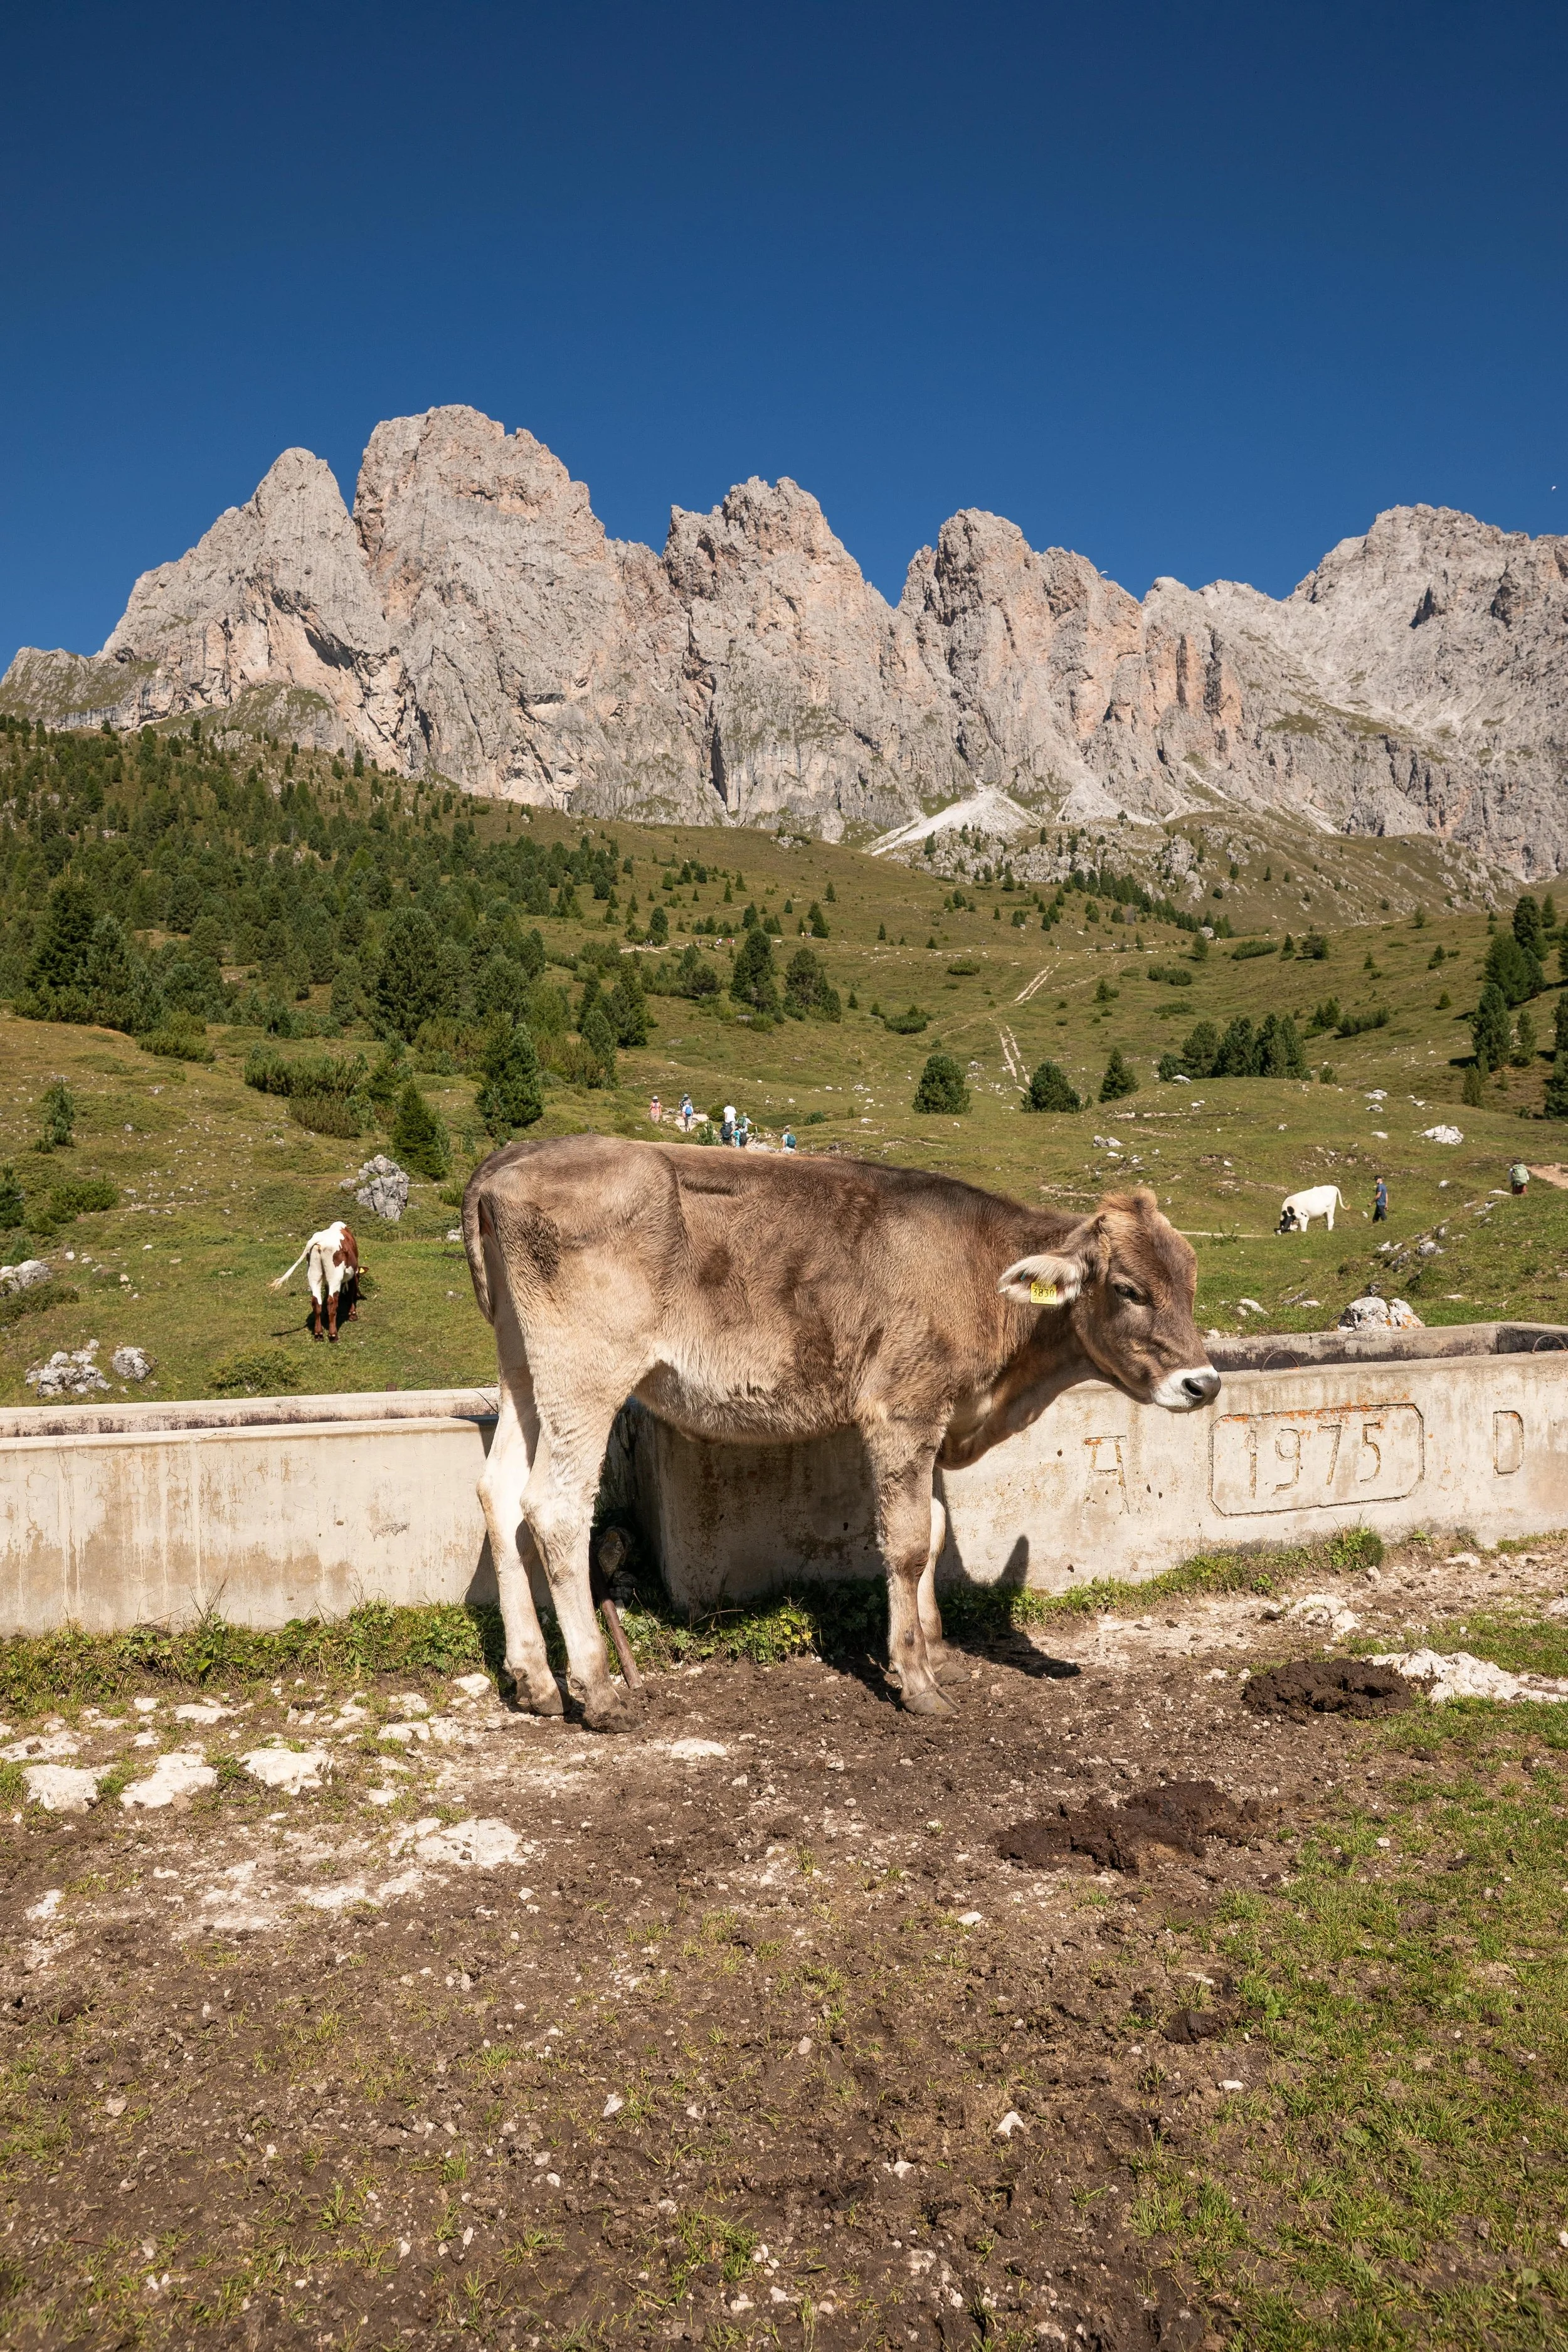
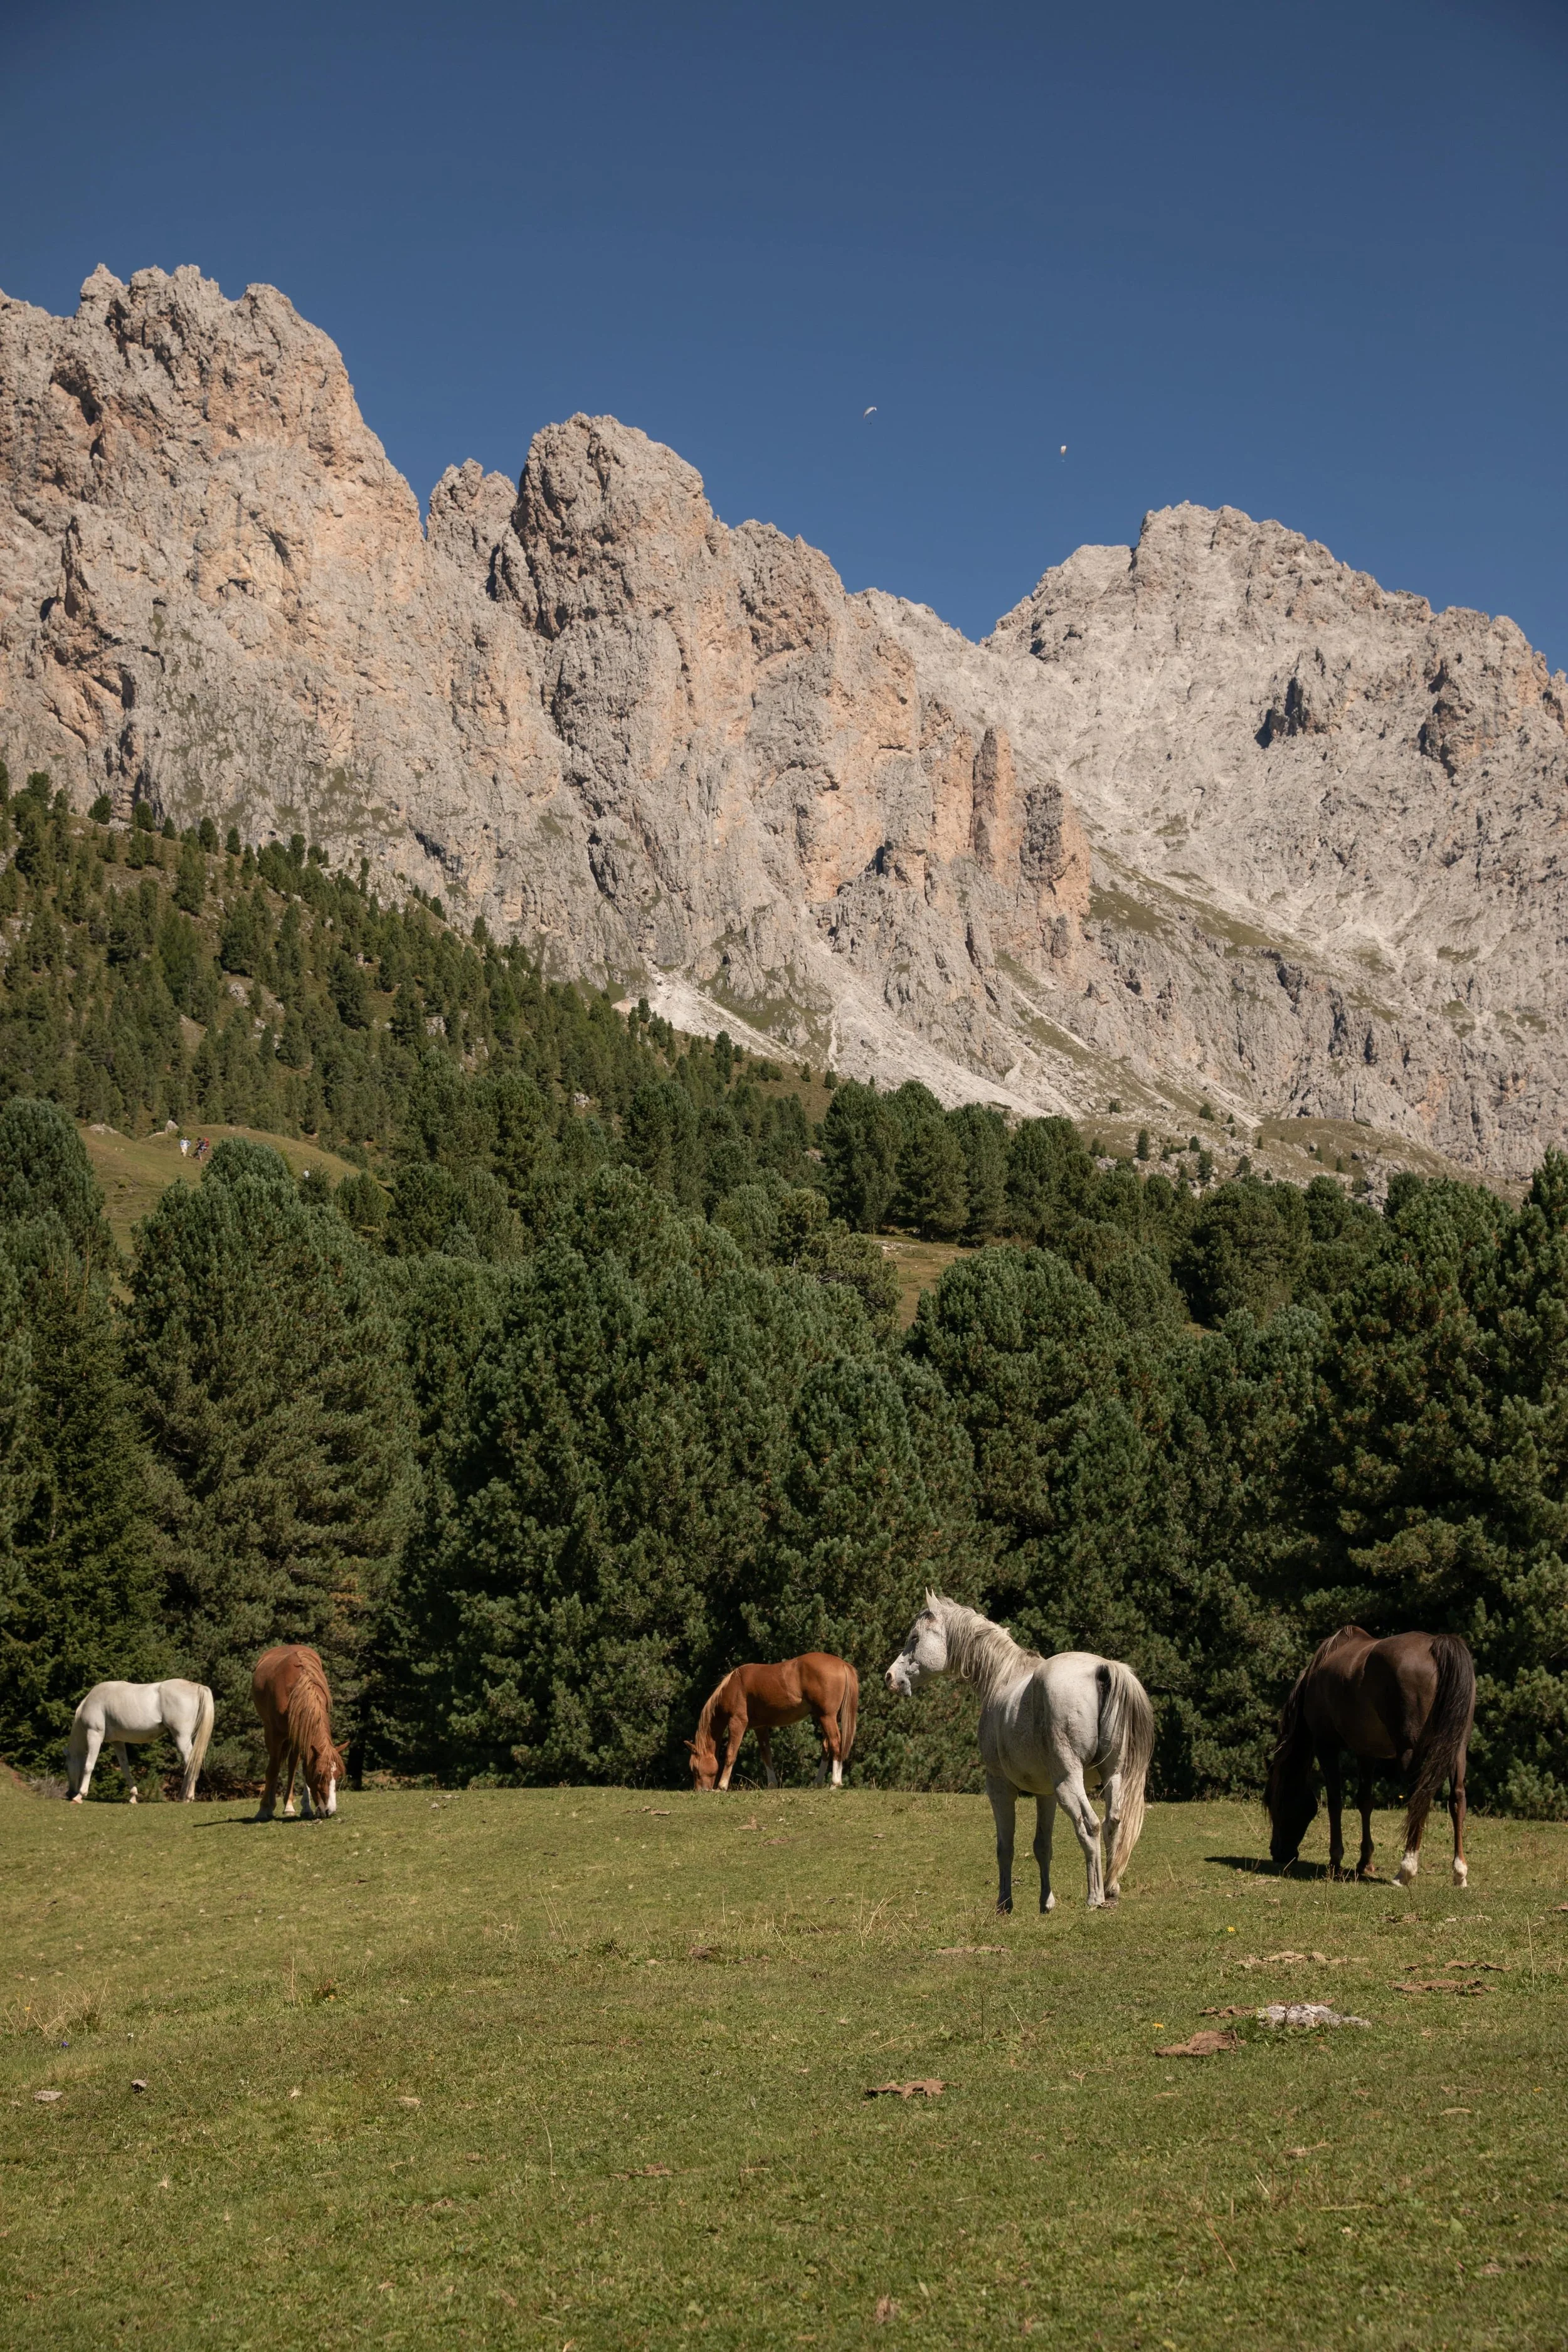
Once you reach Firenze Rifugio, you will see cows and horses! They were right next to the trail, and they were one of my favorite parts of the hike. However, the trail had a lot of poop on it, so keep an eye out for that.
You can stop for a bite to eat at Firenze Rifugio or continue right to loop back towards Col Raiser and then to the Seceda gondola.
Firenze Rifugio to Seceda Gondola
The trail is relatively flat as it approaches Col Raiser, so enjoy it while you can because the rest of the trail is a slow ascent back towards the Seceda gondola.
A few trails take you back towards the gondola, and you can honestly follow any of them. We were following the people in front of us, so we ended up hiking on trails and access roads.
Honestly, this last section of the hike took a lot out of us! It was extremely hot, and we were tired after the hike, so the ascent towards the gondola was slow going.
It was not a technical trail, but some portions were very steep, especially as we approached the end. But we loved taking breaks because the views were incredible!
Once the trail approaches the gondola, you can take a break at Baita Sofie to grab a bite to eat or enjoy a cocktail with a view. This area was packed, but for good reason! Baita Sofie had an outdoor seating area with beautiful views, and many people were enjoying a meal there.
We almost stopped to eat, but it had a long wait for a table, so we decided to hike the last steep section to the gondola and eat once we were back in Ortisei.
Although you can hike a short loop to Seceda, I recommend extending the hike to experience more beautiful views! No matter which way you decide to hike to Seceda, you will quickly fall in love with this area in the Dolomites. It definitely became one of our favorite places!
If you are planning a trip to Seceda, you are in the right place! This guide has everything you need to know about hiking Seceda.

Hey, I’m Nichole!
I am the creator behind Nichole the Nomad, the home of my explorations around the world, mountain hikes, and beautiful pictures taken along the way. I have a deep passion for capturing the world in a beautiful light and sharing my experiences.
I created this blog to share my travels, show how beautiful the world is, provide tips and tricks for traveling, and encourage you to explore. Whether you want to travel across the world or explore what’s in your backyard, I hope this blog inspires you to get outside and find your adventure!
Pin it for later!